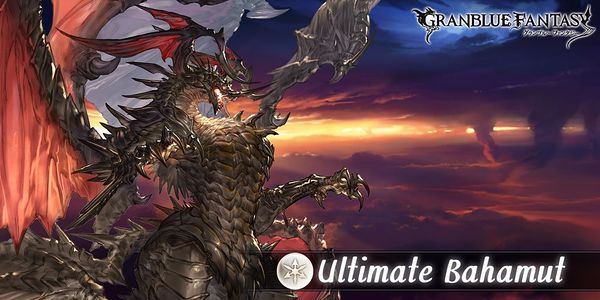
Baha HL guide
Introduction
Baha HL is a highly technical fight with many requirements. However, once every member knows what to do in the fight, it becomes very mechanical and is arguably easier than Medusa HL or Flame Glass HL. The fight can typically takes 30 minutes with a sufficiently geared group (60k stats). Lower geared group can take up to 60 minutes. A key thing to remember when fighting baha hl is that this is a 18 man raid, when you need a heal, a phalanx, or a clear, just wait. If the next special move will kill you, just wait for stun or break. Don’t risk it! Don’t die! However, before we dive into the specifics of the fight, we will discuss one important mechanic which can make or ruin the fight, debuff tolerance.
Tolerance
Cygames has introduced a higher debuff tolerance level to HL and higher tier fights (Bahamuth, Grande, and summon fights). This is to reduce the reliance on powerful debuffs such as stun, fear, and charm. Once a debuff successfully lands, each successive debuff of that type will have a greatly reduced success rate (more than 30% reduction).
This mechanic applies mostly to the following debuffs : charm, fear, stun, break extension of any kind
Other kinds of debuffs such as arrow rain or mist also has tolerance level, but they are not as severe. The general concensus is to just use them every cooldown.
With this in mind, those debuffs (with the exception of Charm) are typically saved for only the harder portions of the fight. Lower potency things such as Sarunan’s break lock, Song’s 2nd ability are typically banned for most of the fight.
Baha HL abilities
Baha HL has many phases, at the start of each phase he will completely fill his diamonds which makes some of the transitions potentially deadly.
Dark phase: 100-90 hp (Easy mode) ◇◇◇
1st turn (0th turn for the quest starter): Ability lock (3 turns), Ougi lock (3 turns), Silence (3 turns), DoT (lasts until cleared) – this is very trivial at this point of the fight, just take your 3 turns and move on.
Non OD and OD special move: Multi-hit multi-colored attack (just like regular Baha) – doesn’t hit that hard, you should survive even without a phalanx.
Fire phase: 90-80 hp (Easy mode) ◇◇◇
Non OD special move: 4k AoE with DoT
OD special move I: Xk AoE, ability lock
OD special move II: multiple random debuffs
Water phase: 80-70 hp (Annoying mode) ◇◇◇
Non OD special move: 4k AoE with DoT (spreads if any abilities are used)
OD special move I: 3k AoE with sleep
OD special move II: multiple random debuffs
It is recommended to wait for clear or phalanx if you are slept. This phase is immune to gravity but the previous gravity application still has an effect until expiration.
Earth phase: 70-60 hp (Medium mode) ◇◇◇
Non OD and OD special move: 100k single target – requires 100% cut or illusion.
OD special move I: Xk AoE and stone debuff
OD special move II: unhealable, def down, and atk heals earth element debuff
This phase is tricky with the single target special move, proceed with caution.
Wind phase: 60-50 hp (Medium mode) ◇◇◇
Non OD and OD special move: reduce HP to 1 – non elemental damage (cannot be avoided by damage negating effects)
Non OD special move: Multi-hit wind damage. Dispel effect on party members. (small damage overall)
OD special move: zombified, fire attack down, and atk heals wind element debuff
This phase is immune to gravity but the previous gravity application still has an effect until expiration.
Dark phase: 50-25 hp (THE BLAZZEEEEEE OF CARRRRNAAAAAGE) ◇◇
Non OD and OD special move: 3k dark damage AoE, gives baha 2 random buffs. The buffs can be dispelled. If you are not playing light, be wary of the att up buff. Baha can potentially oneshot you with its normal hits with the att buff.
Non OD special move: multi-hit multi-color damage, deadly without damage cut (12k+ per chara on average without cut) – rarely used in this phase but since it is deadly, don’t risk it
OD special move: HYPER DIMENSION 4 random hits each dealing 55% of total hp. Non elemental damage. This is the deadliest move from Baha HL. You can easily lose 2 charas. Although the dark AoE can be used during OD as well, Hyper Dimension is used almost always in OD.
This is the hardest phase of Baha HL. If the whole raid can get through this safely, the fight is basically won. It is recommended to save your chain burst for the OD mode to break baha as fast as possible. Players without a Nirvana are recommended not to trigger any OD special moves and wait for break. Holysabers are strictly forbidden to trigger any OD special moves.
During breaks, if Baha has full diamonds, it is recommended to proceed with caution. I have been in a raid that Baha got out of break and killed 4-5 players immediately due to lack of damage cuts.
Dark phase: 25-0 (HARD mode) ◇
Normal attacks for 10k
Non OD special move I: SUPER NOVA 95% max hp non elemental damage AoE
Non OD special move II: multi-hit multi-color damage, deadly with just damage cut only – Athena is preferred here for 100% cut
OD special move: 999999 dark AoE damage
Unlike the previous phase, in this phase you want to get out of non OD as fast as possible.
Since the boss hits very hard in this phase it is recommended to wait for phalanx every turn (unless you have dark buncle buff). In this phase, phalanx rotation should be strictly observed.
The 999999 damage needs a full cut. Comboing a random dark buncle will only give you 25% dark resist.
The same cautionary note about break ending applies here as well.
2%: Special text announcement: nothing really happens…Baha can now TA/DA
1%: Super Nova
Composition
Raid
The following minimum amount of classes are considered required
2 HE with break keep
4 HS
4 BS
2 DF, one with quick down
2 SS with charm
The following setup is recommended
- HE1 break keep
- HE2 break keep
- HS1 dual impulse
- HS2 dual impulse
- HS3
- HS4
- HS5
- HS6
- BS1
- BS2
- BS3
- BS4
- DF1 quick down
- DF2
- SS1 charm
- SS2 charm
- SS3 charm
- SS4 charm
Possible EXes are clear (I prefer 4), rage, blind (2), arrow rain (2)
The raid also requires multiple Songs (I prefer at least 6), 2 Percivals, and 1 Catherine.
Individual
Preferred charas (for light)
Survivability roles
- Albert for delay to make the break transition safer
- Swimsuit Le Fei for 40% reflect (works for earth phase and 999999 damage AoE)
- Song for stun. Do not ougi until 50% Do not use 2nd ability until 25%
- Sophia (backline)
- Sarunarn (1st backline), for his dark resist. This is the only way to survive the final phase if the MC is down. Do not use his break lock.
Damage roles
- Feri is useful when paired with Song since you cannot Ougi until later in the fight.
- Swimsuit Zeta works surprisingly well with break assassin. She can get one shotted with the 1st ability def down debuff in the final phase.
- Amira for the gauge control
A note about Song
Since you cannot ougi until 50%, putting Song in the main party reduces your damage greatly. Some people prefer to put her in the 1st backline position and let someone die. The raid should make sure that at least 2 people have Song as a frontline member for when you hit 50%.
A note about Percival
With debuff tolerance, it is recommend to start using fear from the wind phase to avoid the 1hp special move. 50-25 OD, and 25-0 non OD are also great fear timings.
A note about Catherine
Catherine’s abilities convert charm into temptation. Temptation effect and charm stacks for extra trigger chance. However, since it is relatively hard to land a charm on Baha, it is recommend to do the conversion when charm has less than 25 seconds left. Temptation always lands.
Roles
Buffers (Clear, Rage, Dual Impulse)
Use the abilities on cooldown. For clears, even though Baha no longer do any debuffs once he goes into the 2nd dark phase, people with Feri will appreciate your clears.
Debuffers
It is hard to land debuffs while 90-50. Try to use your debuffs on cooldown, especially Soul Pilfer.
HE
Use break keep only after the 50% mark. It is also possible to use it in the wind phase if it is close to 50%. It is recommended for HEs to have Macura or Medusa as sub summons for backup when break keep fails. If possible, inform the raid if everything fails.
HS
Don’t die. You can use phalanx+kabua (taking hits ability) to avoid Earth’s single target ability and the multi-hit multi-color special move.
Phalanxs should be announced to the raid. A typical method is to use preset text (Under the shield tab) and wait 2 seconds. Then, use the phalanx and sends out a the phalanx emote to confirm.
After 25% phalanx should be used according to a predetermined rotation to ensure that there is a phalanx to be used indefinitely.
BS
Nirvana is required. You will carry the raid during 50-25 ODs. Use heals on cooldown.
DF
If you’re on Quick Down duty you only need to apply it during 50-25 and 2-0. For gravity, an alternative strategy exists. In this strategy, you will start using gravity around the earth phase (so you get 1 extra daimond to avoid the deadly special attack). Let it expires during wind phase (which is immune anyway), and reapply at 50%, so everyone gets the extra diamond at the transition. This looks nice on paper, but fails sometimes because it’s hard to land gravity during the non-dark phases.
Equipments
Recommended main weapons
- Awaken guild war sword for damage cut
- Awaken guild war harp for debuff hit rate and Song’s stun
- Awaken guild war dagger for higher damage on HE and DF
Summons
- Two 30%+ dark resist summons (3 star dark buncles, Famitsu buncles, or Hecaton) – required
- Athena – for earth phase, and multi-color attack – highly recommended
- D Angel – for delay to avoid accidents on break transitions
- Garuda – for earth phase and 25-0 normal attacks – not as useful as Athena
Do not use summon break lock unless you know that the hawkeyes failed their break keeps.
Gear
Typical goal to reach is at least 10k hp and 50k battle power (the number on mypage/home) with the buncles equipped. Most people prefer at least 55k and even more for people that is not running light. This assumes all your weapons are properly skilled, and these numbers are not padded by Cosmos weapons.
Final words
Don’t die! Don’t forget to check stun duration. Don’t leech, and enjoy the loots. I consider 500k contribution points non-leech status.
PS You can only redeem one red cert per day, and you need 3 to upgrade each baha weapon.
PPS Famtisu buncles can be obtained by purchasing a digital download version of Famitsu Weekly here. (Can be purchased by paypal, the code will appear in your bookwalker account page) The code give access to 6 special buncles with 30% damage cut. Offer expires 2016/09/10.


