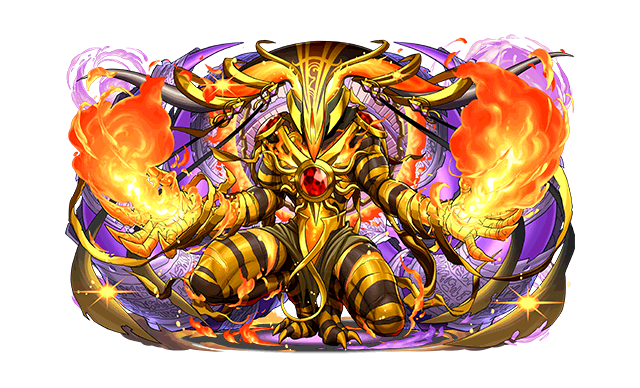
How to Play Amun
By River
Also Ripper wrote a bit about how to build teams for Amun at the end but it’s not 25 28 36 pages long like my part so it’s not as cool also Ripper sucks
Contents
Introduction
Amun can seem like an extremely challenging lead, and he is in fact one of the hardest leads in the game (depending on how comfortable you feel with counting orbs this strictly vs making crosses). But he is actually very manageable once you know what you are doing.
Also I don’t care who thinks it’s Amen, it’s Miru and it’s Rii and it’s Tadis and it’s Amun and you can go die. Also blame Ripper thanks.
Also a caveat that applies to everything in this guide (and in any combo guide, really) is that everyone has their own style of comboing, and if something works better for you than what I write here, and it actually works, then go for it. But seeing someone else’s comboing style is usually a good way to get an idea of the overall types of things you need to be doing, which can lead you to making your own style.
Finally, the methods I talk about are pretty te-heavy – expect to be doing 90-120ish moves per solve. However it is completely consistent if you are able to move fast enough and/or bring enough time extends.
Should I buy Amun?
Amun is a super strong lead for both standard play and farming. In fact, he blurs the line between the two a bit because unlike nearly every other farm lead, you can straight-up combo boards and still deal damage with him without much effort (just match 7c exactly and get 100x which is sufficient to kill a lot of stuff). And then you can save all your skills / kill boards for boss in a dungeon like Hexazion Descended.
That said, he is not for everyone. The 750k MP cost is extremely offputting, especially for newer players. And Kaede is a totally viable option for the majority of swipe farming, since she shares Amun’s multiplier just for clearing board. Even if you are running fire row setups, you can still lead Kaede and be fine for the most part, and adding a Leeza or Alnair still gives a respectable spike for reaching 2c green. While Amun is certainly viable to clear hard content like AA, there are a lot of easier and faster options (faster mostly because Amun boards typically take a lot of thinking).
Before getting Amun, I would suggest running some Endless either paired with an Amun lead or just counting your combos & playing as if you were leading with him. Make sure you actually enjoy the playstyle. Otherwise just use Kaede for swipe farming, and pick other leads for straight-up runs.
One thing to note is that amun has a valuable equip evo; so you could in theory buy an Amun, hypermax it other than the skill, run it for a while, and if you decide you don’t want it anymore then switch it to the equip for the Skill Boost.
Matching Amun Boards
Terms and Definitions
- Extra orbs – orbs that, were you to full combo the board with 3-matches, would be left over.
- Unmatchable orbs – orbs that belong to colors of which there are fewer than 3 total on the board (i.e. they are unmatchable regardless of how many combos you are making or how many orbs there are in a match).
- Matchable orbs – orbs that aren’t unmatchable, i.e. there are at least 3 of them on the board.
- Unmatched orbs – this just means orbs that aren’t matched in the current board.
- Leftover orbs – used interchangeably with “unmatched orbs.”
- TPA/Sparkle – I use these to refer to 4/5-matches regardless of whether you have the awakenings/this lead skill.
- Mod – Read the wikipedia page on Modular arithmetic if you aren’t familiar with this term (https://en.wikipedia.org/wiki/Modular_arithmetic). “a mod b” basically means “the remainder when you divide a by b.”
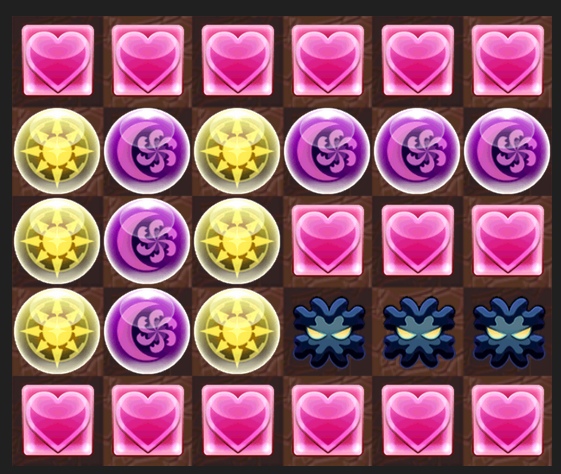
Note that unless otherwise stated, jammers always represent 3 unmatched orbs of any color.
General Steps for Amun Solves
- First, count how many combos there are on the board. This is most easily done by counting the leftover orbs that you would have if you were to 3-match the entire board.
- Determine which family of final board patterns you will be making based on the number of combos.
- Assign orbs to combos based on number (e.g. a color with 8 orbs might be 2 TPAs)
- Assign combos to positions on the board based on current orb placement (do you want to make a top row or a bottom row? 3 TPAs on the left or two on the right, one on the left?) It may help to say this out loud and repeat it to yourself before starting to match.
- Determine, to the best of your ability, which orbs will be left over (sometimes you might say “I’ll make either a red or a light TPA, and whichever one I do as a 3match will be the leftover color)
- Decide on a starting orb that doesn’t need to be in position until the very end of the combo. Depending on your solution and path, this may or may not be a leftover orb.
- Get a rough idea of a path to take. Typically you want to make all of your 3-matches last.
- Match the board!
Counting Combos
- Decide on a fixed order for counting. I use HRBGLD; and if there are hazards I use BPJHRBGLD. Some people (who are wrong) do RBGLDH. Never ever ever count in an order other than your fixed order.
- On the board, count the number of each orb there are, mod 3. Typically I group orbs into sets of 3 visually and then count the ones that didn’t fit (“extra orbs”). Keep a running tally by counting on your fingers (as in literally put up one finger for each extra orb you have counted so far). Seriously, it’s hard to keep track of if you don’t count on your fingers.
- Verify that the total number of extra orbs is equal to 0 mod 3 (because there are 30 spaces on the board, and 30 is also 0 mod 3). If it isn’t, you messed up, try again.
- Do 10 – (the number of extra orbs / 3) to get the total number of combos.
Placing Orbs Into Matches
I’ll go into this in more detail throughout the guide, but just keep in mind that there are multiple ways to divide colors. For example, if there are 8 hearts on the board, maybe you want to make a row of hearts and let 2 of the hearts be left over. Or maybe you want to make 2 heart TPAs. Or finally you could make a 3-match and a sparkle.
A common theme that you may notice is that my boards attempt to narrow the board to a 3xN space, where N is maximized based on practicality & feasibility given a particular distribution of starting orbs. At this point, finishing the Amun solve is equivalent to standard orb stacking and should require no further thought.
Rearranging Patterns
A lot of the patterns shown below have one or more squares in them. To conserve space (hah) I don’t show more than one orientation of elements of solves I consider equivalent. This is probably best explained with an example. The following three boards are equivalent:

When describing patterns in general terms, there’s no reason to differentiate between these boards, but when you are solving you may wish to do so in order to keep orbs closer to their starting locations on the board.
Using This Guide
As you may be used to by now, I write a lot, and not all of it is necessarily applicable to every single reader. If you are a relatively experienced player, you should be fine just looking at the boards & figuring out what to do (also there’s a summary at the end of the normal matching section with the most relevant boards). If you’re a brand-new player then I suggest running a lead easier than Amun. The full text of the guide is meant for someone with decent comboing ability but who maybe only has experience with Blue Hunter making 3-matches and nothing else.
Also make sure you have the outline open, there’s a lot of section headers and I left them all linkable.
About Standard Amun Boards
In this section I assume for the most part that there aren’t any hazards on the board, though in a few cases I do allow for that possibility (particularly in the case where there may be 1 or 2 unmatchable hazards stuck on your board). Furthermore, I assume a “reasonable” distribution of orbs, in particular some of the patterns may not hold up if there are more than 14 of a single color – so they will not generalize to tricolors always.
Finally, I assume you don’t need anything like an L-unlock that makes the pattern more complex, and in fact we will attempt to match straight lines wherever possible since these solutions are easier to visualize (in my opinion at least).
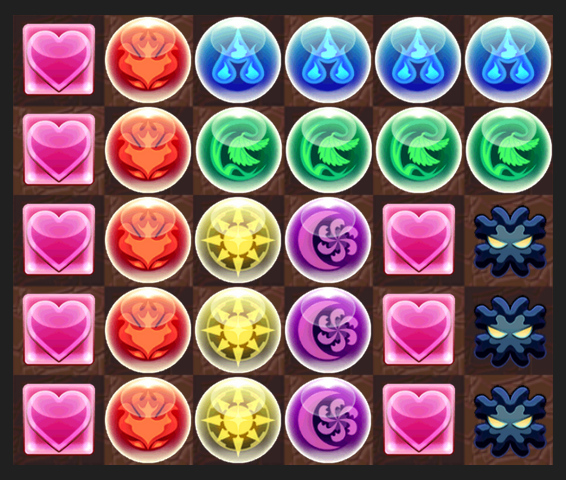
Standard 9 or 10c Board
This case is really easy! Just match the orbs normally but blob 2 colors (3 if it’s a 10c board). I would suggest picking up an orb that’s not 0 mod 3 (i.e. one of the leftover orbs, a “jammer” as pictured), and I would suggest making rows. http://pad.dawnglare.com/?s=Za3Pjj0
But really you can do like anything you want in this case. Try to make red be a color that there are 8 or fewer of, so that you can do full verticals in the bottom half without worry about accidental blobs. If you can’t do that, then either a) make a single blob of 9 orbs instead of two rows; or just change the last 3 3-matches to be horizontal instead of vertical.
Obviously if it’s a 10c board you need to make an additional blob, this is probably done best by picking a color that there’s 9 of to put in the 2nd row and let one vertical blob. If there is no color like that then just make a 2×3 rectangle in the bottom part.
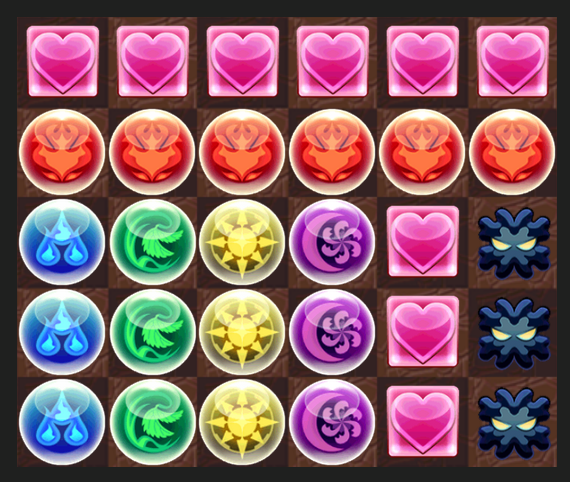
Standard 8c Board
0 Unmatchable Orbs
This case is super easy, there is one solution that pretty much always works (remember the jammers represent unmatched orbs, not an actual combo): http://pad.dawnglare.com/?s=Q4zIpp0

If one of your TPA colors matches your row color, you can instead do this:

Proof of Guarantee
There are 8c on the board, which means there are 6 extra orbs. Divide this set of 6 orbs into 3 sets of 2 each, greedily picking matching colors into the same pair. If three colors are represented, then pick these colors for the TPAs, and the rest of the colors on the board all exist in quantities equal to 0 mod 3 so we are done. For each pair covering two colors, pick both of these colors to be TPAs; once three colors are picked to be TPAs there are only three leftover orbs remaining. Proof that there must be one color with at least 6 orbs and that other than described above, the rest of the board can be filled with 3-matches left as an exercise to the reader.
Method of constructing
- If possible, pick a color with at least 6 orbs present that’s 0 mod 3 to be the row
- Pick your three TPAs (note in some cases it might be convenient for two TPAs to belong to the same color, but this is never required to happen) and decide where to place them on the board (occasionally you might want 2 TPAs on one side and 1 on the other rather than 3 together, etc.)
- Ensure that you will never have an accidental blob in your final pattern
- Match the orbs and figure out the 3-matches at the end (this is typical orb stacking and so should not need to be pre-planned if you counted right)
- I would suggest picking up an orb that IS 0 mod 3 in this case, because the TPAs have to be set up before the 3-matches, and you might change your mind mid-match which colors you are going to make into TPAs. (In fact, I suggest doing this for every board that isn’t 9c or 10c.) (Though unmatchable orbs are also good to pick up.)
3 Unmatchable Orbs
In this case, every single matchable orb must be matched; there is no leeway. That said, there are stricter conditions on what must hold for the matchable orbs: There are only 3 matchable orbs on the board left over after 3-matching the maximum number of orbs possible.
3 Matchable Colors = 1 Mod 3
Actually this case is exactly the same as when there are 0 unmatchable orbs. Your TPA colors are predetermined (there are only 3 possible).
1 Matchable Color = 1 Mod 3
In this case, the three orbs belong to two different colors, and it is forced that the distribution is that one is 2 mod 3, and the other is 1 mod 3. Our setup, if possible, is as follows: http://pad.dawnglare.com/?s=LWVX0f0

If heart is forced to be both the row and the sparkle, you may instead do: http://pad.dawnglare.com/?s=Bv5q1R0

And if heart is forced to be both the row and the TPA, you may be required to do something like the following: http://pad.dawnglare.com/?s=LsAu2N0
It may also be convenient sometimes to do a pattern like this: http://pad.dawnglare.com/?s=Y0zvuo0
This type of pattern is especially nice if you have a lot of hearts, since you can easily fit in 2 extra 3-matches beyond the 7-blob.
1-2 Unmatchable Orbs
Actually there is not really anything nicer or stricter about this case than when there are 3 unmatchable orbs, so pick orbs to be “unmatchable” as desired and match the rest. I would suggest attempting to make a row if possible, but as you can see anything works.
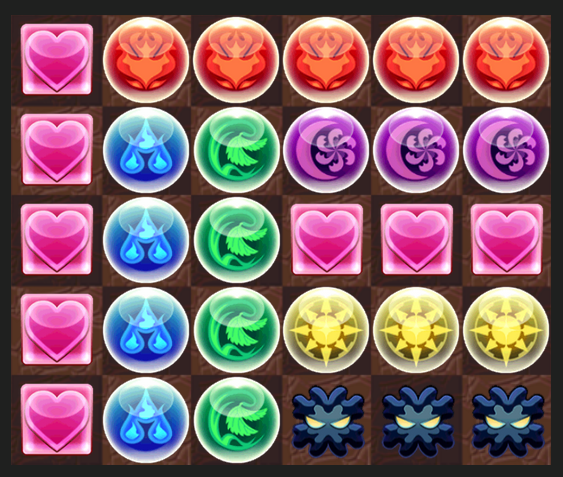
Standard 7c Board
In this case, you don’t blob any combos. There are also 9 extra orbs instead of 8, which makes the restrictions on what orbs are present in what quantities mod 3 very different from 8c.
Similar to 8c boards, let’s first examine the easiest case.
0 Unmatchable Orbs
The general form for this board is as follows (reminder again that the jammers represent unmatched orbs): http://pad.dawnglare.com/?s=qqF8xL0

Proof of Guarantee
There are 7 combos on the board total, so there are 9 extra orbs. Because there are at most 6 colors total (remember we are assuming no hazards), if each color has 1 mod 3 orbs present, we are 3 orbs short of a full board; therefore, at least 3 colors must have 2 mod 3 orbs. Because we are assuming 0 orbs are unmatchable, there are at least 5 of all of these colors, so make these the verticals. There are now 3 extra orbs unaccounted for, and we can let these be extra orbs. The remaining orbs are both matchable and in quantities = 0 mod 3.
Method of Constructing
This is actually pretty easy to do. Count the orbs, identify which colors are 2 mod 3 (there will either be 3 or 4 such colors). Make your verticals, trying to keep a color with exactly 5 orbs in it in the middle column. You should probably pick up an orb that’s 0 mod 3 in this one. Make your horizontals, and you’re done! (n.b. You may wish to arrange the sparkles so that it’s 2 on one side, and 1 on the other, etc.)
3 Unmatchable Orbs
Now we have only 6 extra orbs that are matchable, and so we can no longer guarantee our sparkles. Note that it’s impossible to have exactly 5, 3, or 1 color with 1 mod 3 orbs because of parity.
6 Colors Are 1 Mod 3
Technically this is impossible since we are disallowing hazards, but I will include it anyway. Do the following: http://pad.dawnglare.com/?s=ZFftvw0
First “match” the bottom row, then do the 2 vertical TPAs, and then complete the horizontal TPAs.
4 Colors are 1 Mod 3
So one color is 2 mod 3. Technically this is also impossible if there are 3 extra orbs and no hazards, but again we’ll include anyway.

I’d make the heart sparkle first, then stick one dark orb in the bottom left corner, match green, the blue, then light, then finish dark, then the middle. If one red matches one of the boundary colors (e.g. one red match in the above picture is actually blue), then reorient accordingly. If both red match then idk gl (this is an extremely unlikely situation to occur, and recall that 1 or more hazards on the board is required for it to even happen since as shown at most 2 of the jammers could be dark) http://pad.dawnglare.com/?s=DvupyC0

2 colors are 1 Mod 3
Ok so now we’re actually at a board that can exist. We have 2 colors that are 1 mod 3 and 2 colors that are 2 mod 3, everything else is either unmatchable or 0 mod 3. And suddenly our board is nice again! http://pad.dawnglare.com/?s=v8UpN40
To solve this, match the sparkles, then the TPAs, then the 3-matches. Keep in mind you can also rotate the green TPA to be vertical if that’s easier based on the orbs’ starting positions.
0 Colors are 1 Mod 3
This is the same as the case of there not being any unmatchable orbs.
2 Unmatchable Orbs
So technically if we wanted to, we could just relegate ourselves to one of the above by picking a random color to be “unmatchable,” because I didn’t make any assumptions about number of available colors to match. (We did this in the case of 8c boards.) That said, the case of 4 colors being 1 mod 3 really sucked.
Since there are 2 unmatchable orbs, the matchable orbs add up to 2 mod 3 rather than 0 mod 3, and there are 7 extra orbs. Due to parity, we must have 1, 3, 5, or 7 orbs coming from colors that are 1 mod 3. (Obviously 7 is impossible without hazards.) If 1 or 3, we are in an already solved case because we can pick an extra orb to be leftover to set us to 0 or 2 colors with 1 mod 3 and 3 “unmatchable” orbs.
5 Colors are 1 Mod 3
Ok so out of our 7 extra orbs, 5 are from colors that are 1 mod 3, and 2 are from a color that’s 2 mod 3. Aaaactually….this one is still impossible without hazards, since we are describing 6 colors total but we somehow have unmatchable orbs. Regardless, this is an easy pattern. http://pad.dawnglare.com/?s=Y9uZun0

To match it, start with the heart sparkle, then make sure there’s 1 unmatchable orb in the bottom right corner, match dark, and then work left to right. Pick up an unmatchable orb to start.
7(?) Colors are 1 Mod 3
I’m sorry for the fate that brought you here. http://pad.dawnglare.com/?s=NQYJEu0

1 Unmatchable Orb
Now we’re back to even parity of orbs/colors that are 1 mod 3, and everything should reduce to something nice as described above. One thing to keep in mind when picking which leftover orb will be unmatched is that a TPA + the unmatchable orb = a vertical sparkle.
Summary
Here are the boards you will usually be looking to create (remember jammers = unmatched orbs, not a combo). Read the introduction for general methods of constructing boards. Don’t forget to count your orbs!
9c
8c
7c
L Unlocks
Given Amun’s leader skill, you shouldn’t need to L-unlock unless you actually need to unlock the board, and in that case you can probably spend a turn just unlocking without doing a full solve. So I won’t go into much detail about how to do unlocking solves here, and instead just but a bit of an overview.
There are two types of ways to go about making an L-unlock:
- Plan it at the start, most likely in a corner of the board
- Keep a color with 2 mod 3 orbs left over until the end and then use a transform to finish the L-unlock in your 3xN box.
Both options actually require planning from the start, especially if you have more than one unmatchable orb on the board.
If you are going to match the L-unlock early, I’d recommend attempting to put it in a corner with two unmatchable/unmatched orbs above it and then 2 TPAs above the remainder of the L.This can also be done one step later, after matching a row across the top, with 1 unmatchable orb below the vertical part of the L and 2 3-matches below the horizontal part.
Counting orbs is, if anything, even more important when needing to L in a solve, because your unmatched orbs need to be decided on early on in the process as they are placed to accommodate the L.
If you want to keep the L-unlock until the end, here are two transforms you should know how to do fluently. Which one you use will vary per solve and depends on what position you end up in before making the L (click the links to see replays):
Bicolor Boards
First we’ll go over “standard” matching if you are just pressing a random bicolor and killing a floor with it, and then we’ll list some special-case boards.
12-18 Of Each Color
The general idea of Amun bicolors is to stack orbs until you have 6 combos on the board, and then shove the rest of the orbs at the top to make one last combo. For example:

This works as long as you are able to make 4 combos of the color that there is less of.
10-11 Of One Color
These work similarly to the above, but with the slight modification that you need to divide the red section in half; and if you only have 10 of the lesser color, you will need to start your stack in row 2 instead of row 1. Obviously you can and should mirror the setups if the orbs work out better that way, either vertically or horizontally or both.
| 11-19 | 10-20 |
8-9 Of One Color
For these just memorize optimal boards, but fortunately it’s relatively unlikely to occur. The 8-22 one is the same as the optimal combo board of this distribution, and the 9-21 one is slightly modified from the combo board.
| 8-22 | 9-21 |
FUA Boards
Not mine, credits go to Digity, Rakhir, and nayfaan – https://imgur.com/a/OKZCP for the full album, with multiple options for some distributions. These are available in miru bot with the command ^amunfuaX.

VDP or Super FUA boards
Optional +1c or +2c Active
The boards in the single image are also not mine, link to imgur host – https://i.imgur.com/5MafvRQ.png Not all of these distributions actually contain 7c, for some of them you will also need either a +1c or +2c active. This means they assume that you have a non-board-affecting +combo active (or actives) available for you to use so that you can see the distribution and THEN press the +c active.
In case you don’t have such an active available, you have 2 options: 1) risk the RNG that it won’t be a natural 7c board, or 2) press the +c active before you use the bicolor. Of course this means you can’t do the boards as shown, so after the image I added some boards that let you use +2c for the ones where natural 7c isn’t possible in case you only have a +2c active available, and no +1c.
And in the case that you only have a +2c available and no +1c, you can do the following boards instead:
| 21-9 (+2c) | 20-10 (+2c) | 15-15 (+2c) |
And a few more boards that weren’t included in the original graphic (they’re similar to ones above though):
| 23-7 (+2c) | 14-16 (+2c) | 13-17 (+2c) |
Mandatory +2c Active
If you had to use your +2c active BEFORE pressing the bicolor (e.g. Tachi, Nohime, etc) then you can use the following boards in case the example boards above actually give 7c already.
The following pattern works for 19, 18, or 17 orbs of the VDP color:
| 19-11 (+2c) | 18-12 (+2c) | 17-13 (+2c) |
| http://pad.dawnglare.com/?s=jvqC1k0 | http://pad.dawnglare.com/?s=NFEVoA0 | http://pad.dawnglare.com/?s=ahgj3t0 |
And if you have 16 non-VDP color orbs, you can just move the upper combo over one like this: http://pad.dawnglare.com/?s=POPKCp0&btb=1

+3c Active
If you have the ability to use a +3c active (e.g. Planar or Morrigu) you can do a really easy pattern pretty much always. I’ll show the extreme cases of 12 VDP-color orbs and and you can work out the rest yourself.
| 12-18 (+3c) | 24-6 (+3c) |
| http://pad.dawnglare.com/?s=9rHLdu0 | http://pad.dawnglare.com/?s=NLUamt0 |
If possible I would suggest making the above boards with Planar + single orb changer because it’s required to have at least 12 orbs of the color you want to VDP with, and 11 only in a bicolor is probably more likely than 5 only in a 2-1 board.
Another good option is to use a red pixel if you will have an Amun active available to fix as needed, since then you just need 9 of your pixel color to be provided by the bicolor.
Farming Boards
If you’re farming (or “farming”) with Amun, here are a few boards you should know, either board + top/bottom row or board + left/right column:
Kaoru Fast 7c
This is the easiest way to make 7c on a solid-color board, if it’s possible (i.e. you don’t need vdp etc). The path is super easy and fast, and even if you mess up it should be easy to fix. That said, if you are comfortable with the Kaoru VDP 7c board, that pattern may be faster because you just spin in big circles.
Replay: http://pad.dawnglare.com/?s=SKYw7I1 (26 moves)
Kaoru VDP 7c
If you need a VDP, and bottom & top row don’t match you can do this version.

Path (28 moves): http://pad.dawnglare.com/?s=JXKKoH1
(N.B. this can also be used for Super FUA)
Brachydios VDP 7c
Do this if the top and bottom rows match, so you can’t do the cascade shown above.

Path: http://pad.dawnglare.com/?s=pk5pzD1 (41 moves)
Sephi VDP 6c (+1)
Path: http://pad.dawnglare.com/?s=MIAtoo1 (29 moves) (Credit aKeKBlaze)
If you actually use Sephi, this is only 2 actives since he is +1c, but you could also just use an extra active and do any left/right column that matches.
Raph + Kaoru + Rath Hunter VDP + Fua 6c (+1)

Path – http://pad.dawnglare.com/?s=vxcQVS1 (33 moves)
This board actually takes 4 actives since you need board, Kaoru/Sado, and Rath Hunter, as well as the +1c active, but it’s a pretty quick path all things considered.
Raph + Jin + AAcala VDP + Fua 5c (+2)

This board only takes 3 actives since Acala provides both the 2nd row and the +2c, but it can only be done with green.
Path – http://pad.dawnglare.com/?s=KmUQAG1 (37 moves)
Toshi + AAcala + Mel VDP + Fua 5c (+2)

This is a really fast solve, and Mel can likely be a base that’s used earlier in a build and then reused. Technically you are able to erase 1 more blue orb here than shown, but that slows down the path by 2 moves and it’s unlikely that will make a difference in damage.
Path – http://pad.dawnglare.com/?s=pnSDJy1 (18 moves)
Bartz 7c
Replay: http://pad.dawnglare.com/?s=EwYWin1 (38 moves)
If you don’t have px Sephi or any row maker, but you do have a column maker, you can do this pattern.
Sephi 7c (6c +1) (No VDP)
This path is actually 1 longer than the VDP version, so you should just do the VDP one if you can remember it, but if you can’t then this is fine to do.

http://pad.dawnglare.com/?s=CAF8nF1 (30 moves)
Supergirl 7c
Blue made this board & path, 45 moves so try to avoid this but it can be done:

Path: https://pad.dawnglare.com/?s=xjksHV1
Pattern Link: https://pad.dawnglare.com/?s=xjksHV1
Tricolor Boards
In general you should probably try to use bicolor boards as much as possible just because they’re really nice to match for Amun. But if you have to tricolor, here’s some general advice and patterns.
Method 1 – Blob Normal Solves
9c Boards
There’s a couple options for this depending on distribution & orb count. Here are the two general-purpose boards I’d aim for depending on distribution:
In the second board, you can rotate the last 3 orbs to make the following pattern if needed:
Of course, you can also set up your board with a standard tricolor solve but deliberately blob:
Personally I consider this option a bit trickier because you have more things to keep track of later on in the solve, but depending on orb distribution and your playstyle you might prefer it.
10c Boards
Pretty similar to 9c boards, just blob a bit more. An uneven distribution of orbs could look like this:
Whereas for a more even distribution you may want to do something more like this:

While this pattern may seem a bit confusing to keep track of, consider the following solution order:
- Create the top row
- Create the dark L
- Stack light and heart below dark
- Do literally anything with the remaining space as long as all matches are horizontal, and dark isn’t in the 2nd row and light doesn’t blob; or put dark in the second row and stack the remaining combos LHL
Another option is:
In this version, you make the bottom row two unmatching colors, put the color there’s 12 of in the middle, and then just do vertical stacks on top; this will result in all 12 blobbing together but feels like a normal board setup.
8c Boards
For these you will have to match some TPAs. For most distributions, just do something like the following:
This is very similar to what you do for standard 8c boards (non tricolor), with a row across the top, then 3 TPAs, then the rest in 3matches, being careful not to blob.
In the unlikely event that you have only 5 of one of the colors, follow this pattern:
This will work as long as you don’t have more than 14 of one of your colors.
Here’s a board for 5-8-17:

Method 2 – Vertical Columns
Use this method if you need to FUA, but you can also use this method for normal solves if it’s more comfortable for you.
In previous cases I showed the most general solution first and then covered exceptions, but here I will show the exceptions first and then present the general case. Because of this, here are the 2 general cases if you just want to look at a tl;dr:
| Standard Case | Everything is 1 mod 3 |
9c Boards – 1 Mod 3
The subcases here are the only special cases of this method, which is why it’s a nice method to use. The reason that these are special cases is that a vertical column contains 5 orbs, and 5 = 2 mod 3. But if everything has 1 mod 3 orbs in it, then you are left with 6 unmatchable orbs, which is not allowed. So you cannot have a vertical column of each color.
n.b. the important thing about this case is NOT that it’s a 9c board, but rather that all orbs are 1 mod 3; it just so happens that when all colors are 1 mod 3, you happen to have a 9c board.
All colors are 10 orbs
This is particularly annoying because if you were to do 3 vertical columns, you would be stuck with a distribution of orbs that’s impossible to stack in the desired way at the end. Here are some arrangements you can do to get around it:


In short, only make 2 vertical columns, interrupt the 3rd vertical column to have just 4 of the same color, and then do something with the rest of the orbs that doesn’t suck too much.
Not all are 10
Thankfully, this returns to the general case. Do the following: http://pad.dawnglare.com/?s=SYJZuC0
Basically, we make 2 columns of the color with 10 orbs, and then do horizontal stripes for the least. The color sandwiched in between the 10 should be the color with the most orbs in it. If there were more light orbs then just transpose the horizontals on the right side: http://pad.dawnglare.com/?s=Bk1C2a0

In the more extreme cases we might have to be a bit more creative, but also the more extreme cases are pretty unlikely to actually occur.
General Case
Make 3 verticals and then 2 horizontals; the last square can either be horizontal or vertical, as desired – http://pad.dawnglare.com/?s=oDGGnJ0
As shown, heart should be the color that there’s the least of.
If everything is 2 mod 3, make sure you blob in the last area, but this will almost certainly happen naturally, in one of the following two ways:
In the second case, just make sure that your “Least” color actually has exactly 8 orbs.
Proof of Guarantee
10c case – Everything is 0 mod 3, so by making 3 verticals we are left with 1 mod 3 in each color, which means we can fc the last area and have 7 combos total with 3 orbs left over.
8c case – Everything is 2 mod 3, so by making 3 verticals we are left with 0 mod 3 orbs; therefore if we -1 when finishing the board we will have matched 7c with 0 orbs left over.
9c case – If we have one color with 2 mod 3, and one with 1 mod 3, the last has 0 mod 3. After our 3 verticals, our first color will have 0 orbs left over, the second 2, and the last 1. So again like the 10c case.
If everything has 1 mod 3 orbs then we need to do our exception case listed above and we are fine.
Method of Construction
Identify your 3 colors as Most, Average, and Least. The inner vertical should be your least (obviously the relative position of the first two verticals doesn’t matter). Make sure the Most goes in the top (or bottom) horizontal on the side, and if your Least has 8 or more orbs, make sure you don’t blob it by accident. Generally it will be easier to do 2 horizontals with 2 verticals and leftover orbs below/above them.
Drawbacks of this Method
You do still have to be aware of the orb counts so that you can do the right thing if you have everything 1 mod 3, and this method will fall apart at extreme combo counts. Also, generally you will have to move orbs a bit farther to do this method than the first method. That said, assuming a relatively standard distribution of orbs, everything should happen naturally.
Teambuilding for Amun
By Ripper
While Amun is often described as a “fun lead” on the side of his “main” use as an amazing farming lead – and while it is definitely fun – this doesn’t mean it is not viable at all. While the absurdly huge ATK mult and lack of any survivability in the LS can make it seem very glass cannon, Amun is actually a very flexible and powerful lead if you use correctly all that his multipliers provide you with. Because the full multiplier is an absurd 10 000x ATK (for mirrored lead) that will very casually make a lot of cards hit the damage cap, you barely have to bother thinking about damage at all. This means you can fully focus all your teambuilding efforts on getting utility to stay alive until you can kill the enemy (that means stacking shields, delays, poison resist equips, time buffs, probably Fujin(s) depending on content (though only Vishnu & Heradra are really troublesome) etc).
The most important thing to look at in cards is obviously HP. There are a lot of cards nowadays with huge amounts of HP, and these are all good to run. Depending on the dungeon you’re running, you want to get a comfortable enough amount that only really high pre-emptives and rage hits would one-shot you, and not any normal skills from regular skill-sets (at least not on earlier spawns for longer dungeons, or stuff you can’t afford to burst). This obviously varies depending on what you’re running, but for a comparaison my team has around 60k (solo, using HP badge) and I don’t really feel safe under 50k HP in harder dungeons. Obviously if you are running Arenas 1-3 or One Shots, around 40k HP could be more than enough. You also have to make sure you can heal close to full as much as possible (which can be solved with Heart OE inherits), especially if you are running a dungeon like Arena 4 where there are a lot of RCV debuffs that will really fuck with you if your cards are all HP and no RCV.
Bicolors
If you followed River’s methods (or other methods really, I don’t actually match like River explains it in most of the guide, though kinda close on some parts), after playing it a little bit, you’re going to get used to Amun’s playstyle really easy and quickly. With that done, bicolors will end up becoming basically “free” boards that you can always activate without thinking too much about it because of the limited numbers of patterns you can actually encounter (if you don’t want to learn too many patterns, I recommend learning mostly the FUA/VDP boards, as these still work on any given bicolor, but they are obviously more strict & less natural than most of the bicolor solves River details in her first parts). This means that if you take one or two bicolors on a team, they will basically act as a “destroy this spawn” button, giving you the possibility to kill basically any spawn no matter how tanky it is, or to activate VDP (and probably kill any spawn with it, as even a card as weak as Echidna will do hundreds of millions of damage on the worst VDP boards), or to activate FUA given your bicolor has hearts. What is also really nice about them, is that you don’t even need a team full of these colors most of the time – any bicolor works given you have at least one card in your team with that attribute, the damage from full activation on a bicolor being much much higher than the HP on almost every spawn in the game. Try to get bicolors with a lot of secondary effects though. Stuff like Yog, Kyo, Mega Sonias, Yusuke, Rajoa, Zela, etc are obviously amazing actives to have. Unlock + bicolor in particular is really strong as any locked orbs can really fuck with the patterns and make matching bicolors a lot less free. I actually really recommend running a team with at least a few different attributes
All that said, fully activating Amun every turn can be really tiring, especially in longer dungeons. That is why you also try to have subs that still do decent damage on 100x multiplier, which means mostly cards with 7c awakenings (fortunately, everything has them now, and all good cards you would sub for HP/TE/utility have 7c anyway). Except maybe in dungeons like Alt Arena where the HP is so high anyway that you need to fully activate almost every turn, most floors in Arenas 1-4 and other similar dungeons can be killed with 100x, which means simply matching 7c on natural boards. This also allows you to save all your bicolors for harder/more tanky floors.
Sample Teams
To illustrate, I’ll describe a bit some teams I’ve been running in the last two months, note that this is made with my kinda limited box & also that I don’t particularly recommend running any of these teams, you’re honestly better off building from yourself starting from zero, but showing my reasoning behind some teams could be helpful (some of these also aren’t even good but I want to show them to explain why & what I thought would work in theory but doesn’t in practice).
- Amun (MS Equip Ronia) / Nees (Academy Susano) – 7c SA / Odindra (Unskilled Rathian Equip) – TPA SA / Ideal (MS Rathian Equip) – Team HP SA / Alphonse (Unawoken Indra) / Amun (Yog)
This is the team I’ve mostly been running in Arena 4, but it still works in a lot of other dungeons. Poison resist is so good that I honestly can’t see myself running an Amun team without it (especially since the RCV on that team is not that high, and A4 having a lot of RCV debuffs makes it a lot worse), two shields is mostly safety as I use Nees base active often enough mostly to heal but also when Odindra isn’t up, Odindra sub is absolutely necessary as Fuma/Rushana are pretty bad otherwise, the Delays are really really useful too and I do let it come up on Odindra after a while (mostly after Rushana floor, as Tsubaki/Amnel binds arent that annoying for this team) and help stalling on a lot of spawns as many are actually delayable (especially Norns) or even in case I fuck up on predra/tan floors and don’t want to blow bicolors. Ronia is because I barely have any bicolors and it’s still really nice HP (and kills everything anyway just from Amun/Nees damage), Yog for FUA & just a really nice bicolor. Though I do solo a lot, I’ve also been running this same team paired with my Alt:
- Amun (Yog) / Ilmina (SDR) / Kyo (unskilled Valentine Box) / Mega Gronia (Reiner) / Odindra (unskilled Valentine Box)
This team is mostly boards because… my alt actually doesn’t have much even though it gets all these nice free pulls. Reiner doesn’t often come up but it does give nice HP & when it comes up it’s really nice. Odindra isn’t really needed on both sides but it’s easier & I was running Fujin before but it felt really useless (only absorbs are Sadalmelik & Khepri in A4, Khepri is easily stalled and Sadalmelik gets 1-2 shotted with sub-attributes), all these bicolors have nice second effects anyway so they’re still nice to have.
These teams actually haven’t like… I haven’t PDC’d them so all of my experience running them comes from actually dying in the dungeon (which I don’t recommend btw). They were mostly made so I could get used to playing Amun & getting used to the playstyle, they do have some issues with the Radar Callers because you can only do 100x and then the ragehits are really scary. I’ve been playing around with replacing Nees with Yusuke, whose board is really nice, but I’ve found vdp to not be very reliable on bicolors only so it’s still not that much increased consistency on Radar Callers.
- Amun (Equip Ronia) / R Ney / Enra (Yian Kut-Ku) – L-Unlock SA / Leilan (Zeta Hydra) – Team HP SA / Alphonse (Unawoken Indra) / Amun (Equip Ronia)
This team is actually really bad. I made it without much dungeons in mind, just as a “base” because I initially wanted to run a monocolor team… Monocolor teams actually lose so much flexibility compared to rainbow teams. I’ve mentioned the fact that more rainbow teams can use any bicolor as long as you have one color from it, but it is also true of any random natural boards. If you solve these to get max multiplier, you can still kill most floor given at least one match of a color you have. With a monocolor team, it makes natural boards much less flexible and actually makes it so that you could get orb trolled – which doesn’t happen for more rainbow teams. This team has a lot of other issues though. Though all of the bases are cards with good stats (in particular HP) /awakenings (it is kinda lacking in TE but Amun leads give so much that honestly you don’t need that many in subs), I have found tricolors to be kinda the worse possible boards for activating Amun. While rainbow boards can be summarized to a few patterns that are really easy to recognize without thinking too much about it and bicolors are basically free, tricolors are kinda awkwardly in between these two, which is even worse when you need to FUA these boards & activate your full multiplier. Anyway yeah this team sucks I didn’t really run it much and I don’t think monocolor is very much running at this point. Especially since if your team is red, you can’t even damage control Vishnu because he ends up at some weird threshold (you need like 5c full clear with not too many red, no red OE or something to stay under on lead alone).
As a note, in general, a few of the common damage absorbs are still manageable (both Sopdet & Parvati are) because while the mult only has two scalings, you have options of full clearing the board with less/more than 7c or stuff like that and you have no skyfalls. That said, they can require a few delays to actually go through their entire HP bar in dungeons where it is higher (Alt Arena Sopdet is probably not possible), and RNG can also fuck you on orb requirements, especially for more rainbow teams.
TL;DR
- LOOK AT HP STATS. Limit break can be worth investing in. You NEED as much HP as you can get. Probably use HP badge.
- Get as many TE as you need to be comfortable with, but remember that Amun leads bring a lot & you will only need to 7c on most floors in most dungeons & bicolors are really easy and fast to solve.
- Bicolors are free kills. Try having at least one or two, especially some with great secondary effects.
- Stack as much utility as you can. Shields, Delays, Hazard Resists, Time Buff Actives (probably not if it doesn’t do anything else tbh, but like the YYH assist has a really nice active), eventually Fujin actives, eventually VDP awakening (note that, since the mult is so high, you can use literally any VDP, even the cheap farmable ones like Echidna end up pretty good), eventually FUA awakening.


