
Tower Guide (1-62 complete)
Please comment if you would like to add anything. I don’t have all the units, so I can only comment on my playthrough, and comments from the wiki.
Tower Event Overview
- Items cannot be used.
- HP status for every unit is saved when clearing a stage. Heal before clearing. Jewels are not saved.
- If anyone dies, and you finish the quest with them dead, they will be unusable in the tower for 24hrs.
- After the timer is up, you can heal all your tower units for free
- Otherwise you can pay gems to heal, the cost is based on time remaining. Very expensive though.
- Don’t heal when your first unit dies, heal when you need a dead unit revived to continue.
- If you lose your whole team, but injure the enemy, enemy HP will also be retained. Enemy Jewels are also retained, although their starting positions will reset.
- This is the only way to beat some of the later levels if you lack a required unit, or LS. It’s a valid strategy, but be careful to use it only when necessary.
General Tips
- If anyone dies, if you close the app right away it’ll allow you to redo the last move.
- If you want to rearrange or swap out your team, you can quit the quest without any penalty.
- It’s not required in early stages, but if you need to heal, just inflict status on the last enemy or leave a weak enemy alive and then heal everyone, is the easiest way.
Resetting the Tower
- After reaching the top floor, there is an option to reset the tower back to floor 1. The first time reset is free, second time onwards will cost 500 gems. Replaying the tower awards Veda Coins (red) that are redeemable while the shop is open. Resetting the tower will heal all your units, also resets heal timer back to 24hrs.
Known Bugs
- Starting a floor before reset at 0:00 JST and finishing it after reset will not count properly as having been cleared (from wiki comments)
Tower Rewards
- Rare Summon Ticket
- 5 Silver Bars
- Rare Summon Ticket
- 5 Silver Bars
- Rare summon Ticket
- 5 Silver Bars
- 50 gems
- Job Equipment ticket x2 (regular)
- 5 Gold Bars
- Job Equipment ticket x2 (regular)
- 5 Gold Bars
- Job Equipment ticket x2 (regular)
- 5 Gold Bars
- 100 Gems
- Job Equipment ticket x2 (rare)
- 10 Gold Bars
- 10 Gold Bars
- Job Equipment ticket x2 (rare)
- 10 Gold Bars
- 10 Gold Bars
- 200 Gems
- 5x Fire Pieces
- 5x Water Pieces
- 5x Wind Pieces
- 5x Lightning Pieces
- 5x Light Pieces
- 5x Dark Pieces
- 300 gems
- Gold Alchemy Pots x15
- Job Equipment ticket x2 (SR, same as 2mil tickets)
- Gold Alchemy Pots x15
- Job Equipment ticket x2 (SR)
- Gold Alchemy Pots x15
- Job Equipment ticket (SSR, Gold only)
- 500 gems
- Armament ticket x5
- armament EXP 3k item x10
- 3* minimum guaranteed armament summon ticket x3
- armament EXP 3k item x10
- 4* minimum guaranteed armament summon ticket
- armament EXP 3k item x10
- 500 gems
- 10x Fire Pieces
- 10x Water Pieces
- 10x Wind Pieces
- 10x Lightning Pieces
- 10x Light Pieces
- 10x Dark Pieces
- 15x Rainbow Pieces
- Multi Level Wind Armor 5* armament
- 10x Fire Pieces
- 10x Water Pieces
- armament EXP 3k item x15
- 10x Wind Pieces
- 10x Lightning Pieces
- 500 gems
- 10x Light Pieces
- 10x Dark Pieces
- 15x Rainbow Pieces
- Multi Level Lightning Armor 5* armament
- 600 gems
- 365 gems
Special Thanks to Contributors
wytesong
Frendy
Alurette Valentino
kazasu07
Floor Level 1-15
- 1-15 or so are very easy, basically autobattle territory w/ lvl 60 Job11 units.
- In these 15 early stages element makes very little difference, it’s not necessary to switch to your mono element teams for these.
Level 16

Notable Enemies
- Plant uses Attack Down 1st turn (very small debuff)
- 2nd turn: Chain Out (Combination Link chance down)
- 3rd turn: Attack Down again
- Note: All Plant debuff AoEs are all map skills
- Lancer can inflict Death Sentence, kill him quickly.
- Plant casts Death Sentence, eventually, but if you have a decent lvl 60+ Job 11 team, you probably won’t even notice, because it’s very easy to kill, and quite slow.
Level 17
(Nothing Special)
Level 18

Notable Enemies
- Plant 1st turn (buffs enemy defense x5)
- 2nd turn: Combination Link down
- 3rd turn: Regen AoE on all enemies
Recommended
- Either bring high attack units, self buffing attack units, or kill the Plant and wait for the buff to wear off in a few turns.
- Magic AoE also works, large range AoE (Wiseman or Summoner) is best
- Same strategies as level 19
Level 19
Notable Enemies
- Yellow Plant (Speed: 127)
- 1st turn: Buffs enemy defense 5x
- Green Plant
- Lowers your speed somewhat or uses Chain Out
- Casts AoE regen on enemies
- Occasionally uses poison spore AoE at close range
- Mage
- Casts poison, small AoEs, slow casting, but can still hit slow units
Recommended
- Kill Plants asap
- High speed Ninja can kill plant before it buffs.
- Also Snipers with speed passives (Arber, Chalice, Almira from 4th/5th spot)
- Or Bring High Attack units (Dark Knight, Dragon Knights etc.)
- and/or Self buffing attack units (Saint of Fist, anyone w/ Monk subskill)
- and/or bring Magic Cancel react ability
- Backstab, attacking from higher ground and/or Combination Link attacks can also override high defense
- Alternatively, bring Magic Knights (or subskill) or Wiseman, Summoner or Astrologer, their magic defense is not buffed.
Other Notes
- Enemies can be inflicted w/ Stop, and likely other statuses too.
- Bring Professor or Bishops skills to heal (optional)
- Snipers are ineffective against the soldiers until after the buff wears off. Archers and Mages are not too difficult to kill with buff active though.
Level 20

Notable Enemies
- Plant (Left) (Speed: 127)
- 1st turn: Buffs enemy defense x5
- Can be killed before buffing by Autima, Magnus (ninja) (Leader spot)
- Also Shekinah, Lyle, Almira (Sniper w/ archer subskill) can kill it but might miss.
- Chalice has the range but can’t one shot kill it.
- 1st turn: Buffs enemy defense x5
- Plant (Right) (Speed: 121)
- 1st turn: starts charging
- 2nd turn: casts AoE Snare (lowers movement to 1)
- 3rd turn: moves to attack
More or less the same strategy as Level 19, just different map.
Level 21


Notable Enemies
- Bard casts buffs on enemies:
- 1st turn: Defense up
- 2nd turn: Attack up
- 3rd turn: Magic atk up
- 4th turn: Luck up
- Buffs wears off about 3 turns after they were cast when Bard is dead (easy to kill)
- Plants:
- Lower Left Plant: casts Attack down (Speed: 117)
- Lower Right Plant: casts Combination Link down (Speed: 133)
- Upper Right Plant: will cast room-sized AoE sleep (lasts 3 turns unless you are hit) (Speed: 132 too far away to kill before though)
- Casts on it’s 4th turn, then again on it’s 5th
- Can send Ninja to kill it or just bring Professor instead.
- Archer uses AoE on starting position that hits leader and 2nd unit before they can move, if they are moderately slow. (Speed: 95) Can severely injure low defense units.
Notes
- Kill Bard and Plants asap.
- Plants near starting position are easily killed before their turn. (Anyone same speed or faster listed above)
- Plants (and likely other enemies too) are vulnerable to Stop
- Thief uses paralyze dagger
- Lots of choices for team composition. Of note Zain (65+) can get almost all the clustered enemies in the center with any two Illusionists Overclock. Autima also w/ MA.
Level 22

Notable Enemies
- Plant (Speed: 126)
- 1st turn: casts Skill Lock/Silence on everyone
- He’s somewhat fast, so you’ll either need a faster Ninja team or just go without using skills until it wears off in a few turns. The plant is easy to kill.
- Can try bringing a status resistance armament on a Professor (high chance to fail though, not recommended)
- 2nd turn: casts Enemy Defense Buff x5
- 3rd turn: casts Speed Down AoE
- 4th turn: casts Sleep AoE
- 1st turn: casts Skill Lock/Silence on everyone
- Monk (right side) uses prevent movement and attack.
- Defense buffed enemies are still vulnerable to magic and high attack, as usual. This isn’t needed if you brought water melee team.
Strategy
- This stage doesn’t require water units or any 50% LS. If you lack a strong water team, this level can be cleared using either Veteru (65+), Zain (65+) or Selena (lvl?) by sending them over to kill the plant slowly.
- Bring non-wind ranged units (Snipers, Machinery or Rangers) as support.
- Stop works, can use ninjas and then wait for skill lock and/or defense buff to wear off.
- Lupine can cast magic, since she has immune to skill lock passive skill. Keep her away from the archers though.
- Of course, if you have good water melee fighters, then this level is very easy. These guys almost all inflict 1 damage on 75+ water units.
- Also can bring a high speed team 126+
Level 23

Notable Enemies
- Plant (Speed: 126)
- 1st turn: Chain Out
- 2nd turn: Attack down
- 3rd turn: starts charging Snare and Poison
- 4th turn: inflicts Snare and Poison AoE
- 5th turn: moves to attack, uses Ice Spore
- Chalice Sniper with double range can kill it before it’s turn. (3rd spot) (Speed needs to be 126 or higher)
- Enemy Bishops w/ regen like to cast Shining (not a threat to non-fire melee units)
Strategy
- Lightning team and/or LS are not required for this stage, just don’t bring any fire units.
- Zain (65+, but 60 might work too) can easily clear this with a couple of illusionists. Ranged units are good too. That being said there’s a lot of great possible team choices here.
- Autima can MA four enemies on the right side from 2nd spot
Level 24

Notable Enemies
- Plant
- 1st turn: Plant casts enemy Defense x5 buff (Speed: 132)
- Can be killed before buff by Magnus (Ninja w/ Machinery) (5th spot). Also Lyle, Shekinah and Autima but can miss.
- Note Autima will need to heal probably.
- Chalice can’t reach this one
- Can be killed before buff by Magnus (Ninja w/ Machinery) (5th spot). Also Lyle, Shekinah and Autima but can miss.
- 2nd turn: Chain Out
- 3rd turn: starts charging
- 4th turn: casts AoE Death Sentence
- 1st turn: Plant casts enemy Defense x5 buff (Speed: 132)
- Monks: these guys can self buff, so their attack is fairly high. Keep support units away from them.
- They attack if in range, otherwise they move towards your team and/or self buff atk.
Notes
- Enemies can be inflicted with status, including Stop and Prevent movement, likely others too.
- Defense Buffs wears off after 3-4 turns, but don’t wait it out, they will do a lot of damage if not stopped.
Strategy
- Fire team and Fire LS are not required for this stage, but it will be much easier if you have them. That being said, these guys aren’t too bad. Put your tanks in front. Naturally Veteru (65+) is quite good here, as is likely Kadanoba (75) and Zain (75). Veteru should have his usual magic sword subskill for damage.
- But honestly I think almost any non-lightning tank as leader will do here.
- Zain (65+) is still an excellent clean up here, with his Shining Flare AoE. He can’t tank as well as Zain lvl 75 or Veteru, but he can still do a lot of damage with 2-3 illusionists. (have them cast and stay behind your tank)
- After clearing the L shaped platform next to start, it’s a good spot to put your support. The enemy cannot jump, they have to use the steps.

Zain or Zangetsu, 3 Illusionists and Veteru/Tank
- Zangetsu Dragon Knight and 3 Illusionists works quite well too. He’s more awkward to use since the enemy isn’t lined up, but he can clean up very well. His ability to climb is useful too. (last team member Veteru)
- If you don’t have strong fire units or Zain or Zangetsu, try inflicting as much status as possible and take em down one at a time. Water Illusionists Black Hole is very effective. Bring Professor to protect against death sentence or kill the plant asap.
- Of course if you have a team of high speed units you can just breeze through. Rangers like Shekinah or Lyle work very well. Overclock them and can be done very fast.
Level 25


Notable Enemies
- Plant (Speed: 129)
- 1st turn: Chain Out
- 2nd turn: AoE Clock Down
- Easily killed with a fast ninja or Cedar. Almira can kill it quickly without LS with Assault Burst. Balt Twin Blade+ w/ Dark Knight subskill also.
- There are two minibosses (the AJ series spinning blade robots) that are faster and tankier and more dangerous than the other enemies. The bottom one attacked Rafu here before her turn.
- Gunner robots around the edges seem to prefer to use a defense penetrating bullet, which hits a bit hard, even to wind units
- Gunner robots can be inflicted w/ Stop. The spinning blade robots seem to be immune to status afaik.
Strategy
- Wind units and Wind LS are not required, but they do make things very easy. Cedar (60+) Job 9 is surprisingly good leader, plus Venom Rain Arrow can do very good damage. Shita (60+) (Job 11) is very useable here too.
- Yomi and/or Lucia (SoF, 75), Flamel (BM+), Setsuna, Balt are excellent as main damage dealers.
- Melish and Fencer are pretty good for getting those pesky gunners, but keep them away from the AJs.
- Rafu is good but will take heavy damage, bring her Bishop subskill for healing if using her.
- Zain and Veteru are good in the last team spot to draw fire from AJ, if you can’t kill it before it’s turn.
Level 26

Notable Enemies
- Plant in upper right corner
- 1st turn: casts Speed down or Chain Out
- 2nd turn: skips turn
- 3rd turn: does AoE Paralyze (lasts 3 turns, chance to still be able to move)
- 4th turn: uses Regen AoE on it’s allies
- 5th turn: moves to attack.
Notes
- They can all be inflicted with status. Tried Headshot and Poison, others likely work too.
Strategy
- The plants are fairly easy to kill in 1-2 hits even without any dark units or dark LS. But avoid getting surrounded by them unless you have a very tanky unit, a couple ranged hits got Yomi down to ⅓ HP (lvl 85 w/ defense armament). They hit surprisingly hard.
- Edit: they inflict magic damage
- Best to shoot them from a distance, Ranger and/or Snipers. Magic works too. Low level units then I recommend bringing as many Snipers as you have, use Headshot to keep them at bay while you snipe them.
- Of course Arber is a great Leader, but Chalice or Almira works very well too. Bring Rangers to fill in your empty spots.
- Low level Rangers can use Hunter Eyes or Arrow Rain for high damage.
- Alternatively, try Overclocking Zain (60+).
Level 27

Notable Enemies
- Plant (Speed: 129)
- 1st turn: casts Defense Buff x5 first turn
- Too far away to be shot before turn by sniper w/ speed boost. But can be hit by Balt TB+ (80)
- Defense buff wears off after 4 turns.
- Can be charmed
- 2nd turn: casts Blindness (lowers accuracy of physical attacks)
- 3rd turn: inflicts Clock Down (lowers speed, doesn’t display though)
- 4th turn: Speed Down
- 5th turn: Magic Atk Down
- OR Combination Link down (seems to vary)
- OR both. May move to attack then or attack next turn.
- 1st turn: casts Defense Buff x5 first turn
- Knights (mobs)
- Won’t attack first few turns as long as you stay off the edge of the stage, and the area next to the steps.
- Dark Knights
- Very dangerous, get the drop on them first.
- Use ranged Soul Sacrifices AoE attack
Notes
- Anyone with decently fast speed (129+) can go before the defense buff is up, which is a lot easier to clean up some mobs w/ Magnus (ninja w/ machinery subskill), Snipers (need a Speed Boost passive) and fast Rangers.
- Lyle (75), Shekinah (75), Autima (70-ish) can also take out 1-2 knights each. Cedar (70+ish) as well. Probably Carol too.
- Can use fast ranged team and just clean up and have Autima MA the last two Dark Knights together.
- Defense Ignore or Piercing attacks work on the buffed soldiers, as does using units with High Attack.
- They are also weak to magic, if using Magic recommend tanks with Magic Knight subskills or Wiseman, Summoner, Astrologer.
- More recent magic units like Autima, Rin Tohsaka, Illya can probably solo this stage with Clock up.
- Soldiers can be inflicted w/ Stop (chance is maybe 30%-ish, seems low). Seem immune to most other statuses.
Strategy
- After the defense buff is up, the mobs can still be killed easily with moderately high attack and 50% LS.
- Suzuka (Ninja w/ Overdrive and Dark Knight subskill) or Zain (65+) can be Overclocked with three Illusionists and easily take out the Dark Knights, Plant and come back for another round of Overclock to finish off any mobs.
- Otherwise, I’d suggest magic AoEs (Wiseman, Summoner or Astrologer) from a distance. It is still a good idea to bring an Illusionist or two to Clock Up your magic caster and use Overclock to bring them out of enemy attack range if needed. Autima is fast enough to not need it (unless you want him to solo clean up the stage)
Level 28


Notable Enemies
- Plant (Speed: 134)
- 1st turn: Defense Buff x5
- Too far to be killed before its turn.
- Buff wears off by turn 5 or so.
- 2nd turn: Chain Out (Combination Link chance down)
- 3rd turn: Magic Atk down
- 4th and 5th turn: does nothing
- 6th turn: Physical Atk down
- 7th turn: Blindness AoE
- 8th turn: AoE Regen (on enemies)
- 9th, 10th, 11th turn: charging
- 12th turn: AoE Clock Stop
- note: Plant can be inflicted w/ Stop
- note: they have nerfed this level to be much easier. Originally uses Clock Stop turn 8, now delayed to 12.
- 1st turn: Defense Buff x5
- Arber
- Can be killed by Suzuka (ninja) before her turn, or another ninja w/ high attack (like Grantz), or Sniper with combination link attack.
- Alternatively inflict Headsnipe or Stop and she won’t be able to attack.
- Edit: they added ability to inflict Stop to her on one of the tower event reruns.
- Also Lyle Ranger (75) with speed passive (with his 30% LS, or bring 50% LS) but he can miss.
- Magnus
- Very high defense, high HP, definitely the final boss. Rains down deadly attacks from his mountain.
- Edit: he’s been nerfed. He’s slower, half HP than before and less deadly now.
- Easily killed with Zain, Yomi or Zangetsu (overclocked 3x). Flamel BM+ doesn’t need overclock.
- Can also be inflicted w/ stop (high chance)
- Very high defense, high HP, definitely the final boss. Rains down deadly attacks from his mountain.
- Lightning Lancer
- Will inflict a close range Provoke AoE around plant’s turn 7, if anyone is close to it. (Note: they changed it to turn 7, previously turn 5)
- AJ4000
- Immune to status. Edit: penetrating shot nerfed (removed)
Notes
- Headshot works on the mobs and Arber.
- Edit: now this level has been nerfed, team compositions are much more flexible. Leaving the old stuff up as suggestion, still works, it’s just kinda overkill.
Strategy
- Zain leader (65+) can again be Overclocked here with three Illusionists and bring Suzuka or Lyle or a Sniper to get enemy Arber. Zain can use first round of Overclocks to hit the nearby water warrior, and come back for another round.
- Head straight towards the base of Magnus’ hill, kill the light robot on the way. Get Magnus and then wipe out the two on the base of the hill.
- Zain (65) only takes 1 damage from Magnus’ Craft Bomb, but still can be hurt by the rest of them.
- Zain (75) is pretty safe from everything except Clock Stop.
- Alternatively Zangetsu (75) works here too. He won’t be able to kill the water warrior, but it’s no problem. First give him a round of Overclocks to hit the water warrior, then go back for another round of Overclock.
- He can reach Magnus in 3 Overclocks too. With his speed, he can’t make it back, so you might want to leave him somewhere safe. He will probably take a hit or two.
- Have an Illusionist cast Bind on the water warrior, it’s very slow and not much threat.
- Alternatively use Yomi (75). Same as Zangetsu and Zain, give her two rounds of Overclock. She will need to buff to kill Magnus but does not need any LS. I would still use Lyle or Suzuka (as Leader) to get enemy Arber.
- She can also get the Plant after buffing, but will get one minor hit from the AJ4000. (Bring healing subskill on an Illusionist if you want to finish with full health)
- Yomi can’t kill AJ4000, even after buffing, but Lyle or Suzuka can do it easily. Overclock them after Magnus is dead.
Level 29

Enemies
- Dancer (Speed: 116)
- Casts Defense Down every turn, first four turns or so
- Then casts Attack Down
- Then Magic Attack Down
- Enhancer casts atk up on Zangetsu 1st turn, then archer 2nd
- Zangetsu (Boss)
- still hits very hard with defense penetrating strike, even against water units, Veteru (75), Zain (75)
- Immune to status afaik.
- Fire Rats
- Use defense ignore, penetrating attacks, attack self buffs, or magic
- Can be inflicted with Stop and Headsnipe.
- Soldiers use light sword AoE, or close range magic sword skills but are not too much of a threat. Fairly tanky though.
- Can be inflicted with Stop and Headsnipe.
Strategy
- Water team with 50% LS is of course the easiest. Still need to be a bit careful with Zangetsu, but it’s easy for say, Sheena to buff and then get him quickly.
- Shenmei’s Dropping Anchor is really good here, as is Rofia’s Magic Knight and of course Sheena (SoF)
- Rofia as Magic Knight can probably solo the stage by herself, with Illusionists would be much faster though.
- Alternatively 65+ Autima, preferably with MA, can solo this level with any four illusionists. He needs fast casting. Plus his LS his attacks cast very quickly.
- Water team and LS are not required for this level though. At the minimum, this stage just needs any two water Illusionists, and a strong non-wind melee fighter to kill enemy Zangetsu
- Veteru (75) can do it with an Ice Sword (Holy Knight with Magic Sword subskill) and a couple regular hits, to survive, he’ll need three Illusionists. Go partway down the left side, then triple Overclock.
- After enemy Zangetsu is dead, heal Veteru and use Bind and Black Hole on the fire rats and the enemy knights. Stop and Headsnipe both work on them, so a Sniper can be helpful too. (anyone except Almira).
- Clock up your casters before attacking so they will be fast. Headsnipe then Bind on them is safest.
Level 30


Special Enemies
- Plant (nerfed speed: 122)
- 1st turn: Combination Link chance down
- 2nd turn: Attack Down, but not much, seems to affect non-lightning units more. Wears off in about 2 turns.
- 3rd and 4th turn: starts charging a Stone Arrow like attack.
- Hits one character on 5th turn.
- Seemed to deliberately target my Professor.
- Note frozen in stone status counts as death for HP purposes when clearing a stage.
- Can be inflicted w/ Silence to prevent casting
- The Sniper Gacha Armament (the one that starts as 3*) is useful here (but completely optional)
- Fon Riu
- Very deadly, fast casting (Edit: speed nerfed to 85!)
- Edit: no need to lure him out, he now comes out by himself instead of lurking.
- Can be inflicted w/ Headsnipe. Edit: Stop works now too.
- Alternatively Rofia 75+ Magic Knight can probably tank his hits and get him slowly.
Other Enemies
- Thieves inflict Charm, snipe ‘em or bring Professor (Edit: their speed was severely nerfed, they are not that dangerous anymore. Still charm though.)
- Sword Robots are pretty weak, but are somewhat tanky vs. non lightning element, at least while the Attack Down debuff is active.
- Can be inflicted with Stop and Poison.
Edit: This stage has also been nerfed, particularly all enemy’s speed. Plus the non-thief enemies used to be highly resistant to all elements other than lightning when debuff was up.
- Now Zain can clear it with only two Illusionists, and Fon Riu is much less dangerous. Leaving the old stuff up, it still works just a bit overkill.
- Still need non-fire units, but now wind team with Setsuna (70) leader works (bring any 4 illusionists) very easy.
Notes
- Chalice (Sniper) can still solo this stage easily with Illusionist help, since there’s no enemy defense buff.
- Magnus is better as Machinery in this stage.
- Dirga and Monzein are so slow, if using them better bring an Illusionist. Now that lightning isn’t required though, why bother.
Zain Method (old, now overkill)
- If you have zero lightning units (other than Edgar of course) then this level is clearable no deaths with Zain. This took quite some tries to find out, so you are all welcome xD
- Need a lvl 70-ish Zain and any 4 Illusionists.

Start by moving your Zain and Illusionists like this, casting Overclock on first turn. My alt account Zain is lvl 70.

1st Overclock

2nd Overclock use Shining Flare on the thieves.
- Next turn, kill the Plant with a normal hit.
- Next turn, use Lightning Bolt on Fon Riu. This only has a 76% hit chance so restart if it misses. Then move within Lightning Bolt distance of the water blade robot (the one next to Fon Riu) and end turn.
- Next turn, hit the water blade robot with another Lightning Bolt and run back towards your Illusionists.
After that, the left side enemies will approach your illusionists.
- Cast Black Hole on the Robot, Stop will work on him (high chance). Must be non-fire Illusionist. Fire Illusionist can still help by casting Clock Up on the Black Hole caster.
- Zain will probably get charmed by the remaining thief, but as long as he gets attacked by the gunner robot next it’s no problem.
- Zain’s next turn, kill the thief and head back for healing (bring any healing subskill on one illusionist) and a couple more Overclocks.
- Overclock and use Lightning Bolt on the last Gunner Robot. Heal anyone if needed and then kill the Stopped Robot.
Level 31


Special Enemies
- Green Plant
- 1st turn: Defense Buff x5
- 2nd turn: Attack Down (large)
- 3rd turn: Combination Link range down
- 4th turn: Magic Atk Down
- 5th turn: skip turn
- 6th turn: moves to attack
- Yellow Striped Plant
- Green Plant’s 5th turn: uses Paralysis room-sized AoE (not 100% chance of unable to move)
- afterwards uses close ranged paralyze spit
- Green Plant’s 5th turn: uses Paralysis room-sized AoE (not 100% chance of unable to move)
Other Enemies
- Right Archer inflicts prevent attack AoE first turn if your units are in range. It will try and hit as many of your units as possible. (Previously: Prevent Attack plus Skill Lock)
- First turn it won’t attack if you don’t move from starting positions, so you can get your Prophylactic Medicine up. (No longer needed, but still works)
- Archers are nothing special.
- AJ2000 both of them are very tanky, but have pretty weak attacks, at least against fire units
- Zangetsu can kill one before the Attack Down hits
- Beware they take almost no damage from non-fire units once defense buff is up. (Edit: now they take magic damage)
- Fire Sword and Fire magic does decent damage against them.
- Can be inflicted w/ Stop. Edit: Much lower damage now, not likely to kill any Illusionists, but bring healing.
- Lancers
- Edit: Defense penetrating spear strike changed to small jewel absorb.
- Hayate
- Self buffs his attack, he is now much slower though.
- Has very low defense, so if you can get to him first either with Overclock or someone with very high speed, he is easy to defeat.
Edits: This stage no longer requires any fire LS, can clear with Zain leader and four Illusionists. (Use Shining Flare)
- The skill lock arrow rain is now gone
- non-fire magic does damage now.
- All the Robots and archers near front can be inflicted with Stop now then Black Hole to kill. Illusionists required speed lowered, faster is still better.
- Hayate is way slower and less dangerous.
- Still watch out for 5th turn Paralyze though!
Other Notes (old info still works, edited)
- Wiki recommends using Kagura (3rd Job, Job 11, lvl 75) and Illusionists. Kagura can almost solo the stage with some Illusionists help. 4th Job, Job 11 is even stronger. Stay out of Hayate’s range and go down the right side at the beginning. (Thanks, Frendy!)
- Summoner is likely good here too. Kagura has more instant magic skills though.
- The defense buff and the attack down lasts about 4 turns after each is cast. Either survive until then, and stick your tanks in front, or send someone fast to kill either or both plants
- First few turns the enemies in the back don’t seem to attack (except the archers) so Reimei or Melda can kill the plants asap
- Unfortunately the Dark Knight will start to move around the turn after that, so you might lose a unit with this strategy.
- Veteru is very tanky in this stage but does very little damage while the defense and attack down buffs are active.
- Zangetsu can use his attack buff, get overclocked and kill the Dark Knight (and/or Hayate)
- Reimei is probably better here, since his speed as Ninja w/ Monk subskill is a lot higher.
- Vargas seems a bit too fragile for this stage, but he is useable if you can keep him safe until the buffs are gone.
Zangetsu Method (old info still works)
- If your only strong fire unit is Zangetsu (75 Dragon Knight), then try this strategy:
- Start Zangetsu in the center (team member 3). Bring 4 Illusionists. Leader skill is ideally faster charge time, like Rofia’s LS but it’s not needed.
- All Illusionists cast Overclock first turn and don’t move.
- Every turn, send Zangetsu straight down the center, more or less. Have him hit the Dark Knight for jewels, buff and Grand Cross to get the Dark Knight, Hayate and both plants at the same time.
- After that, cast Bind or Black Hole on all the nearby enemies. Ideally have at least one Fire Illusionist to do heavy damage with Black Hole.
Fast casting is needed to avoid getting hit. - Edit: can easily no death clear with Zangetsu now.
Level 32
(note this is the left side)

(this is the right side)
(up) ->
Special Enemies
- 1st Turn Upper Right Corner Plant: Chain Out (Combination Link Range Down)
- Next the Center Plant: Attack Down
- Next enemy Chalice uses Head Snipe on either your 2nd or 4th team member, whoever has lower defense. Dangerous to low defense units, like support units or Snipers
- Left Plant starts charging AoE Snare, next turn
- soon after that it uses Paralyze Spore on whoever is in range
- All the Plants use Paralyzing Spore
- Chalice uses Piercing Shot next.
- Deadly to any low defense units, even Wind ones.
- The lower right corner plant (lower left corner in pic) uses AoE Paralyze around turn 8 or so if left alive. Not sure about the others, but they all seem to use paralyze.
Other Enemies
- The enemies are not that tanky, but are aggressive and have moderately strong attacks. Watch out for the spinning blade move of the spinning robots.
- The Plants are pretty weak but use close range Paralyzing Spore, it’s best if you can attack them first or from a distance.
Suggested Team Composition

- Leader: Cedar (Lvl 60, Job 9 w/ range+1 from 2nd job works) or Tamamo (75)
- 2nd: strong wind fighter, like Yomi, Lucia, Rameses (65), Shita (65)
- Yomi or Lucia (SoF) or Setsuna (1st Job w/ Monk subskill) can cure themselves of the don’t move status. Yomi is the best, fastest.
- 3rd: If using Almira put her here. Only spot she can survive. Can put Melish or Fencer too. First turn attack (ranged only) then head towards Cedar’s corner.
- 4th: Another strong wind fighter ideally, or a tank to draw fire.
- 5th: Illusionist, Professor or another wind unit.
Edit: This stage hasn’t changed too much, with one big difference. 50% Wind LS is no longer required for no death clear.
- Wind units without any LS at all still do fairly good damage. Non-wind units now do some damage, used to be near zero.
- 30% Wind LS is quite good now.
- 50% Wind LS can do quite a bit more damage than it used to, the stage is way easier.
- Previously kinda had to form a wall with wind melee units up front and ranged wind behind them, but now that’s no longer necessary.
- No Illusionist or Professor required anymore. (to beat the all map Paralyze AoE)
- Chalice and AoE Paralyze (if your damage is low) are still just as deadly as ever though Chalice is notably slower than before.
Other Notes
- Cedar (65+) and Tamamo (75+ Ranger) have great 50% LS here, and the starting corner is the safest for them. I think Melish (80+) is not bad, but without 50% LS does much less damage.
- Fencer (85) does good damage, but doesn’t dodge too often. She has a 30% LS. She dies kinda easily, but can be a good assisting fighter to finish off enemies.
- Hatsuki is a bit slow, but useable lvl 70. Unfortunately she doesn’t get to move before the AoE Snare. She dies really easily to Chalice, be careful to keep her out of range.
- Yomi and/or Lucia (SoF) are great here. There aren’t really any Wind tanks so they get to be in front but don’t charge in, deal with the ones closest to the stage in the center first. Stay on the stage and let them come to you, which doesn’t take long.
- Don’t forget they can use Virtue Qigong to cure themselves of some statuses (most things except anything that prevents skill use)
- Whirlwind Kick works great w/ 50% LS
- Flamel (75+) BeastMaster+ can kill one of the AJ3000 near the start w/ Demons Killing. Boar’s Tackle is also good for enemies lined up in a row. He’s best as BM+ since the enemies are fast.
- Almira is somewhat fragile here, but can still do good damage from the corner without getting killed. Not as much as Cedar though. Shoot closest first.
Suggested Strategy
- Stay on the stage at first, pick off as many enemies in range as possible. Keep Rangers/Archers, Snipers and/or Professors in the right corner out of range, until Chalice is dead.
- Kill Chalice as soon as you can, easiest is Cedar’s Venom Rain. Flamel BM+ can also do it since he’s tanky, good range and fast. Yomi Ninja can do it too, but probably will get killed shortly after.
- Almira and Cedar can shoot her,
but would likely need Overclock to avoid getting killed. Chalice is very fast, and so are all the rest of the enemies. - For Cedar I’d suggest using an Illusionist as Team member 5.
- Almira and Cedar can shoot her,
- Armaments w/ status resistance can be used, but when I tried them it didn’t seem to help at all. Mine aren’t 5* though, only 3* and 4*.
Level 33

Enemies
- Archer: 1st turn uses Charm Arrow (Edit: Speed only 110)
- Will hit whoever has lower defense, team member 1 or 2.
- Either put someone slow so Professor can go before them, or use Merchant which is faster.
- There are status resistance armaments you can try, personally I gave Rafu the 3* earring and it never worked (5/5 tries before I figured out how to clear with no deaths)
- He uses Charm arrow every turn until he runs out of jewels, usually on the unit with the lowest defense.
- 2nd turn, Mages in the corner start charging Clock Up, cast on the Lancer Lizardmen
- Lancers inflict Charm. They can sometimes move twice once clocked up, so their attack range is huge.
- Next, Corner Mage uses Poison or a Magic AoE if anyone is in range, he casts decently quickly so watch out. The other Mages will cast small AoEs too if you give them a chance.
- Next, sometimes either Saint Knight will approach. They are both tanky to non-dark elements. If using Kudan or Gormaras you might need to buff before hitting the top one.
- They are tanky and have shadow knight subskill, but can inflict prevent movement or Stop to them (decently high chance)
- Overall, the enemies are fairly easy to kill, but quite fast, and of course they inflict Charm.
Edit: As far as I can tell this level still works pretty much the same as before, with the exception that Arber (Leader) seems to do more damage now and takes much less damage.
- So Overclocking her (Machinery w/ range and speed boost) with 3 Illusionists and a Merchant is a good way to clear the stage now.
- Enemy speed and defense overall are greatly reduced.
Recommended Strategy
Rosa Strategy (old but still works great)

- After some tries, I think Rosa Dragon Knight (75+ w/ Over Limit and Ninja Step) is the best for this stage. Originally I tried Kudan Stein (75) leader and while he is still very good here, he doesn’t have the climbing and movement range like Rosa does, plus the range of Grand Cross
- Used with three Illusionists, Professor
- For this strategy, have Rosa wait till the whole team gets Prophylactic Medicine, then she gets Overclocked three times.
- I sent her to where the mage and saint knight were, hit the mage for jewels, then she did a Grand Cross as shown.
- The other Saint Knight on the other side moved to attack, so my Illusionists hit him with two Black Holes (Rofia and Rafu both have fast casting passives). Stop works on him sometimes, but can fail, so it’s better to cast multiple times.
Zangetsu Method
- Zangetsu (75) can be used instead of Rosa, but it’s pretty tricky and takes some luck. It’s tough because he’s slow and this map is designed with Ninja Step in mind which he doesn’t have.
- Bring three Illusionists and Professor. Professor should be faster than your slowest Illusionist. Put slowest Illusionist as leader, and Zangetsu in slot 2.
- First, have Zangetsu stay still first turn and wait for your charmed illusionist to be cured with Prophylactic Medicine. Once all your Illusionists are free of status have them cast Overclock on Zangetsu and stay put.
- The mage and knight pair will approach. If you are lucky, the knight will use an HP drain attack instead of light AoE. The Mage will approach very close then start casting, right before Zangetsu’s next turn. Zangetsu can then kill him before it casts.
- Hit the Knight once for extra jewels, ideally from higher ground if he can be hit without moving, and then head towards the lined up group in the corner. Buff and then Grand Cross.

- After that, I went for Archer, by jumping up on the raised bit and using Dragon Slayer, but Zangetsu still got charmed by the surviving lancer. That was ok though since he was far away from the rest of the team.
- The Knights will start heading towards the Illusionists. Illusionists can cast black hole (fast casters) or Bind on them. Professor can also use Narcotic to prevent them from getting too close. Anyway have your support units help each other, heal, clock up, overclock etc.
- When Zangetsu gets close enough Overclock Professor and use Prophylactic Medicine on him again. Heal him and Overclock and kill the remaining Knights and/or Lancer.
- Unlike Rosa’s no death run strategy, you might lose a support unit or two, especially if Stop fails. Just try and minimize casualties best you can.
Other Notes
- Kudan Stein, is still very good, but it’s much harder to clear with no deaths. Of course, you can always suicide run this stage and use your 24hr free HP restore later on. Kudan Stein has the better leader skill (50%) but since there’s no defense buff here, not really needed.
Arber (Machinery w/ Sniper Range and Booster+2)Clock Up/Overclock Assistance from Illusionist will help speed up / save arber.Arber can pick off the archer but next turn will be killed by Saint Knight. She can oneshot the Saint Knight if she gets a Combination Link attack though.
- Zain cannot kill the clustered group with Shining Flare, he only does around half damage.
- Veteru is a good, slow choice for this stage, very tanky and takes very little damage, so he can be mobbed. But it would hard to keep him clear of status. On the plus side, getting hit by normal attacks will remove charm.
- Zahar, Anastasia, Reaper (75 all) are all too slow and don’t have good movement/climbing or ranged AoEs to be good here. I think non-dark units might be a better choice.
- Anastasia is best Dark Knight+ (80+). Her speed is much better but her AoEs are kinda limited.
As Ninjas Rosa and Grantz are useable, but die too easily. Their speed doesn’t save them here, since the enemy is fast, and their low defense makes them likely to be targeted by the archer. The lancer lizardman also hits low defense units pretty hard.
Level 34

Enemies
- Plants (Speed: both now 138)
- 1st turn ground level plant uses Chain Out (Combination Range Down)
- Next corner Plant uses Defense and Magic Defense x5 Buff
- after that both Plants move to attack, they inflict Petrify.
- can be inflicted with Stop and Sleep
- Cerberus
- Skips first turn, uses Rage AoE. Note even though it can’t jump, it’s Rage AoE can be used +2 height.
- Attack Dogs
- Move to attack right away, have a ranged gunner-like attack that can hit anyone in the center floor first turn. Fairly fast.
Edit: Plants speed greatly decreased, used to be faster (150-something).
- Setsuna Strategy
- Use Chalice or Lyle (5th spot, 138+ speed) and Setsuna leader (70+). Chalice might need combination link to kill the upper corner plant. Lyle use Hunter Eyes.
- Overclock Setsuna 3x and send her to AoE in the corner (see pic)
- Hit the plant and go back.
- Have Chalice snipe the surviving Dark Knight.
- Wait for the defense buff on the Cerberus to wear off, then kill it.
- Lyle Strategy
- Lyle (5th spot, 138+ speed) and four Illusionists can clear this no deaths. Use Hunter eyes on defense buffing plant.
- Overclock 4x and use Arrow Rain on dogs and plant, then hit the Dark Knight and then use Wide Shooting (may miss).
- Go back and repeatedly Black Hole and shoot at Cerberus and you’re done!
- Lightning Team
- With only 138 speed, you can now shoot the plant (upper corner) before it buffs with Chalice (5th spot) and 50% Lightning LS (Eisan or Monzein, don’t bring Lucretia) (Chalice will get hit with Rage but it should only last one turn)
- Overclock Chalice and have her use her piercing shot on the clustered mobs. Annerose can be inflicted with headshot. Send her back before the Dark Knight can move, finish him off from a distance.
- In the meantime, Overclock Monzein or Eisan and have them take out the Attack Dogs. Leave Cerberus for last, he has some kind of defense buff that wears off.
- Use Black Hole on the Plant before it gets too close.

Recommended Strategy (old but still works)
- Suzuka 75+, Zain 70+ works really well here.
- Bring 4 Illusionists
- Dragoon Chloe (75+) and Spica might be a good option too.

Suzuka Strategy
- Use Suzuka leader (Ninja w/ Overdrive and Ninja Step) w/ Dark Knight subskill.
- 4 Illusionists to cast 4 Overclock. Only important part is to start out with Cerberus from a distance (see pic), so the Attack Dogs can’t reach you, and you’ll still be within range of your Illusionists.
- First Overclock, backstab the Attack Dog, if you’re lucky it’ll be a critical hit.
- 2nd Overclock, kill the Plant and go up on the stage.
- 3rd Overclock use Retribution Blade on Arber and Co in the corner
- 4th Overclock kill the next enemy whose turn is next
- After that it’ll be Suzuka’s turn again and she can clean up.
Zain Strategy (70+, 65 might work too)
- First turn wait next to your illusionists and wait until they can cast Overclock. Don’t bother trying to kill Cerberus while the defense buff is up.
- Second turn move up towards the right and kill both plants with a Shining Flare.
- Head towards the clustered group and hit the closest for jewels. Then another Shining Flare.

- Next turn hit the Dark Knight.
- Start moving your Illusionists away from Cerberus. He mostly uses his rage AoE first turn, but with all the other enemies dead it’s not too bad if they get hit with it.
- Have Zain head slowly towards Cerberus, Overclock him if you can. By the time he gets there the defense buff will have worn off and Cerberus can be killed.
Other Notes
- Light tanks (Chloe, Tyrfing, Victor, Logi, Phrase/Freys) are not good for this stage, the enemy are very fast and deadly, and also very tanky and aggressive.
- Spica would likely do pretty well here too, as Dragon Knight (75+), although her LS is only 20% attack (and 30% HP), which I’m not sure is enough. As Axe Warrior, I think she’d be fairly good, with 50% LS but don’t have her.
- Soleiu (75+) w/ fast casting might be worth trying, but she’s extremely fragile, and the enemy have ranged attacks. It’d probably end up being a suicide run.
Level 35

Enemies
- This stage is kinda difficult to write a guide for, because even if you go in with the same team and same placement every time, the AI of the enemies varies quite a LOT.
- Reimei’s (Samurai w/ Monk subskill)
- possible initial actions:
- self buff attack and then stay put
- move to attack
- possible initial actions:
- Shenmei (Pirate)
- possible initial actions:
- Dropping Anchor (ranged straight line attack)
- Jump up the platform
- Black Hole seems to work on her.
- possible initial actions:
- Melish
- Stays put, starts charging ranged AoE attack
- Immediate AoE attack (less often?) that can hit the starting area
- Single far ranged shot (rare)
- Resius/Lexius
- Whirlwind Cut on anyone in range, which was buffed in a previous patch to be a long ranged attack. Otherwise he’ll stay put for a couple turns.
- Merrick
- Stays still, and will buff Dragoon Chloe’s attack
- Stays still and cast single element resist on Dragoon Chloe
- moves and starts charging (?)
- will just cast element resist on herself if she’s the last one left, pretty safe to kill last
- Dragoon Chloe
- will jump down when it’s her turn and try and shoot her defense piercing shot.
- Tamamo
- first turn will use her Miko buff, 2nd turn will use Ranger AoE
- Soleiu will cast a magic AoE
- Courage
- will shoot anyone in range, piercing shot, leg shot, head shot.
Suggested Strategy (New!)
- After some thought, I think this strategy is much simpler and has a better chance to be a quick no deaths run:
- Team: Leader: Zain (75) w/ Kadanoba free sword
- 2nd: Rofia or any decent Illusionist
- 3rd: Elizabeth or Rafu (Illusionist w/ healing subskill)
- 4th: Veteru Holy Knight (80+) w/ Kadanoba free sword
- 5th: any Illusionist
- Team: Leader: Zain (75) w/ Kadanoba free sword
- Strategy is Veteru steps forward towards clustered enemies and waits. Meanwhile Zain stays put until he gets 3x Overclock.
- Zain gets Overclocked, goes right around the corner, uses Lightning Bolt on Shenmei, heads toward the enemy cluster corner. When gets there kill Tamamo and then go up and get Melish and Dragoon Chloe (one shot her with Holy Jail).
- Veteru can use Ice Sword subskill to one shot Reimei. After Zain gets overclocked, it’s Veteru’s turn. Send him to help Zain.
- If Resius gets into range, Illusionists can use Black Hole on him from behind the hill. (They should stay out of Courage’s attack area.)
- If needed, heal Veteru before ending the stage (optional)
- If you get far enough, this is a good level to sacrifice some of your units and heal them later, this stage is a real pain.
- If you don’t have good units for this stage, I think you’ll just have to repeatedly suicide run and get as far as you can.
Other Notes
- This isn’t a good level for Autima, Ninjas and other low defense units, they can be oneshot by Courage, Dragoon Chloe or Reimei even without being a weak element. Melish has a piercing shot too. Also Dragoon Chloe can kill even Veteru if she gets lucky.
- All Map abilities comments:
- Stat reduction (Chihaya: Dancer+) did not make an notable difference
- Sleep (Porin: Bard+) low chance of success
- Prevent Attack (Rena) very low chance of success
- Charm (Mikoto) untried but might be interesting.
Level 36

Starting Stage

After Charm (I changed my team placement)

Team Order
Enemies
- Plant
- First turn: Chain Out (Cooperation Range down)
- 2nd turn: Blindness
- after that repeatedly uses Fire Spore (weak) or weak normal attacks
- Has high defense
- Thieves
- Charm Dagger, Charm Dagger everywhere
- They are a bit fast so probably will strike before you can have Prophylactic Medicine up.
- On the plus side, if you get attacked with a normal attack it’ll wear off.
- Zangetsu and Melda
- Zangetsu will attack on his turn, not dangerous
to most water units, unless their defense is low. - Melda is not dangerous anymore either.
- Zangetsu will attack on his turn, not dangerous
Strategy
- Team Placement
- Have your characters placed so they can’t kill each other before Charm is cured with Prophylactic Medicine.
- This will take some trial and error
- Charmed units will go for the lowest defense unit in your team.
- There’s Merchant now as alternative, but the range of Poison Pill isn’t quite as convenient here. Thieves will keep charming every time any unit is not protected.
- 1st Leader gets attacked twice (will not be charmed)
- 2nd will be charmed, should be the fastest so 2nd turn will be after Professor’s turn
- 3rd does not get charmed. Professor can go here.
- 4th does not get charmed. I put Lamia here, because she’s faster than Rofia, and can jump down. That being said, as long as they can’t be killed by 5th in one turn, it’s fine.
- 5th will be charmed. I put Rofia (Magic Knight) here because she can’t jump down and kill Elizabeth.
- Have your characters placed so they can’t kill each other before Charm is cured with Prophylactic Medicine.
Edit: This stage wasn’t hard to begin with, now it’s very easy.
- Don’t even need water units now, can clear with any team with melee units that are not wind. Water can autobattle after status protection is up. Autima is great.
- Zangetsu and Melda were severely nerfed, they can’t even kill Elizabeth anymore.
- The speed and defense of all enemies has been greatly reduced.
- I’d still recommend waiting in place until Professor can use Prophylactic Medicine, it’s easier than running after charmed units.
Other Notes
- Other than the Charm, this stage is actually pretty easy. The thieves are very weak, and nothing to worry about once your team is protected.
The rest of the enemies are pretty easy to kill as long as you have good water melee units above 65+ or so, and not very dangerous (except to your Professor, but it’s easy to keep them out of danger).
Level 37

Enemies
- 1st turn, Cerberus uses Provoke AoE (close ranged)
- cannot be inflicted w/ status afaik (tried stop and headsnipe)
- Saint Knights
- use stun attack and Holy Saber, really weak
- can be inflicted with prevent movement, and stone sword, likely other statuses too.
- Shadow Knights
- Hit a bit harder, but also pretty weak
- Can be inflicted with Charm
Edit: Another nerfed stage. It wasn’t that hard to begin with, but the damage from the enemies has been nerfed. They also are much slower.
- Cerberus is much weaker now, fairly easy to kill and not dangerous.
- Lightning units no longer required at all, if you can bring any at all, including tanks, or ranged, it’ll be a breeze. There are story quests harder than this.
- This can be cleared with a Zain led mono light tank team now. Probably don’t need Zain either.
- Note: if bringing low defense units: lightning units will be fine, but other elements will take moderate amount damage. Will be fine if you bring a healer.
Other Notes
If bringing a Professor, I suggest putting them in 4th spot so they don’t get hit with provoke. Don’t really need one though, it looks like Provoke wears off once Cerberus is dead.- (Removed unit recommendations, anyone not Fire is fine)
Level 38

Enemies
- Plants
- Plants use poison and wind spore, normal attacks
- can still be inflicted w/ Headsnipe, Sleep, possibly more
- high defense, usual weaknesses
- Archers
- Use Stone arrow, a lot. (Stone status counts as death when finishing a stage)
- Also use Random Shoot (small AoE)
- Bart
- Dodges a decent amount. Remember combination link attacks are 100% sure hit. Ranger also has sure hit skill.
- Uses hard hitting Whirlwind Cut (ranged attack)
Edit: They actually greatly increased the enemy’s speed here to the point where overclocking Zangetsu is no longer a good strategy, but they’ve also cut the attack power and defense of the enemies by a lot as well. Enemies also no longer skip first turn.
- I do recommend bringing some Fire units, minimum Veteru and/or Courage. Veteru HK should have Magic Knight subskill, he can one shot the plants with his fire sword skill.
- Bring a Professor/Merchant, to protect against stone arrow, they can hang out safely in the starting corner.
- I’d bring at least one sniper, Courage or Almira, mostly to get Balt from a distance, he still hits kinda hard and dodges (70% ish chance to hit him).
- Can be inflicted with Head Shot.
- Shekinah can also one shot Balt (as leader) with Hunter Eyes. (guaranteed hit)
- Kadanoba (75) can provoke the enemies.
- All in all, bring a few Fire units if you can, but this stage isn’t bad at all.
Level 39

Notable Enemies
- Magnus (Machinery)
- Edit: Nerfed, not dangerous
- Easily gotten with Cedar, Melish or Tamamo (Rangers), Shekinah
- Plant uses:
- Turn 1: Chain Out
- Turn 2: Attack Down (small)
- Turn 3: Magic Attack Down (small)
- Turn 4: Regen on enemies
- Turn 5: Inflicts Blindness
- Turn 6: moves to attack
- Dark Knight
- Ranged Skill: Edit: now Jewel Drain+ almost always instead of HP Drain. Still uses HP Drain occasionally but very weak.
- Rarely uses other skills, nerfed so very slow now. Still very high HP and moderate defense.
Other Enemies
- Attack Dogs (x2): slightly tanky, slow, not much threat.
- Archer (nothing special)
- Wolves (4x)
- One shot-able by any wind units no LS required
- inflict Clock Down (close range) or Defense Down
- Edit: changed so they now have huge movement and can jump on the starting hill. Fast but extremely weak.
Edit: This stage has been seriously nerfed, it used to be one of the more challenging ones mid-tower, but now it’s incredibly easy. Edited strategy and etc.
Strategy:
- Kill Magnus and the Archer first, then the Dark Knight. Magnus can now easily be killed by literally any Ranger (including Shekinah and Lyle), except Fate Archer who still does ¾ damage. Can also use Almira to snipe him now too, since he’s much slower and less dangerous.
- Ranger skill: Arrow Rain (sure hit) recommended, it’s fast and easy. Hit a wolf to charge jewels.
- Cedar, Melish and Tamamo (Ranger) are great of course.
- For the Dark Knight, I would still recommend bringing at least one Wind unit to deal with him. Yomi works very well, she doesn’t even need any LS to buff and use her ninja step to move in and one shot kill him.
- Of course Setsuna is overkill, bring her for a super easy clear (65+ ish) w/ Illusionist, Setsuna (75) doesn’t need any support.
- Flamel BM+ can likely solo this too.
- Plant still has high defense, and can be killed by:
- Magic attacks, including Illusionist, Wind Sword (Magic Knight)
- Saint of Fist (self buff attack first)
- Fencer (self buff attack)
- Or if you get lucky w/ Combination Link attack w/ your ranged unit.
Recommended Units
- Any Ranger to quickly clean out Magnus and the archer. If bringing Fate Archer (free unit), give him backup Sniper to finish off Magnus. Or give him a dark boosting LS. Ranger not required either, it’s just faster and easier that way.
- At least one Wind unit to kill the Dark Knight and the Plant. The other enemies can be killed by any non-water element.
- Don’t bring water melee units and ninjas and other low defense units (low defense wind is fine, Fencer, Almira etc. Bring healer though).
Level 40

Top half

Bottom half
Enemies:
- First turn Plant uses Chain Out
- 2nd turn: Blindness
- Will attack close range, otherwise stays put
- Monk
- Will use an attack on team members 2 and 3 that prevents movement, if you don’t kill them first. Not too dangerous anymore.
- Mages
- Are the most dangerous, still have fast casting and hit decently hard. Use small AoEs and Shining.
- Highly resistant to non-dark damage, including non-dark magic.
- Archer will shoot Paralysis or Poison arrow on anyone in range.
- All enemies have been changed so they can now be inflicted with Stop (100% afaik).
- Sleep works often too. (high chance)
- Charm works too.
- Prevent movement (Head Shot)
Edit: Wow, this stage has been nerfed hard. Enemy speed used to be above 130-ish so only Ninja was faster back then, and Stop previously didn’t work.
- All enemy speed has been severely nerfed, so even enemies Chloe and Suzuka now kinda snail’s pace now.
- The only thing unchanged is the mages, who are still pretty dangerous.
- Also whoever kills the monk near the archer will still likely get paralyzed.
Recommended Units:
- Since this level has been nerfed so much, the team composition is pretty flexible. Since the mages are still very resistant to non-dark damage, I would still bring a 50% Dark LS leader however.
- Arber (75) preferred but even (65) will work with some Ninja Stop or other status infliction support. Can bring an Illusionist too.
- Gormaras and Kudan will do great. Kudan, it’s safest to give them at least 1 Illusionist support so they can avoid getting hit.
- Can also bring Anastasia (optional) and other Dark Knights like Zahar.
- As mentioned earlier, bringing Ninjas and inflicting Stop, then cleaning up with your Dark leader is a good quick and easy strategy. Or bring other status infliction, like:
- Asward: Charm and Sleep
- Autima: Sleep
Level 41

Enemies:
- Plant
- 1st turn: Chain Out (repeats sometimes)
- 2nd turn: Regen AoE on enemies (repeat sometimes)
- 3rd turn: Dark Spore on any in close range (weak magic attack)
- high defense, weak to magic, high attack etc.
- AJ2000 (x2)
- Next to starting area. Tanky with defense penetrating skills
- Edit: now they can be inflicted with Stop, Prevent Movement, Prevent Attack and Charm! (high chance, but can fail)
- AJ4000 (x3)
- Have gunner-ranged attacks, can shoot anyone who goes up the steps
- Very dangerous combination link attacks that can deal high damage, even to tanks.
- Immune to status, as far as I can tell.
- AJ3500 (x2)
- Spinning blade attacks
- Anastasia
- Inflicts Death Sentence. Much slower and weaker now, but still don’t let her hit you.
- Mare
- Cures allies. Easily sniped or shot from a distance
Edit: This stage has been nerfed somewhat, but overall, even though the enemies are much slower and weaker, they still can hit very hard with combination link attacks or piercing skills. So it’s still best to use tanks, particularly Holy Knights or tanks like Zain.
- They are also still quite resistant to non-light damage, so bring light units and/or light skills.
- Enemies are a lot weaker now, Zain (as leader) can wipe out a bunch of enemies with a single Shining Flare. Dirga doesn’t even need to buff anymore.
- Other Light units like Kanon do great damage now, but still gotta be careful to keep them from getting hit from combination link/defense piercing skills.
- Misc changes: AJ2000s no longer inflict skill lock. Professor no longer needed.
Recommended Units
- Best Leaders:
- Zain (75) (for a mono light or mostly light team) or (65) with two Illusionists. Can also use Suzuka for LS but she’ll probably get killed.
- If using Zain (65) with Illusionists, then you’ll need a couple tanks up front to guard while waiting for Overclock.
- Veteru (80+) for mixed element tank team
- Monzein (75) good leader if using Dirga and/or Theona only. Monzein himself does little damage because his skills are lightning and not light.
- Zain (75) (for a mono light or mostly light team) or (65) with two Illusionists. Can also use Suzuka for LS but she’ll probably get killed.
- Good team members for any leader: Theona (75), Logi (Holy Knight+), Chloe (75+), Zeke (85), Kanon (75, 3rd Job), Dirga HK+ (75+), Vincent (75+), Tyrfing (85), and/or Logi (2nd) (80+) and keep on healing them. Fate Zahar (75) is also a great tank but doesn’t deal light damage.
- Ranged team members (optional): Lyle, Carol, Chalice (for Headshot)
- Support: 1-2 Illusionists, Autima (healing)
Strategy
- Basically, put your best tanks up front to block in the AJ2000s, or inflict them with status (preferably from a safe distance). This is to keep them from heading down where your support or ranged units are waiting.
- Behind the tanks, your support units can Overclock or Heal as needed. The best to Overclock is naturally Zain since he has the biggest light AoE.
- As a tank, Theona particularly stands out, since she can tank quite a bit of dark damage here after using her skills with elemental resist. Her damage isn’t great unless Monzein is leader, but to draw fire she’s perfect.
- If using Kanon, keep her from getting hit. She can do great damage w/ 50% LS but she should be away from the clustered enemies. And bring both dark passive skills.
Level 42

(forgot to take screenshot of the team I ended up using, but here’s the enemies)
Enemies
- Magnus
- Will attack first, can be deadly (especially if he gets a Combination Link on any low defense units)
- Can be killed by Ranger shot (from 1st spot, Hunter Eyes)
- then your ranger will be attacked by Sheena next two turns
- Can be killed by Flamel (BM+) (from 1st spot) w/ Demons Killing
- Can be sniped by some snipers, but open to attack next from Arber
- Arber
- Pretty tanky to non-light element, gets a lot of Combination Links.
- Can be killed 1st turn by Lyle, possible Carol too. (don’t have her)
- If you don’t trigger her range she’ll just stand in the corner for a long time.
- Holy Knights: Dirga, Veteru and Chloe
- Dirga:
- Next to start but very slow, will attack on his turn
- Can be inflicted with prohibit attack/movement (sometimes only one part will proc)
- Can be inflicted with Stop
- Veteru
- Can be inflicted with Stop
- Can be inflicted with Snare (Reduce Movement to 1)
- Chloe
- Can be inflicted with Stop
- All three can be inflicted with Death Sentence as well, although it’s less useful.
- Dirga:
- Sheena
- Starts moving to attack immediately.
- Can be inflicted with Slow (Reduce Movement to 1)
- Can be inflicted with Stop.
- Easily killed w/ lightning units, but can be dangerous.
- Illusionists:
- Reagen will Overclock Sheena repeatedly. If Sheena is dead he’ll start using Bind/BlackHole
- Elizabeth will Overclock Magnus or Chloe, but will switch to attacking if they’re dead.
- Rafu and Rofia will repeatedly Overclock each other, sometimes Elizabeth unless you get in their attack range
- Changes to attacking with Bind / Blackhole / Gravity Jam Hole when in range (6 squares)
Edit: So this stage is basically the same as before. Taking out Arber and Magnus before their turns really does make it a lot easier.
Strategy
- This is basically a free for all, so bring a mixed team.
- Anyway, there’s quite the mix of enemies here, different elements, high speed enemies plus overclocking, ranged enemies, tanks, physical and magical attacks… quite the mix. Since all units have their strengths and weaknesses, this level clearing with no deaths is quite tough.
- It is not too difficult to clear with a few deaths though, if you want to charge onwards. I recommend it, it’s not worth redoing this stage more than a few times.
Arber Note (old but unchanged)
- Since I lacked a strong light unit to kill Arber asap (Zain, Lyle, Carol and possibly Dragoon Chloe) Arber was the main cause of deaths in this stage for me. If you have them, it really opens your team up to a very different strategy. Suzuka is just too fragile for this stage, unfortunately.
Left Side First (saving Arber for last method)
- Since Arber, Rafu and Rofia don’t attack immediately as long as you don’t trigger their range, I think it is a good idea to start on the left side, with Magnus, Dirga and Sheena, then wipe out Chloe and Veteru. Then mop up the Illusionists and Arber last.
- Magnus
- can be killed by a Wind Ranger from leader spot (Cedar, Tamamo 75+ best) Use Hunter Eyes (sure hit) or an AoE.
- can be killed by Flamel BM+ (Demons Killing, only 30% LS though)
- can be killed by Chalice w/ both range passives, from right side, but this will trigger Arber’s range, which can kill Chalice
- can also lure him out with someone tanky
- Sheena will attack next
- can be killed by Monzain’s Shoots-the-Axe w/o LS
- can be killed by Chalice w/ combination link attack
- can be inflicted with status
- Dirga
- Very slow, can be chipped away at by any earth unit. Note the spot directly in front of him will trigger Arber’s range
- Chloe and Veteru
- Plenty of choices to disable them, inflict status, use someone with moderately high attack, cast magic or Bind/BlackHole at them.
- Snipers can also take them out w/ lucky combination link attack w/o LS.
- Illusionists
- Rofia (Illusionist+ w/ Clock Resist and Elemental Resist) is very good for getting rid of the enemy Illusionists. With Clock Resist she can’t be stopped, literally. As long as Dirga and Magnus are stopped from attacking her, she’s fine.
- Alternatively give her fast casting instead of Clock Resist and try and take Illusionists out from a distance.
- Arber
- Since Rofia can tank a hit or two, I had her cast BlackHole on her. Lots of choices here.
Right Side First/Simultaneous attack
- Lyle w/ 50% LS can wipe out Arber before she attacks.
- Edit: she’s slower now, so Lyle can reach her 1st turn, no Overclock needed.
Ranged Party (Thanks Frendy!)
- Use Lyle with Chalice LS can use AoE to get Arber, and do moderate damage to Rofia and Rafu. Melish can AoE to finish them off.
- Magnus (Machinery) can be used to easily kill Regen and Elizabeth. Cedar (60+) Venom Rain can kill Magnus easily.
Other Notes
- I would try and bring a 50% LS if possible, Wind, Light, Dark are good choices. Water and Fire are kinda meh. Lightning is OK.
- There’s really a lot of flexibility in team composition possible in this stage.
- Trying to overclock anyone, like Zangetsu, or Suzuka won’t work, the enemy are too fast and will kill most Illusionists other than Rofia.
- Ninjas can be used in a suicide run. They can run around inflicting Stop, but will die.
Level 43

(forgot to screenshot my final team, was Fon Riu, Elizabeth, Gein, Rofia and Sheena)
Enemies
- Chihaya (Dancer)
- 1st turn “Attack becomes Zero” large debuff
- 2nd turn “Dance of Shield Shattering” next turn (defense down, small debuff)
- 3rd turn “Dance of Bone Extraction” attack down (small)
- repeats and repeats
- Fire Rats
- Don’t move first couple turns
- Use Chains preventing movement attack (close range)
- Can kill low defense units with this
- Vulnerable to magic
- Fire Plants
- Sleep Spore
- Can be inflicted with Stop (use Bind/BlackHole)
- Melda (Beastmaster)
- Attacks 3rd turn
- Fairly quick, immune to stop
- Veteru
- Moves to attack 4th turn
- Uses his usual light sword AoEs
- Immune to stop
- Easily killed with Black Hole (water illusionist)
- Mianne
- Stays put until you get close
- only uses normal attacks
- Can be killed by Sheena (buffed) or with magic
Edit: This level is exactly the same as before, bring Water Magic or kill Chihaya asap.
Strategy
This stage is very straight forward, either bring Water Magic users, or kill the Dancer asap with Lamia (Dragon Knight)
- Magic Method: If bringing Autima he does more damage here as Wiseman. Don’t forget to re-equip his staff, and he should have fast casting.
- For maximum effect, he should be leader and pair him with Astrologer. If he can get Quincunx and Clock Up then he can cast extremely quickly.
- It still is fairly fast to have another Wiseman casting on the right side, but if you keep Quincunx, Clock Up and etc on Autima can probably solo the stage.
- Also Astrologer can cast Quincunx on themselves then Gravitation on enemies if you want to delay any enemies from attacking. Water Astrologer preferred so they benefit from Autima LS.
Kill Dancer method (thanks, Frendy!)
- Lamia (Dragon Knight) can kill the dancer and the plant on the left side using Grand Cross, with the help of two Illusionists. (Might work with Folcas 75 too)
- Have her (or move her) in front of the left pillar to get overclocked. Hit the Plant for jewels.
- Grand Cross (hers is called Night of 1000 Days) through the wall and kill both the dancer and the plant.
- After the dancer is dead, the debuffs will wear off in a turn or two. Then the remaining enemies can be killed normally.
- Definitely bring Professor.
Magic Method:
- Autima (75) Wiseman w/ 1st job passives
- Illyasviel (unsure of required level)
- Fon Riu 70+ (20% water magic LS)
- Rofia 70+ (Illusionist+, or at least Magic Knight)
- Sheena (Illusionist)
- Elizabeth (Illusionist)
- Regen (Illusionist)
- Rin (Illusionist)
- Other magic users (useable, will take more AoEs)
- non-water wiseman (Soleiu, Peridot, Vincent)
- non-water Illusionists (but not wind of course)
- since they will do less damage, might need to cast, move away, cast, move etc.
- If your mages don’t have fast casting then bring an extra Illusionist to Clock Up, this stage does need a decent casting time.
- Professor (not required, but very useful)
Magic Strategy (Old strategy, same stage still works)
- Start by casting Water AoEs on the sides of the stage, get the center rat w/ Black Hole.
- Soon Melda and some of the fire creatures will start heading your way on the right side. Melda can kill mages, and will take a couple hits to get her.
- If you brought Rofia, Ice Sword from Magic Knight subskill, is a good way to finish her off.
- Plant uses sleep spore, Rat uses chain attack, both are short range attacks, bringing a Professor is a good idea
- After that Veteru will start moving your way. He’s slow and there’s easily time to cast Black Hole on him twice, but stay out of range of his sword AoE.
- After that, Mianne and Chihaya are not any threat.
Level 44

(note: team I ended up using was Monzein, Gein, Rofia, Chalice and Resius)
Enemies
- Shenmei
- Edit: changed to random AI. Will use Dropping Anchor, Maelstrom, etc.
- Rofia
- Uses Clock Up on Lamia
- Uses Clock Stop, Black Hole (fast casting)
- Has regen (10% per turn)
- Lamia
- Jump attacks
- HP+2 absorb reaction ability (don’t hit with normal attacks)
- Fon Riu
- Casts Large Magic AoEs, sometimes Poison
- Edit: now casts only water magic AoEs
- Has Magic Counter+2
- Golem
- Laser (ranged attack)
- ground spike ice attack
- Has very high HP (4690) and regen (10% per turn)
Other Enemies
- Mages (x4)
- cast small AoEs, moderately fast speed can get out of the way
- Edit: now casts only water magic AoEs
- no counter ability (safe to hit)
Edit: This stage is basically unchanged, with one major difference: the mages in the stage now only cast water AoEs instead of wind AoEs.
- This helps a lot, plus there a lot more lightning melee units out now. When this stage was released it was just Monzein and Laevateinn.
Strategy
- This stage requires a mono lightning team, preferably with 50% LS: Monzein or Eisen.
- Between the two Eisen is faster and has higher attack. They both need to be 75 to be good but still worth bringing as lower levels for their LS.
- Gilgamesh (75) with either 50% LS can steamroll the stage, one shot nearly everything with his skills, except the Golem (Thanks, Desmond Pang!) Probably safe to give Gil an Illusionist assist, I think.
- Other excellent lightning units: Alba (Dragon Knight), Theona (75), Meifan (75)
- Monzein’s usefulness:
- Monzein’s useful skills: he can use Provoke AoE on Rofia and Fon Riu to get them to stop casting. The regular mages are not much to worry about.
- Or use Shoots-the-Axe to get them from a distance
- can buff defense, physical and magical
- can kill the Golem in 2-3 hits
- I recommend bring Rofia (Illusionist+) to Overclock him, since he’s still a bit slow. Rofia is the most tanky Illusionist.
- Monzein’s useful skills: he can use Provoke AoE on Rofia and Fon Riu to get them to stop casting. The regular mages are not much to worry about.
- Laevateinn (75+) is almost certainly really good here, (Ninja w/ Overdrive and Ninja Step) since she can do a lot of damage.
- Her LS is only 30% but her attack and speed are high.
- Lucretia might be useful here to kill the mages (please comment?) as Bride, and would be a good healer and excellent status prevention for as Professor. Vincent (Professor) is a good substitute.
- Dirga dies pretty easily here (he’s slow, and is weak to magic) but is still pretty useable if you are going the suicide route.
- Resius can survive decently if he dodges enough, but does very little damage, even with 50% LS. He’s not bad for finishing blows though.
- None of the enemies can be inflicted with status, as far as I can tell (tried Stop and Head Snipe) (Checked again, nope)
- Magnus and Chalice are both kinda so-so in this stage. If they get lucky combination link attacks, they can do good damage (w/ 50% LS) otherwise their attacks aren’t strong enough without someone stronger to do the heavy lifting.
- Deneb’s defense and magic defense buffs are very useful here. She can also cure one unit’s status and inflict magic damage. (Thanks, Alurette Valentino!)
- She can also cast Gravitation on the Golem. The Golem isn’t that dangerous to lightning melee units but it delays the regen.
Without lightning melee units, the only way to clear this stage is likely to whittle down the enemy HP with by sending a bunch of your units on a suicide mission and use the free 24hr heal later when needed.
Level 45

Enemies
- Balt: (Boss) This guy is fast, hits like a truck, and dodges at a very high rate, about 44% to hit him, and if you don’t miss, it might still trigger his Avoid dodge skill.
- This includes sure-hit ranger skills (seriously, how can they be sure hit if they can miss?), and according to the wiki comments he even has a small chance to dodge Combination Link attacks, which is crazy (If only Fencer and Yaurus could dodge this much!)
- However there are tricks to hitting him.
- I used Vargas’ Flare Burst at first, which said 100% chance. Alternatively Vargas (fully limit broken to 85) gets a lot of Combination Link attacks.
- Any unit fully limit broken to 85 has an greatly increased rate of Chain Combination Link Attacks.
- Used four Overclocks to kill him on turn two
- Magic works, but it’s tricky to use.
- Lupine and/or Kagura works, but both are kinda fragile and needs to be protected (preferably with a fire tank in front).
- I used Vargas’ Flare Burst at first, which said 100% chance. Alternatively Vargas (fully limit broken to 85) gets a lot of Combination Link attacks.
- Tamamo (Ranger)
- Inflicts Red Chains (preventing attack)
- Uses Arrow Rain (AoE), can kill low defense fire units
- Rafu
- Uses Clock Up on Tamamo, then herself. Then Overclock on Tamamo.
- Hayate
- Mostly uses One Arrow a lot. Preference for lowest defense in range.
- Cerberus
- Not sure how dangerous he is, he’s slow and killed him asap. Probably pretty dangerous.
- AJ series Robot
- Very tanky. Somewhat weak to magic.
Other enemies
- Gunners use Leg Shot (slow)
- They have a slight preference to attack Tanks but it’s not 100%
- Gunner robot
- nothing special
Vargas Overclocking Strategy
- Bring Vargas (mine was 84, 80+ probably fine) leader, and four Illusionists. They should be a fairly high level for speed. (75+ gacha, Rin 85)
- Vargas should stay still for his first turn.
- Cast Overclock and move Illusionists in the corner (see pic) so Bart has no one to attack first turn.
- Hope for a Combination Link attack (in my experience, very high chance) to hit Bart first thing for jewels. And then the second hit should kill him. If it doesn’t I’d restart the stage and try again.
- Make your way to Cerberus and attack. Brave Flame can kill it in one hit but inflicts madness on Vargas (will lose control of him). I think Shining Flame of Tenacity is better, even though it will leave some HP left.
- Move to the right side of Cerberus and use Flare Burst to wipe out Tamamo and Rafu. This will keep Tamamo from inflicting status. Then kill Cerberus.
- After that head back and kill Hayate and the Gunner Robot.
- Start moving your Illusionists to your new safe zone, since they will get attacked very soon. They can cast Overclock on each other to speed things up.
- Once reunited w/ Vargas, they can Overclock him again to finish off the remaining enemies.
Other Notes
- Zangetsu is way too slow for this stage. Vargas is actually better for once.
- I think Shekina and Eve (SoF) would likely be very good here, but I don’t have them.
- Veteru is a great tank, but doesn’t do a lot of damage. He does ok damage w/ Fire sword (Magic Knight)
- Kadanoba (3rd job) is very tanky, extremely recommendedhere, great as leader (50% LS).
- Kadanoba (1st job) is insufficient and can only take 2-3 hits before dying.
- Reimei (50% LS) is recommended here, since he can buff his attack and has good movement and speed, but he can’t take many hits.
- Courage, I don’t think she’s useable here, since the enemy has so much HP, and without 50% LS I wouldn’t bring her at all.
- Weak as sniper, dies in two hits. However, can still do at least some damage and kill one unit. (Needs at least Over Limit)
- Shadow Knight subskill or as main job is useable. (Thanks, wytesong!)
- Kagura (recommended Leader: Mare for Magic 20% LS, or Lupine for 20% Fire magic LS) (Thanks Wytesong and Frendy!)
- Can kill Bart w/ 3rd Job and some lucky attacks
- Master Ability can do about 2500 damage if it hits (39%)
- Then can get him with one more spell.
- For first turn, need to use Scarlet-threaded Armor of Scorching Heat that raises wind resistance so she isn’t targeted by Balt.
- Edit: This is Kagura’s 3rd job Wind resistance skill (3 turns) (-Frendy)
- Tank should move one square in front of leader, to protect mages from Balt.
- Lupine: (LS Fire units 20% Fire magic and 30% HP) Good leader for more HP and increased magic attack, but somewhat squishy.
- Good combination with Kagura in party.
- Strong AOE, Recommend using illusionist OverClock as soon as possible if Balt is still alive. Does around 1600 damage AOE to him, but only 39% chance to hit.
- Summoner’s Ratton Falls can be cast quickly, but hit chance is around 38%. (Thanks Wytesong!)
Level 46

Enemies:
- Magnus (Machinery)
- Can be inflicted with Sleep
- Priority attacks units w/ lowest defense in range
- Uses his strongest AoEs, Dynamic Buster Bomb, etc.
- Brad (middle center Dark Knight)
- weakest of all the Dark Knights, will attack first.
- Megisutosu (Crafter)
- uses Blindness or Stun inflicting move sometimes
- Can use AoE to kill low support units at the start, on the right side
- 2x Knights
- no reaction ability, no AoEs, safe to hit, easy to kill
- Dirga
- Very tanky, but not particularly dangerous
- 3x Dark Knights
- These are the same guys from the Melish Extra Stage, (except lightning element) including their signature move, that deals damage based on number of enemies you’ve killed.
- Extremely deadly, even to very tanky wind units
- Priest (on stage)
- Uses Clock Up and Overclock on Dark Knights
- After that stays on stage. Will cast Clock Stop.
Recommended Units (team placement)
- Leader: Cedar (1st Job) or Tamamo (Required) Ranger 75+
- Lucia (SoF) 75+
- Rafu (Illusionist) or Hazuki (Professor): highly recommended
- Yomi (SoF) 80+ (for HP)
- Flamel (BM+) 75+
- Shita is likely good here too (65+), and Rameses (unsure of lvl)
- Subs or alternatives: Fencer (85) (best), Melish, Almira
Notes
- This stage is brutal, even if you have the strongest wind units currently available. Best I could manage was two deaths, this stage takes so long. I thought about redoing it to get one death but it’s honestly not worth the hassle. Definitely a good stage to rely on your free 24hrs heal.
- Right away there’s some issues. At most you can only bring one support unit (Rafu or Hazuki) or low defense (Almira) because of how difficult it is to keep them alive with Magnus and Megisutosu targeting low defense units from up on the walls.
- There’s no way to kill Magnus and Megisutosu first turn in one hit, they are too tanky.
- Give Rafu or Hazuki the speed scarf (mine is 3*) and move them carefully out of range on their turn. (starting row, move left or right) (Professor is for healing, not required)
- The enemies are very fast and aggressive. The three Dark Knights were basically designed to be impossible to kill without getting attacked next turn.
- Even with 50% LS, Yomi (85 w/ SoF 4* Armament) cannot kill a Dark Knight after buffing, only about ⅘ HP.
- The Dark Knights start clustered together and will move to attack around the same time. Once you’ve killed one, their signature move (deals damage based on number of fallen allies) becomes lethal to everybody.
- And then, since that’s not enough, the two Dark Knights starting on stage receive Clock Up and Overclock
- Since they will start moving to attack you on turn 2 or 3, there’s very little time for the Saint of Fists to fill up on jewels and self buff.
Strategy
- First, kill Magnus and Megisutosu.
- Since 50% LS is pretty much required for this, Cedar or Tamomo can start by going up the left wall and attack Magnus. He takes 2-3 hits to kill.
- I sent Flamel up to help.
- Right side, I recommend sending Yomi. If she is in the 4th position she can go up the right wall, first turn, and self buff to kill Megisutosu in one critical hit, or two without crit. Otherwise he will continue shooting down a lot of steady damage.
- Don’t move opposite the center platform edge, or she’ll get hit by Brad’s Retribution Sword next turn. It doesn’t do much damage but she needs all her HP. She’ll still get hit by Dark Bringer but it’s a weaker attack.
- After Megisutosu is dead, time to buff and attack one of the Dark Knights. Stay out of range on the wall until ready.
- Lucia, I had him wait until Brad jumped on the center platform, then went to hit him for jewels from the middle spot. It’s important to keep him or Yomi away from the main three Dark Knights as much as possible (Brad is kinda unavoidable)
- After that, sent him back to wait and buff, and receive Overclock from Rafu.
- For choice of support unit here, I think Rafu (75+ w/ fast casting) is best because without Overclock, it’s guaranteed to be attacked by one or two Dark Knights (not including Brad) before you can kill even just one of them.
- Hazuki (for healing) is not a bad choice, but will only buy your SoF another turn or so, since after the first Dark Knight is dead, the rest will have a lethal one hit move.
- Don’t kill Brad first or the other Dark Knight’s first attack will be lethal from the start.
- Since 50% LS is pretty much required for this, Cedar or Tamomo can start by going up the left wall and attack Magnus. He takes 2-3 hits to kill.
Unit Notes
- Cedar: I’m not sure if her status infliction is any good here. She’s still great for raining down support fire from the left wall, which is pretty safe after Magnus is dead.
- Fencer: surprisingly good for this stage, but she needs to get lucky with her dodge move, or she’s toast. When it does activate, she can dodge the Dark Knight’s deadly move. She does very good damage w/ 50% LS, and can self buff for even more damage.
- Almira: Headsnipe doesn’t seem to work on anyone, and her damage is kinda low (w/ 50% LS)
- Melish: not as good as Cedar or Tamamo, but still pretty decent here. Has low damage, but makes up for it somewhat with Ranger AoE skills.
- Flamel (BM+): very tanky, but sadly won’t save him from the Dark Knight’s special move once it’s turned lethal. Damage is kinda decent, he’s a good assist to the Saint of Fists, and good for drawing fire away from them.
Armament Notes
- For the most part Armaments are usually pretty optional, but this stage, they make a noticeable difference. Give your team as much physical defense boosting armaments as you can. (Except Cedar and Tamamo, give them attack boosting)
Other Notes
- If you don’t have the required two Saint of Fists and 50% LS for this stage, then unfortunately you’ll probably lose most or all of your team.
- Just try a few times until you can find out how to do as much damage as possible, wait for the free 24hr heal if needed, and whittle down the enemy HP as you can.
Level 47

Enemies:
- Lyle (Boss)
- Uses very deadly AoEs if you step even one square forward
- Will not attack if you stay in the starting area, until around turn 8 or so, then he’ll attack regardless.
Other enemies
- Other than their very high HP and speed, nothing special.
- They stay put as long as you stay out of their range, at least for a long time (9+ turns)
- For the first 4 turns or so, they’ll stay put even if you are decently close, except Chloe and Logi who will attack.
- Mages will heal.
Strategy
- This stage is actually really easy as long as you have Kudan Stein (75+).
- Arber Sniper (75+) is also pretty good. Gormaras (75+) should be good as well. Both Arber and/or Gormaras will need more time to clean up the mobs since they lack large AoE type attacks.
- Kudan Stein can clear out the whole map in two minutes with the help of four Illusionists.
- Illusionists need to have good speed, so as before 75+ (gacha) or 85 Rin. If your Illusionists aren’t fast enough try using the speed scarf.

Kudan Stein Overclocking Method
- Start by having him stay put, and wait for Overclock
- Then go down the center and next turn hit Chloe for jewels. Then use Blood Strike as shown. (Chloe’s turn comes before Logi’s so it’s safer to kill her first)
- Next turn, backstab Logi.
- Next, kill Lyle.
- After that, you’ll be out of Overclocks, but it’s ok, the remaining enemies won’t attack until the next turn. Self Buff your attack and wait.
- Next turn, use Blood Strike again on the remaining group of three enemies. Kudan will get hit by the archer soon, but it’s no problem.
- Last, kill the archer. He’s not a threat, if you want you can have one of your Illusionists bring healing subskill (Elizabeth or Rafu) to heal him before the stage ends. (Optional)
Arber Method
- Arber Sniper 75+ Leader (w/ Sniper Range passive and Shooting Mastery+2)
- Bring Illusionists and one Enhancer (for attack buff) to increase damage per turn. (Or better yet, either Rofia and Rafu Illusionists can bring Enhancer subskill). This is important because mages will heal every turn. This method will take a while, but it works.
Gormaras Overclocking Method
- Gormaras 75+ (SoF) Leader
- A lot like Overclocking Kudan Stein. Use four Illusionists and go down the center, and hit Lyle before his turn arrives. Gormaras will leave more of the mobs alive, since his only AoE as SoF is his Whirlwind Kick, and he’ll need more turns to self buff to kill the tankier enemies.
- On the plus side, he’s not fragile like Kudan Stein and can survive a few hits.
Other Units:
- I don’t think Rosa has high enough attack, or good enough LS to clear this stage with no deaths. But if she’s the best you’ve got she can still do a lot of damage with her Dragon Slayer. It also might be worth trying to buff her attack w/ enhancer subskills.
- Lupine can assist w/ dark damage, since she has a dark element AoE, but honestly the enemies here are pretty tanky against both physical and magic damage, it’s easier to kill them without magic.
Level 48

Enemies:
- Sabareta and Thieves
- Starts w/ avoidance up
- Inflict Charm Dagger if not protected, otherwise will use normal attacks. Note they will switch back to Charm Dagger the second Prophylactic medicine wears off.
- Extremely fast (Speed 190+) and very high HP
- Preference to attack tanks
- Rosa (Ninja)
- moves to attack after her avoidance up.
- very fast but usually only dangerous to low defense units
- preference to attack tanks, but will attack low defense units if that’s the only option available
- Arber (Thief)
- initially will stay put
- will attack turn 4 or so
- preference to attack tanks, hits moderately harder than Rosa
- Dios
- Very deadly to light units
- Extremely high HP, but will use an attack that uses up half his HP.
- Will attack turn 5 or so, can sacrifice someone so he is much easier to kill.
Strategy
- Team members 1, 4 and 5 will not be charmed first turn. Leader should be 50% light LS, so put any Professor in spot 4 or 5. (if using Veteru 80+ put him in 4 or 5 too, because he’ll likely be faster.)
- Team members 2 and 3 will be charmed right away, so put slow tanks in those spots. These two tanks should be slower than your Professor.
- Cluster your team together, for a higher chance of combination link attacks which will guarantee a hit against these slippery thieves, and the ninja. Keep Professor in the back.
- It’s best to not let anyone die, at least while there are still a lot of thieves alive, because any subs will probably get charmed before the professor’s next turn.
Recommended Units
- Leader: Zain (65+ for LS, best 75+) or Suzuka (75+)
- Zain (75) is way easier to use, plus he can heal himself and close allies. Keeping Suzuka alive is tricky. (Zain should have elemental resist and guardian.)
- Strongly recommend Veteru to draw away fire. He takes a lot less damage than light units. Ideally level 80+ for the stats and speed boost from his character story quest.
- Alternatively, use Kadanoba (75+)
- Other tanks: Chloe (75+), Zeke (75+), Phrase (75+), Victor (70+) Tyrfing (85), Logi (80+). Note Zeke and Tyrfing should have Guardian and Guard Up passives. (If Zeke is 85 he might be able to take Overdrive instead.)
- Professors: Lucretia (75+), Gein (75+), Regen as Pharmacist also has pretty good speed
- or anyone faster than your 2 and 3 units really
Veteru Strategy

- Veteru is great, because he’ll take very little damage, unless you get really unlucky with a lot of successive enemy combination link attacks.
- Keep your team together close enough that Professor can use Prophylactic Medicine on his turn.
- Gein is pretty slow, so fast units like Suzuka or Zain will have 2-3 turns during one turn of Gein’s. So you might need to use Prophylactic medicine very often.
- I recommend the formation above (see pic), with Veteru in front. Suzuka can attack around the formation as needed, but make sure to leave Veteru open for Rosa to attack, otherwise she will do a lot more damage to anyone else.
- Professor can stay there, in the back, the entire time, as long as there’s a tank available to attack, they will completely ignore him. Except Dios, anyway.
- After all the thieves and Rosa are dead, Gein can switch to healing.
Alternate Strategy
- Kadanoba can use his AoE Provoke attack, this will keep them from inflicting charm.
Dios
- Extremely high HP. His first move is usually a ranged attack that drains half his HP. He will target this at the lowest defense unit in reach, so while Veteru might be able to survive it, Dios will ignore Veteru if he can hit someone else. His ranged attack is a plus shaped AoE about 3-4(?) spaces away, plus he can move 4 spaces as well.
- It’s not a bad idea to send someone out as a sacrifice, otherwise he’ll use his AoE on your likely still clustered team
- Put high attack units as subs, ideally with good speed and movement.
- After that he will use more typical Dark Knight attacks like Blood Eater and Dark Bringer.
Armaments Note
- It’s not required, but equipping your tanks with sword armaments will boost their damage quite a bit. Kadanoba’s sword (the free event sword) is particularly good, and Chloe’s sword is decent too.
Level 49

Stage Overview:
- All enemies as basically like the defending team in arena, AI wise, they will move to attack from wherever they are and, will use their attack skills. Tamamo will use AoEs, Rosa will Grand Cross, Yomi will use her magic attack, etc etc. They are tankier than arena, but not so much that only strong elements can kill them.
- Because enemies are not that tanky, so element and LS matter a lot less in this stage than previous stages.
Enemies (In approx. attacking order)
- Suzuka
- Very deadly, fast, can kill team member 2 at the start.
- Can kill her with a Suzuka lvl 80 (not sure if 75 can) or inflict Stop on her w/ Magnus (ninja w/ speed boost)
- alternatively, put a weak unit to be sacrificed in this spot.
- Shenmei
- Decently strong AoE (Maelstrom) and will occasionally use Dropping Anchor (strong single target attack)
- Has a water reaction ability, harmless to lightning units
- Sheena
- Has Cross Counter reaction ability (strong)
- Can cure herself of Chains (preventing movement)
- If using Stop on her w/ Ninja, Ninja will be attacked by Tamamo and Arber next turn
- Anastasia
- Has Avenger reaction ability. Kill with one attack or from a distance, or inflict status.
- Arber and Tamamo can do a lot of damage from a distance with their AoEs, it’s best to take them out as quickly as possible.
- In addition, Tamamo somehow has Charm Arrow (as Ranger, weird) but doesn’t always use it
- Arber will also use Dynamic Buster Bomb
- They are out of Sniper range at the start, but will move towards you right away.
- Rosa
- Uses her Jump attacks, Dragon Slayer, Grand Cross etc.
- HP+2 absorption react ability
- Elizabeth
- Uses Prophylactic Medicine and heals. Will also inflict Poison. Don’t leave her till last because she’ll run around healing and curing status.
- Yomi
- Uses her Miko general buff first turn, then will use her light magic attack or normal attacks.
- Safe to hit, afaik
- Chloe
- Exactly as you’d expect, Guard, usual light sword AoEs etc.
- Deneb
- Definitely the weakest threat in the stage, if you don’t get too close to her she just stays put the entire time.
Status Inflictions
- Not all statuses can be inflicted in this stage, and some that can aren’t useful.
- The most useful one that seems to have a high success rate is Stop
- Sleep can also be inflicted.
- Prevent Movement/Prevent Attack will proc, sometimes only one part, it can be useful sometimes. Don’t bother inflicting it on Sheena, Elizabeth or Deneb because they’ll cure themselves. Elizabeth will also cure any units near her, Shenmei, Rosa, etc.
Strategy
- After a lot of experimenting, reading the wiki, watching playthroughs, I don’t believe there is any way to clear this stage with no deaths. And I also think that most players, depending on what units you have, will probably need at least two teams to clear this stage, with the first team being wiped out. (hopefully doing as much damage to the enemy as possible)
- Inflicting Stop is a good way to disable Anastasia and Sheena.
- Since Gunners and Illusionists are way too slow, that just leaves high level Ninjas. They will die next turn though.
- Snipers to shoot Elizabeth and Tamamo. Also can inflict Headsnipe to just about anyone, but Elizabeth will cure it. It can still buy you time though.
- Units w/ decently high attack to finish them off.
Recommended Units
- Zain (75+)
- High Speed and Attack: Suzuka 75+ (Ninja w/ Overdrive), Laevateinn 75+ (Ninja w/ Overdrive), Grantz (lvl?)
- Saint of Fists: Sheena, Yomi, Lucia, Gormaras. (Probably too much water enemies for Eve or Shekinah)
- High Evasion: Yauras, Balt, Masamune, Lyle (75+), Fencer (85), Resius (85)
- Ranged: Snipers (especially Chalice), Rangers, Cedar
- Other decent picks: Monzein (75+), Shenmei (75+), Rosa (75+), Lamia (75+), Flamel (75+), Vargas (85)
- as rear guard or subs, not in front
Don’t Bring
- Slow units that will die before doing any damage to the enemy
- Zangetsu
- Dirga
- Illusionists, Wiseman, other magic types
Level 50

| Unit | Type | HP | Jewel | ATK | DEF | MAG | MND | DEX | SPD | CRT | LUC | CHN |
| Magic Golem | Fire | 1253 | 553 | 312 | 270 | 179 | 168 | 318 | 95 | 199 | 158 | 32 |
| Dark Knight | Fire | 3589 | 123 | 376 | 246 | 141 | 170 | 243 | 90 | 241 | 104 | 32 |
| Attack Dog | Fire | 1833 | 134 | 277 | 204 | 132 | 78 | 281 | 109 | 195 | 156 | 32 |
| Cerberus | Fire | 4573 | 146 | 214 | 164 | 204 | 250 | 182 | 93 | 180 | 253 | 32 |
| Ice Plant | Water | 1863 | 439 | 288 | 1133 | 151 | 105 | 245 | 107 | 200 | 156 | 32 |
| Fire Plant | Fire | 1863 | 439 | 288 | 1133 | 151 | 105 | 245 | 107 | 200 | 156 | 32 |
| AJ7000 | Thunder | 6682 | 567 | 367 | 267 | 151 | 188 | 279 | 89 | 250 | 305 | 32 |
| AJ4000 | Thunder | 4465 | 138 | 368 | 232 | 146 | 153 | 272 | 98 | 247 | 283 | 32 |
| Waginao ワギナオ | Dark | 2694 | 144 | 166 | 276 | 336 | 337 | 145 | 104 | 202 | 267 | 32 |
| Diablo ディアブロ | Dark | 6505 | 553 | 341 | 337 | 187 | 234 | 313 | 78 | 188 | 188 | 32 |
(thanks Wytesong)
First Team Enemies (recommended: Dark team)
- Fire Plant
- Inflicts Charms (single target)
- Ice Plant
- Sleep (AoE) & Sleep (single target)
- Revenge ability: Sleep Spore (sometimes)
Second Team Enemies (recommended: Water team)
- Fire Golem (Magic type)
- Magic Cross hurts units with low magic def, especially below 250
- Does little damage to magic units or those w/ Magic Barrier+2
- Fire Dark Knight
- Easily killed with water units
- Uses AoE that sacrifices HP
- Alternatively can use Fodder to get the dark knight to trigger his AoE until he runs out, will leave him w/ 1HP left
- Fire Attack Dog
- Long Ranged Shoot skill
Third Team Enemies (recommended: Wind or Light mono team, or do both Wind and Light separately)
- Lightning AJ4000 (Magic Sword)
- At the start, wIll Shoot and Aim at your units with a long shot skill until his jewels are below 24. After that has 5 ranged shot.
- Lightning AJ7000 (Ranged)
- AOE Fireball
- AOE Rapid Spin Machine Gun
- Magic Sword Line (Slashes 3 squares)
- Ultimate Attack: AOE Soundboom
- Counter Blade (strong)
- Dark Waginao (Mage/Ranged)
- AOE – Dark Magic: At least 300 DMG
- can sometimes Petrify
- AOE – Clock stop
- AOE – Dark Magic: At least 300 DMG
- Dark Cerberus: (Melee)
- AOE – Berserk/Rage Inflict (1st move)
- AOE – Slam (3×3)
- Dark Diablo: (Mage/Support)
- Chain / Combination Out
- Defense 5x Buff
- If close enough: (AOE) Pain Rain
First Team Strategy
- Congratulations for making it to the top! This stage cannot be beaten with a single team, so we will use several teams.
- First kill the status inflicting plants. Since Professor can’t survive in this stage, let’s kill them first. They have high defense but are weak to high attack and magic (high attack is best)
- Suggested Units (note: all these units will need a minimum speed of 107+ to go before the plants. Can use speed scarf.)
- Also will need at least two combination links to kill in one hit. Restart until it fires, or bring a fast ranged unit like Chalice or Arber to assist. The more limit breaks, the better.
- Kudan Stein (75+) (leader)
- Zahar (Dark Knight) (at lvl 80, speed is 110, so maybe can be 75-77-ish) requires a 50% Dark LS
- Anastasia (Dark Knight) requires a 50% Dark LS
- Reaper (not sure of speed)
- Laevateinn (Dark Knight) (can kill water one only)
- Suzuka (Dark Knight or Ninja w/ Overdrive)
- might want to save her for killing the Diablo later
- Can also bring an expendable Ninja to inflict Stop to the plants, if you want, but it’s better to kill them in one hit.
- Team Composition:
- 50% Dark Leader, 1-2 High Attackers, 1-2 Ranged Assists, 1-2 Combination Link assists to fill up last spot or two in party (any free 85 MLB units, just need limit break. I’d save Fencer for later if you can.)
- After the Plants are both dead, just do as much damage as you can before your team gets wiped out, likely after the Diablo’s defense buff
Second Team Strategy
- Bring a Water team to wipe out the fire enemies.
- Golem inflicts magic damage, so Rofia or Elizabeth can tank the hit easily, but be careful of the Dark Knight. Sheena can also buff and kill it fairly easily.
- Dark Knight is only a threat to water Illusionists, other water units are fine. Stay away from the other side as much as you can, until the fire enemies are dead, then do as much damage to the remaining enemies as possible before dying.
Third Team Strategy
- Unless you have Zain (75) for your light team leader, then I recommend bringing a mono Wind team instead. There are more strong wind attackers, whereas other than Zain and Suzuka most light types are tanks.
- Unfortunately Suzuka is just too fragile for this stage, the enemies have powerful ranged attacks and are very fast.
- Wind units can do very good damage to the remaining lightning and dark enemies. If you have a strong wind team, then a third team is all you’ll need.
- Most all Wind units are pretty good here, including Fencer. Sniper support is also pretty useful.
Stay out of the range of Waginao, and try to hit him with a ranged combination link attack for the sure hit.
Level 51
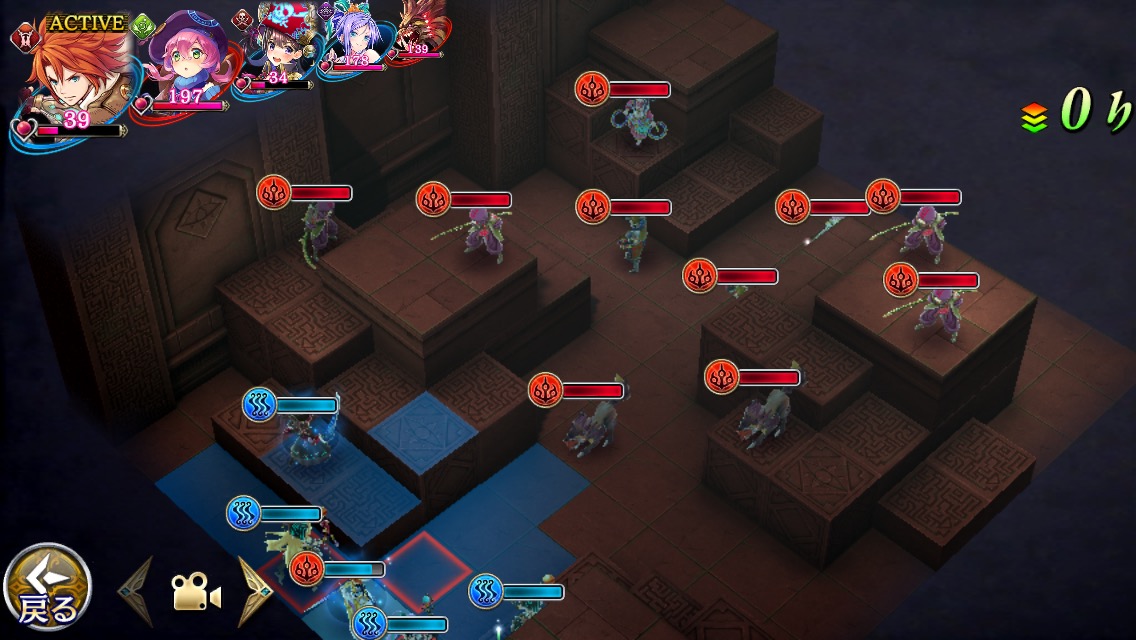
Enemies
- Dancer
- Repeatedly uses small debuffs on your team, including lower defense, lower attack, lower magic attack and lower magic defense
- The debuffs are not that strong, not much concern for mostly water teams. Be careful of the lowered defense though.
- Attack with ranged hits only, her reaction ability inflicts Charm.
- Monks
- These guys buff their attack 2.5x and can do a lot of damage even to tanky water units. Keep your distance or inflict status.
- Can be inflicted with Stop (high chance, but not 100%)
- Wolves
- Resist attacking them first turn, will put your unit in range of the buffed monk. They have a high chance of combination links.
- Can be inflicted with Stop.
- Archers
- Repeatedly target Team Member 5 at the start, might change targets later as your team moves. If you keep your tank near the center they will always shoot them instead of support units.
- Bishop
- Mostly casts regen on herself and her allies or uses normal attacks.
Difficulty Level: Extra stage
Strategy
- After the ordeal that is level 50, this level is back to being only about as difficult as level 30-something. This does require a water team though.
- Team Member 5 should be a tank. Selena, Veteru or Zain are top picks (75+). Move your support to the right of your tank at the start.
- Recommend giving the tank Kadanoba’s sword (+25 fire resistance)
- Let the monks approach you, then surround them and wipe them out one by one. Even if you have an 85 Selena or Sheena this guys will knock them down to ⅓ HP. (Likely because of the defense debuff).
- If using Black Hole have someone like Rofia cast it (Clocked Up, fast casting)
- Archers and Dancer are very weak and can be left for last. If you have Regen put him on the right hill and snipe away.
- Of course a strong water team would be ideal here.
- At the minimum bring 2-3 Water Illusionists to Overclock or just cast Bind/BlackHole. Shenmei’s Maelstrom works pretty well here (3 Overclocks, and don’t let her get hit by the monks).
- If you can, bring an Illusionist with healing subskill, you’ll need it.
(75) Shenmei’s Maelstrom
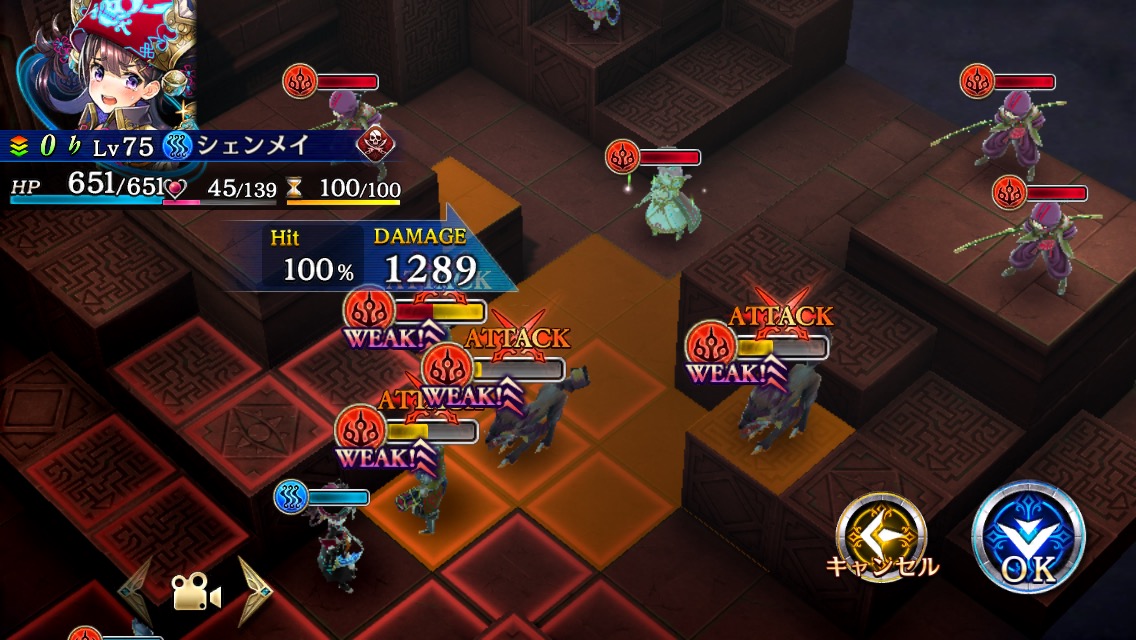
Level 52

Left Side

Right Side
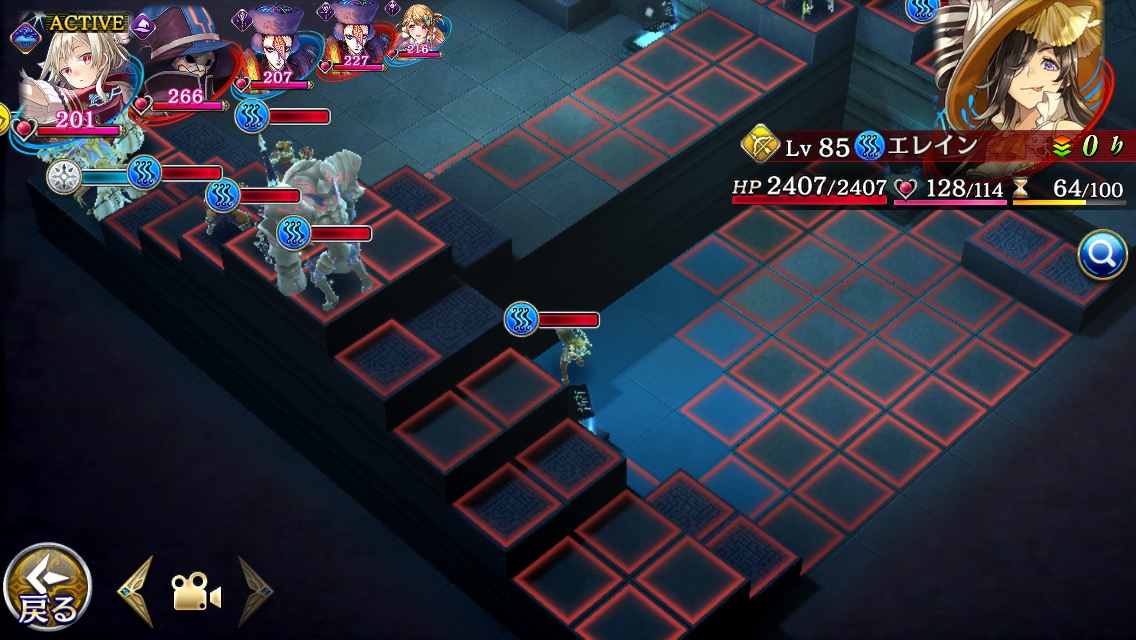
Hidden Archer
Enemies
- Left Side (Weak to Physical Attacks)
- Golem (1st turn Buffs it’s magic defense)
- 2 Mages
- Rofia
- Fon Riu
- Has Magic Counter+2
- Right Side (Weak to Magic)
- Golem (1st turn Buffs it’s physical defense)
- 2 Monks
- Lamia (Dragon Knight)
- Elaine (Archer)
- Can be inflicted with Stop (suggested Black Hole)
Difficulty Level: Extra Plus
Setting up Teams
- Team will be divided into two parts, Leader and Team member 2 will start on the left side. The remaining three will start on the right side.
- Lightning units absolutely required, ideally with Monzein leader. This level requires one lightning melee physical attacker and one non-fire magic type (wiseman best).
- Monzein is the best, but I think other lightning units might be workable too, including Theona and Alba (Dragon Knight)
- Dirga is very tanky, but his damage even after buffing is pretty low.
- For Magic types (in order): Vincent, Mare, Fon Riu, Soleiu, Peridot. If you don’t have Monzein, it might be worth using a magic LS instead. It’s awkward to move them over the other side, but it’s a large damage boost.
- Deneb’s LS is 30% magic atk up for lightning units. Works well with Vincent, and also surprisingly well with Vannekis (85 Mage with fast charge and move+1)
- Mare has 20% general magic LS
Left Side Strategy
- Left Side is easily cleared with Monzein (65+ with his Axe’s Master Ability) and any Illusionist.
- First turn have Monzein hit the right mage to charge jewels, then use his Master Ability.
- Next, can either one shot enemy Fon Riu with Shoots-the-Axe or just tank the weak water hit and hit the Golem instead.
- Then finish off the Golem.
- After that, Monzein and Illusionist can go over to the right side and help out.

Monzein’s Master Ability (Doesn’t need to be 75, 65+ works too. Maybe 60 too (untested). Needs to be leader though.
Right Side Strategy
- Right Side is much more difficult to clear. I recommend using Dirga (Holy Knight) in front with 1-2 Wiseman behind him. Wiseman is ideally Vincent, but Fon Riu, Soleiu and Mare will work well too. Use two Wiseman or Wiseman and a Support (Astrologer or Illusionist)
- First turn have your Wiseman cast at the spot in the pic below. (Don’t worry about hitting your ally, they will move). Then move far left as you can.
- Have Dirga stand in the spot in the next pic. This way he will be targeted by the archer and the others instead of your squishy wisemen.

Cast at the spot right in front of the right Monk

Run away!

Dirga can stand here and block the way down for a turn.
- Unfortunately the Archer’s AI is fairly random. Even replaying with the same units, in the same places, she will sometimes skip her first two turns, use single shots, use AoEs, etc. So Dirga method doesn’t always work.
- Since all Magic types can only survive two hits from the archer, it might be worth bringing a third support instead of Dirga. Ideally someone who can Overclock and heal.
- Without Dirga, the enemies will continue chasing after your magic types. Lamia is particularly deadly since she can oneshot them, and jump down too. It’s manageable but pretty tricky.
- Whatever your team, casting is the same. Move into range (large lightning AoEs) and cast, then Overclock them and move them out of danger. If Overclock doesn’t come fast enough, try casting Clock Up on your Illusionist first.
- Astrologer’s skill to reduce casting time by ⅓ is very useful here.
Other Notes
- Getting no deaths on this level is kinda not worth the effort here imo. It’s possible but will take a bunch of retries and luck and this level is fairly long.
Level 53
Enemies
- Plant:
- 1st turn: Chain Out
- 2nd turn: Wind Regen (on other enemies)
- 3rd turn: Defense x5! (enemies already have high defense)
- Can be killed by Chalice or Cedar see details below
- Archer
- Uses Skill lock AoE every single turn.
- Will hit Team members 3, 4 and 5 first turn, has a speed around 128
- AJ2500 (water blade robots)
- They don’t move first turn, but have a strong reaction ability and are pretty quick. Will attack on their turn 2.
- No ranged attacks but start on both sides of your team
- AJ7000 (dark androids)
- Move to attack on their 2nd turn, attack 3rd turn.
- Weak to Light magic or Light AoEs w/ 50% LS
- Will take about 2-3 AoEs to kill
- Gunner Robots (2 Lightning, 1 Wind)
- Somewhat weak to non-resistant elements, but takes about 2-3 AoEs to kill them.
- Lupine
- Will use Dark Flare if you step on the stage. Casts fairly quickly. Weak to physical attacks.
Difficulty: Extra Plus
I recommend this video:
Zain of course can be used instead of Suzuka. Or Shaman (75) instead of Elizabeth.
Strategy
- The first problem is the Archer who uses skill lock on anyone in range, every single turn. The easiest way is to bring Professor or Shaman (3rd job) in the second team slot.
- The Archer will do some damage every turn, so bring someone with AoE heal if possible.
- Elizabeth can bring Bishop subskill for Cure Rest
- Alternatively, a fast team (Ninjas, Saint of Fists etc.) with a speed higher than 128 can move out of the way before archer’s turn, but it’s a very limiting strategy imo.
- Second, the Dark Androids attack very quickly.
- They inflict ranged magic attacks (weak but inflict snare)
- Or have powerful close ranged physical attacks.
- Only can be damaged with light element attacks, highly resistant to other elements. Without light damage these things are insanely tanky.
- Can cast (or Spica’s Leap Slash) before they move, it takes some time.

Cast Lupine’s Judgement or use Spica’s Leap Slash here.
- They must be killed asap or they will slaughter your team.
- Lupine (no LS needed) can do about ⅓ HP damage by casting Judgement
- Lyle (75) w/ 50% LS can use Arrow Rain to do about ½ HP damage
- Spica (75) w/ 50% LS can do about ¾ HP damage with Leap Slash
- Carol w/ 50% LS should be able to do at least ⅓ HP damage too (untested)
- If you can’t kill them quickly, there’s no way other than losing your team and sending another team in.
- To kill the Plant (and the Archer after that) before the defense buff goes up, the easiest way is to use Chalice Sniper+ or Arber Sniper.
- Chalice should have Long Snipe (Range+2) passive and Shooting Mastery+2.
- Or 85 Chalice can use both range passives and 4* blue sniper rifle lvl 25 armament
- I think Chalice is better since she can help with the water robots.
- Chalice with only range+2 needs to use Assault Burst from the right corner where the water blade robot was.
- Cedar can inflict Death Sentence (from wiki)
- The remaining Robots and Lupine will advance soon afterwards.
- They are all weak to both physical and magical attacks (but not from unfavorable elements)
- Still require 2-3 AoEs or other strong attacks to kill the robots
- Lupine is fairly vulnerable to physical attacks.
- They all will attack anyone who goes up on the stage.
Multiple Run Strategy
- If you don’t have the required units, then focus the first run on taking out the plant and archer. Ideally cut the HP of water robots too (leave at least one alive so they can be used to fill up jewels.) This will allow a lot more flexibility in your team setup.
- Without the skill lock and defense buff then you can bring your strongest fighter (Zain, Kudan Stein or Zangetsu for example) and four Illusionists to deal a ton of damage.
Other Notes
- Zain needs to be 75+ in this stage, and still will take heavy damage.

Avoid standing in the circled spots, the dark AJ7000s will shoot. (from wiki)

Avoid standing in the X spot, AJ6000 will shoot and can get hit by Luminous. (from wiki)
Level 54

Back of stage

Front of stage. Note your team will be split into two groups.
Enemies
- Metal Rats
- Use typical chains preventing movement
- Scherazade
- Uses a small attack down debuff
- Gunner Robot
- Typical close ranged shots
- Mages
- Typical small magic AoEs
Difficulty: Easier than most Extra stages, but don’t let down your guard.
Zangetsu Strategy
- Clear with Zangetsu, Illusionist and Professor (left side team, members 1-3). If you have Rofia Illusionist put her in slot 2, and weak Professor in slot 3.
- Other side can use another professor (or Astrologer) and another Illusionist to walk over and join the rest.
- Or bring fire units instead.
- Use Prophylactic Medicine first turn.
- Have Zangetsu hit nearby enemy for jewels, buff, Grand Cross, the usual really. Repeat and wipe them all out

Fire team strategy
- Of course full 50% fire team will work here as well. In particular I think Kadanoba’s Rage AoE would work great here, to make the mages uses normal attacks instead.
- From Wiki, Shekinah’s Ranger w/ Saint of Fist buff can AoE and kill the mages.
Level 55
Top

Bottom
Enemies
- Mages
- Randomly use Change and swap positions with your units
- Use small AoEs but not particularly dangerous (to wind)
- AJ7000
- When they start charging, move far away in any direction, they cast a strong fire AoE, particularly towards the center. Can kill low defense wind units and severely injure SoFs.
- Easily killed with a buffed hit (unparalleled fighting dance) from SoF, plus another normal hit
- No reaction ability (safe to hit for jewels)
- Diablos
- Typical attacks
- strong reaction ability damage
- short distance spike throwing
- close range ground spike
- combination link down
- Also will randomly change places with your units, especially on the high parts.
- Best to stay out of their spike range unless attacking.
- Use several strong wind units to take down one at a time. After the Androids are dead first though.
- Typical attacks
Strategy
- 50% Wind LS required here, and strong wind team.
- Use strong buffers (Yomi, Lucia, Shita) to take down the enemy quickly.
- Bring a healer/overclocker. Ideally Shaman, but Rafu with Bishop subskill can help quite a bit too.
- I think Rameses (65) might do pretty well here too, will try second playthrough.
- Use Rangers or Almira to shoot ranged attacks while your strong wind units fill jewels, buff and take down the enemies. Keep them moving around and try to avoid getting him by Android’s fire AoE.
- Go for the mages and Androids first, then do Diablos one at a time.
- Stay out of multiple Diablo ranges as much as possible.
- Send Yomi and etc to healer for regular healing, somewhere out of enemy range.
- If you don’t have a strong wind team, bring as many self-buffing or high attack (but not too fragile or slow like Dark Knights) units and do as much damage as you can. I’d still take them out in that order (mages, androids, Diablos)
Level 56

Enemies
- Lyle and Almira (Beastmasters)
- Both have very high speed, can jump and can attack diagonally
- Attack Dogs (1 Dark, 1 Fire)
- Very fast, both have defense penetrating shots, high chance of combination links, and are fairly tanky.
- Dark Knights (1 Fire, 1 Lightning, 1 Wind)
- These guys don’t use ranged attacks as far as I can tell.
- They are actually noticeably weaker than usual, both in damage and defense. Still quite tough overall, but not instant death bosses like usual.
- Deneb
- Likes to cast her stop inflicting attack. Will hit whoever is closest.
- Rofia
- Uses Clock Down, not sure if she uses other attacks.
Strategy
- Overall, this is another free for all.
- It is possible to use Zangetsu and Overclocking here, but I don’t know if I’d recommend it. It’s very tricky to pull off because of RNG of the enemy AI. Sometimes they’ll line up perfectly, other times they just move differently. This happens even rerunning the stage with the same team.
- The biggest issue is the attack dogs. They are faster than even fast Illusionists and will definitely attack before the Overclock goes off. They can kill non-water Illusionists and Rin (even though she’s water her defense and HP are low)
- Also can kill water Illusionists if they get lucky with enough combination links.
- Anyway, a successful run, Zangetsu needs to get at least one Attack dog in Grand Cross because they are too dangerous to leave alive.

Zangetsu’s 2nd Turn (after hitting attack dog for jewels)

A very lucky alignment. Left attack dog decided to do a ranged shot on Rofia.
In this pic:
- Leader: Rofia (85) w/ high speed charge
- 2nd: Rafu (77) w/ 4* speed scarf and high speed charge
- 3rd: Zangetsu (85)
- 4th: Chihaya (78)
- 5th: Sheena (85) HP up and Clock Resist (because of Deneb)
In later runs trying to make sure this could be duplicated, I took Rafu out since she kept dying (the run above she survived, which was a miracle), but her replacement didn’t have fast charge and the AI just wouldn’t act consistently so things got kinda tricky. In the run I stuck with and finished, I lost 2 Illusionists, but I guess that’s not too bad.
So basically, feel free to try Zangetsu here, but it takes luck to make it work, plus time fiddling around with your Illusionists elements, speed, armaments.. etc and may not be worth the time or effort.
Level 57
Top

Bottom
Enemies
- Plants
- Use Poison glob, Poison AoE and normal attacks
- Cannot jump, but are fast
- Can be charmed (high chance)
- AJ7000 (Magic Knight) (Mini Boss)
- Very tanky, very deadly.
- Uses moderate ranged small magic damage hits
- Close range Spinning damage (very deadly)
- Highly resistant to magic, vulnerable to buffed dark attacks
- Mages
- Sniper ranged magic shot attack, weak, but slowly depletes HP
- Waginao (Boss)
- Sniper ranged “Gravity” shot attack, but fairly weak
- Not particularly high defense, but high speed and Evasion (29% to hit) but can get 100% hit chance with Kudan Stein’s Master Ability (75+)
- Can do aoe physical attack debuff from very far away
- Can be inflicted with sleep
Strategy
Suggested Video: https://m.youtube.com/watch?v=wE-TCALt0ek
Kudan Stein No Deaths Strategy (very tricky/lucky)
- Needed: Kudan Stein (75+) w/ Overdrive and his unique Armament
- 3 Illusionists, ideally Rofia, Rafu (both with fast casting) and Chihaya.
- Shaman (65+) 2nd job w/ Master Ability
- First turn move Kudan next to the left stairs. Then cast 3x Overclock on him.
- First turn hit the nearby plant for jewels, then go down the steps, buff, and cut down AJ7000’s HP.
- Sometimes AJ7000 will head towards the other set of stairs which makes it more difficult to get it, and a bunch of the mobs together in a single Bloodstrike.
- If that’s the case, don’t waste your HP, use Geo Cross instead, hit the android and a mage if you can.
- Hit the Android with normal hits until dead, while making your way back up the steps.
- The Mages and Waginao’s ranged hits and poison will start to take a toll. Gather everyone together and use Shaman’s Master Ability heal.
- Time for another round of Overclocking. This time try and reach Waginao and wipe him out with Kudan’s Master Ability.
- Wipe out remaining mob enemies and/or more healing.
- This strategy is tricky thanks to the movement of the enemy AI. The more they cluster together (with the android) the easier it is to wipe them out, but they don’t always cooperate. The more mobs that survive will increase amount of damage Kudan takes. Again, re-running this stage with the same units can have vastly different results.
Two Team Strategy (Much easier to pull off)
- Taking down the Android and Waginao seperately is much easier. If Kudan Stein (75) can be on team 2 w/ Shaman that is that is way easier.
- Dark units are definitely required for this stage and 50% LS makes a big difference.
- For a first team, Gormarus (Pirate w/ Saint of Fist subability) can do a lot of damage to the mobs with Illusionist help. Or alternatively use him to cut down the HP of the android as Saint of Fist.
- Dark Knights Zahar, Anastasia, Reaper can be used as well. It still takes multiple hits for them to kill things, but the damage output is decently good. Of note Reaper can inflict charm on the plants.
- I don’t recommend Arber here, the constant magic damage kills her very easily and there is no safe spot to shoot from.
- Use Illusionists, and bring healing if you can.
- I’d still use Kudan’s Master Ability to wipe out Waginao, if you have him. His 29% chance to hit him can be like 0% sometimes as far as RNG is concerned.
Level 58


Enemy side (back)

Team side
Enemies
- Plant
- Uses Skill lock AoE first turn, but fairly slow, any Professor with a speed of 89+ will go before it.
- Will not use skill lock move if everyone is protected by Professor.
- Uses shooting damage debuff 3rd or 4th turn
- Dark Knights
- Super Lethal ranged AoE as usual
- Ninjas w/ Illusionists skills
- Have extra long range Change to swap places that they use on anyone in range.
- Inflict Charm
- Easy to kill otherwise
- Beetle
- Defense is not that high, but has high attack.
- Normal attacks and skills can penetrate defense.
- Bishop
- Uses Jewel Shift (gives jewels to Dark Knights)
- Golem
- Has lower defense and HP than usual, but fairly dangerous to light units. Inflicts mostly magic damage.
Zain Strategy
- Zain (70+) will need 3 Illusionists and 1 Professor
- Also will require a sword armament, I recommend Kadanoba’s free event sword.
- The step by step of this varies a lot depending on the speed of your Illusionists, and if they have fast casting or not. Try varying the speed of your casters and see what works best. I used Rafu (93 speed w/ fast casting), Shaman (97 speed) and Chihaya (104 speed)
- If Zain is faster than your Illusionists then move slightly and wait (see pic)
- Overclock x3 and Professor Prophylactic Medicine

- Zain’s turn, go straight down the center. Depending on your Illusionists speed, one of the Dark Knights might step forward if the first Overclock is slow. I actually think this way is easier (the youtube video they are all fast Illusionists)
- If the Dark Knight steps forward, kill him with a normal hit. Otherwise use Shining Flare on the clustered enemies.
- If there are more turns left, go up and kill the Beetle.
- After that Zain will get swapped with the Ninja next to the Beetle.
- If the Beetle is alive, it and the Plant can be wiped out together with Supernova.
- If he has turns left, have him stand on the spot marked and use Shining Flare on any Dark Knights left. Note without a sword armament he will only do 9/10th damage instead of killing them.

Stand there.
- After that Zain will be out of turns. If he’s at the spot marked, the Golem won’t be able to laser him.
- Start moving your Illusionists and Professor down the center. Keep Prophylactic Medicine up even if the Plant is dead, because of the charm infliction (from Ninjas)
- If Zain is charmed, either hope Zain gets hit, or Overclock Professor and use prophylactic medicine on him when he gets close.
- Kill any ninjas when you can, they’re quite weak.
- Overclock Zain (if needed) and use Super Nova on the Golem to cut down most of it’s HP. After that it can be killed easily by Black Hole, Bind or a regular hit from Zain.
- Note (70) Zain can only survive one hit max from the Golem.
Alternative Strategy (untested)
- I think Suzuka (Ninja w/ Overdrive) leader party with a high level Lyle (80+) might be able to do a lot of damage here as well. The Shooting damage debuff is quite late, so Lyle can do a good bit of damage before then.
- Have him shoot from one of the raised platforms through the beginning arch on either side. He will get skill locked.
- Wait at the beginning area for the Dark Knights to approach. Cut down their HP with Lyle and have Suzuka finish them off. Use Overclock and Professor for her.
- Check out this video for ideas: https://m.youtube.com/watch?v=5IhNtXN2rAM
- Please comment if you try this (or have another strategy to suggestion)
Level 59

Top half

Bottom half (same wind dark knight in both pics)
Enemies
- Plant (left)
- Repeatedly uses Slash damage down (repeats regularly)
- Plant (right)
- Repeatedly uses Shooting damage down (repeats regularly)
- Uses Petrification (single target) 2-3 times (forgot to count). Aims at unprotected units. Keep status protection up.
- Uses Petrification close range AoE as long as any unit is within one square or so every turn. Inflicts moderate damage too.
- Archers (two)
- Both use Rage AoE first turn, then switch to very weak single shots every turn after that.
- Dark Knights (1 Fire and 1 Wind)
- Both use Jewel Eater+ (AoE) from a moderate distance away
- Same as Mare Job+ stage, sucks away all jewels from target(s) in range.
- Lucia
- standard Saint of Fist enemy
- Golems (1 Fire and 1 Light)
- Usual attacks, ranged shooting, close range attacks etc.
- typical golem
Strategy
- Since both slashing and shooting damage are greatly reduced in this stage, the choices are mainly blow damage or piercing damage. While a triple Saint of Fist team is quite workable here, it is way easier and faster if you have Zangetsu.
- This stage is not bad, regular Extra stage difficulty. No Deaths is not hard this time.
Zangetsu method: https://m.youtube.com/watch?v=dcG0hknFJ8E
Zangetsu Tips
- First turn there are two Rage AoEs in a row from the archers (speed 100). If you can move someone who is a bit faster to the side or forward a little they won’t be able to target your whole team. Put Professor in team slot 5.
- Team is Zangetsu, 3 Illusionists and a Professor. I suggest Gein here since he has move+1 and this stage is huge, but anyone will do.
- Go Clockwise, it’s easier since you can hit the archer for jewels. Until Zangetsu normal hits the archer, don’t waste your Overclocks. But keep Prophylactic Medicine up. Keep your team clustered with Professor’s range in mind.
- Note: the youtube video they start overclocking much earlier, that’s because they brought Shaman to be both Professor and Overclocker (subskill), so they have 4 Illusionists basically.
- The Dark Knights are pretty slow, so watch for their turn and don’t move into their range (around 6 spaces or so) until after their turn has passed and you’re ready to do a round of Overclocking.

First set of Overclocks, buff and Grand Cross the fire Dark Knight, left Plant and fire Golem.
- After that, send Zangetsu back to regroup and prepare for another round. Zangetsu might get Petrified on his way back, but no problem, just more Prophylactic medicine will cure him next turn.
- More Overclocks.
- The surviving Plant will use petrification AoE if you stand very close to it, but it’s safe to be a little near it. It doesn’t move. No rush to kill it.
- The plant cannot be inflicted with Stop.
- The wind Dark Knight and Lucia can be killed with normal hits from Zangetsu, but it’s still better to Overclock to hit the Dark Knight so he doesn’t suck away your jewels. Lucia either wait for him to move towards you, then hit him, or Overclock, buff, and take him out along with the Light Golem.
- Don’t go towards Lucia, it will take you into the Golem’s range.
- Finish off the plant, just don’t get too close. Can use repeated bind or just get Zangetsu to Grand Cross or use Dragon Slayer again.
- Heal up and kill the surviving weak archer.
Level 60
I forgot to screenshot… but just watch this video
Enemies
- Plant (Dark)
- 1st turn: Chain Out
- 2nd turn: Attack down
- 3rd turn: Wind Regen
- 4th turn: Wind Poison
- 4th turn: Magic Attack Down
- 5th turn Wind Clock Down
- 6th turn Wind Jewel Regen
- 7th turn Chain Out
- and I think it might repeat but not sure about the order.
- Reimei: exceptionally fast (153 speed)
- Alba
- First few moves generally are either Poison Pill (status cure) if Reimei is inflicted with status or Jewel Invest to the Plant.
- Also uses Jewel Regen on allies randomly. Normal attacks once the Plant is stopped.
- AI varies a lot.
- Fon Riu
- Magic Counter+2 and fast casting
- Zahar, Veteru, Lyle, Magnus, Gormarus, Zangetsu are pretty much like normal.
- All enemies are vulnerable to Stop (very high chance)
Single Team No Deaths Strategy
- The No Deaths video is the best strategy I’ve seen for this level, very well thought out.
- If you have the units in the video and want to try the same strategy, some notes:
- Zain (70+) leader
- Absolutely needs Slashing damage passive. For second passive I think Guardian is slightly better than elemental resist (by itself) if you have his 3rd job unlocked.
- Equipping a sword armament seems like a safe bet too.
- Rofia
- Illusionist here needs fast casting. 80+ should work just as well though, very small speed difference.
- In the video, she has the Halloween Hat for 50% HP Heal, but you can give her anything really.
- Magnus
- Needs speed faster than Reimei to inflict Stop on him before he can move. Reimei’s speed is 153. Magnus’ (85) speed with Booster+2 is 170-ish, so he doesn’t need to be 85. Likely lvl 75 is fine.
- Yomi
- Aside from needing to tank a hit from Magnus, Team member 4 doesn’t need to be Yomi. Can be any Ninja that’s not water. I think Grantz (or Laeva, I don’t have her) might actually be better for damage, will give it a shot next time I climb the tower.
- Note in the video she has some kind of 5* defense armament
- Suzuka
- Strong, fast light unit, she can take on the right side by herself and kill the dark plant.
- The biggest issue with doing this strategy is Alba. He will randomly use Poison Pill (status cure) and Jewel Invest (reduce time until next turn) which really messes things up for a status infliction strategy. It’s not too much trouble to restart if he uses Poison Pill on Reimei, at least. The video they probably took at least a few tries to get it to work.
- For Zain to be able to kill Zangetsu, Reimei and Gormaras with Shining Flare, he needs his slashing damage increase passive, plus an Overclock to wait out the Attack down debuff.

Shining Flare, with attack down debuff still active. If Overclocking wait a turn.

Next turn: Shining Flare after Overclock. Need Slashing damage passive.
- Even though Stop has a very high chance, it can still fail occasionally.
- It’s important to get Fon Riu in the center so Zain can kill him in two turns, otherwise Zain will die. Sometimes Fon Riu doesn’t cooperate.
- Lastly, it’s critically needed to inflict Stop to the Plant. While it keeps the Attack down and Magic attack down debuffs active, it can’t be killed, more or less.
Multiple Team Strategy
- Similar to this strategy here: https://m.youtube.com/watch?v=2-kg6DLyTg0 (don’t need to watch the whole thing, it’s long and not particularly well planned)
- There is no need to run a full team each time, you can send in a unit or two or as needed and take down one at a time.
- Sheena or another water melee fighter to take down Reimei first is a great place to start.
- After that there are a ton of possibilities. Try a ranged shooting party. Try a non OP ninja party. Or try a strong melee unit plus Illusionist team.
- Note that playing the Tower again will heal your units anyway, so go wild. Or if you are stopping after finishing 60, it doesn’t matter either, so time to use those units.
Level 61

This is a super easy bonus level. All enemies are lvl 10 and can be autobattled by any units. Dirga is petrified. All enemy reinforcements are also lvl 10.
Level 62

Enemies:
- All the Sacred Stone units lvl 85 plus Kanon and Kagura (well except Miuna)
- Autima, Kagura can use their MA first turn! Everyone else can MA after they have enough jewels! Basically like PVP.
- Luckily everyone is vulnerable to Stop so bring a full ninja team or anyone else who is fast with Stop.
Notes
- Chihaya Dancer+ is a great help here.


