Final Calamity [End]
Below Morning Glories
SuYang DaeGun / Sejo of Joseon Invades!

Shoutouts to Listless#0942, Haven#6945 and Crescendo Piano#6569 [robin#4379]
Based on Mandora (Zgoon#0001)’s guide on Naver.
Difficulty without recommended team: Impossible
Difficulty with recommended team: Extremely Hard
Gimmicks:
- Damage Panels (main gimmick);
- Samurai Killer (preemptive, lethal);
- Junk;
- ATK down;
- REC down;
- ATK/REC/DEF down killers;
- Timers;
- Fixed damage sections (barrier units mandatory);
- Virus;
- CP, attribute, bomb panel absorptions to reduce damage;
- Damage race;
- Semi-lethal and lethal counter;
- Tap down;
- Turn time limit (similar to pre-revamp Bonanza, 5s per turn and 10s per turn);
- Protected panels;
- Skillbind;
- 100% mitigation from off-colour units (they won’t deal any damage on the boss stage);
- Disables board conversion (boss only);
- Panel Power Down.
Demons gain DP break.
I’ve decided to split this section into 4 categories of units: Highly recommended, recommended, confirmed units, and theoretically-possible units.
- Highly recommended units are the best units that fit the job in countering this quest. They are usually the units you should seek when getting a lend.
- Recommended units are good to put into your team. While they don’t get the job done as well as the former category, you can probably assemble a team with then and take a highly recommended unit and might stand a chance. If you have one of these, this is what you should use when accepting a lend.
- Confirmed units have been seen to clear the quest in the past, but taking them will most likely make the quest difficult on you. You should probably avoid using these if you’re taking lends unless you have nothing else that could work.
- Theoretically possible units have some sort of feature or aspect that could be useful in the quest, but no one has cleared with them yet or even has the unit, or maybe it’s very far-fetched and probably wouldn’t work.
Note that this list is incomplete and missing a lot of units since last rotation. Given the time, I will update it properly when I am available.
Essentials (What you need in a comp):
- DP breakers (or Demon tribe units, since they gain DPB until the boss), a full party of them if possible;
- ATK buffs, preferably on CP;
- A way to convert or remove a board filled with nothing but timers;
- A barrier unit near the start of the quest OR over 32k HP;
- If the latter is chosen, if you want to eliminate RNG you will need a Virus curer but not necessary;
- Fast skills (skill-hasters are appreciated, NYGang + Fantasy units being the most popular option) or multiple-turn offensive skills;
- Bomb drops, preferably not 100% rate bomb drops, recommended blue->bomb drop skills or direct bomb drops like T.Pascal;
- OPTIONAL: REC and DEF buffs to avoid Suyang’s sudden REC/DEF killers on Bar 3, also DEF to soften YeonSanGun’s DEF killer attacks (however they are non-lethal even without DEF buffs)
- OPTIONAL: If planning to stall on YeonSanGun, a way to disable Counters (Gildong is the best and arguably the only viable method) – trivial if you can oneshot.
- At least 1 Yellow unit. This might seem silly to include but it is impossible to clear Suyang with 4 off-colour units since he has 100% non-yellow mitigation on his floor.
Highly recommended units:
- Jeong YakYong – Counter FES unit. DP break, provides 4 lasers in a row, which is mandatory for clearing out specific timer spawns. Removes virus, drops yellow bombs for 2 turns, 1 party SCP drops, no blue panels for better board manipulation. CSkill counters attack down. 20b HIGHLY recommended due to skillhaste and handshake.
- Bi Gan/Wen Cai Shen – With 20b, her skill is available at the start. You get 2 turns of CP drop and she has an extremely good REC stat. Her skill combined with some other bomb dropper and either attacking while she’s leading, or attacking on a unit with ATK up’s turn, will result in most bars getting oneshot immediately. She has been used in the past to 2-unit clear this Quest with little to no effort.
- Travel Pascal – One of the best substitutes for YakYong. Clears the board, provides with large bomb drops at very good rates, panel power up for additional damage. Works well with Summer Fleming. CP counters both ATK and REC down. 20b is HIGHLY recommended for smoother transition to boss.
- New Years Gangrim – Gets DP break due to Demon tribe. Enhances yellow panels, provides 6k barrier (otherwise you need 32k+ HP and probably a Virus Cure), immense bomb blast up, immense easy CP spawn, immensely enhances 3 existing CPs. CSkill counters attack down. 20b HIGHLY recommended due to skillhaste.
- Summer Fleming – Free DP break buff due to Demon tribe. Very powerful skill at 5CD, combined with YakYong or T.Pascal it can oneshot any bar. Very high REC stat and heal + REC up on CP increases your survivability a lot. 20b makes F1 way easier due to extra tap and -6 CP gen on both units next to her.
- Galileo + Galilei – DP break, two-colour multichain and ATK/REC up. No Fantasy tribe but provides -2CD for all yellow units right at the start. HP pool is a bit lacking; likely meaning that you’ll need a barrier instead of trying to reach the 32k HP cap for F1 Bar 2. Also, if you’re running NY Gangrim, at 10b Gali can drop 2 of their CP each turn which is great fodder to help NYGang enhance CP. Only 1 is recommended, because 2 Galis will make your overall HP incredibly low which is problematic in F1 and later on.
- Aegis UA – Extremely powerful staller. Can help you wait for skills and tank hits easily while recovering HP from her ability in the process. But don’t use her as an excuse to stall on YeonSanGun bar 1, or else your run will probably end to his lethal counter.
- Halloween Laplace (Gacha version, not Werewolf) – Very high damage output due to her having one of the highest base ATK stats in the game. Skill is amazing for nuking and could even be used to oneshot bars on her own turn with a good Blue panel preparation. Nuke becomes even more potent with 20b. Note that due to her Recovery she’s a glass cannon and won’t heal much on her turn unless you destroy a ton of panels through her skill.
- Summer Kougei – Very good support unit providing bomb drops for and a free skillhaste to Yellow units. Bomb drops make him a usable replacement for Yak’s skill in Suyang Bar 1 and his 10b ability provides a barrier which means you could skip getting a Barrier unit if Kougei’s barrier lasts.
- Helmholtz – A “Yellow Oda”. Makes all 4 units join your current attack, which is extremely useful during nuking phases. She’s also, in a way, a glass cannon version of Sunggye. Drops Greens as yellow bombs for 3 turns instead of 2, however she has almost no recovery. This + the SCP spawn gives her amazing nuking potential much like H.Laplace but falls short in healing. Be extremely careful with heals.
- Travel Nyarla – Almost hesitant to admit but as long as you’re careful with DP, her 20b ability can be useful if you give yourself the time to focus on Fevering more. The blue chain and enemy ATK reduction is really handy in helping you survive. The tap up + ATK up are useful and her Fantasy tribe + Technical typing will work with the typical Yak/Gang team very smoothly.
- Eibon – Jack of all trades. Has the potential to carry non-DP Breakers not listed here due to her ability which grants free DPB/JB when you skill something. Very short CD, 10b spawns a barrier which helps deal with F1, helps avoid DEF killer on F3 (although only for the front unit), hard-counters F5 by giving you DPB/JB chain to stop Junk from filling the board, and finally deals killer damage towards Suyang himself.
Recommended units:
- Hong GilDong – Hard-counters F3. Provides DEF up buff to counter killers, removes SanGun’s counters and converts junk. Provides yellow drop manipulation for added burst, occasional extra taps via ability. Board conversion gets blocked in Suyang B2, beware. 20b not necessary but makes F1 a lot easier. Acts as a run stabilizer when running Yak/Gang teams.
- Summer Jang YeongSil – Deals with both DP and Junk, two turns of great burst, Fantasy tribe and Technical tribe meaning she fits all the criteria for Gangrim’s skillhaste and YakYong’s handshake ability. Damage output further increased if YeongSil is at 40b due to Fantasy damage up ability.
- BuYeo Gu – Popular bugmax option. DP break, good skill with healing and blast enhancement for a bit of burst while skilling YakYong. CSkill counters attack down. Hero/Fantasy skillhaste, self mitigation. Only ONE max recommended.
- Lee SungGye – Recently I’ve discovered that even if an enemy has Attack Skill nullification, SeongGae will still heal you with his, even if it deals 0 damage to the enemy. Due to this SeongGae can be used for emergency healing, benefits from Gangrim’s skillhaste due to Hero tribe, and can speed up your party’s skills thanks to his skillhaste. He also enhances 3 SCPs and makes greens 100% drop as bombs meaning more explosions when comboing with NYGangrim. Be careful during panel absorption phases on SuYang’s substage since no greens = death.
- Swan – Provides barrier, great board-cleansing skill but becomes a complete dud on SuYang’s boss stage. Still, with her skill active and when combo’d with YakYong, you will get a mono-colour board giving you a lot of burst potential. No DP break, however she does get skillhasted due to her Fantasy Tribe.
- Wu Gang/Wu Kang (KR Transfer/TW only) – Acts as a replacement for Yak/Pascal. Has a timer convert skill and good synergy due to Human + Fantasy tribes, boosts yellow droprates and grants a free blast enhancement, although normal sized. Even provides a barrier, hard-countering F1. At 60b she gains -1cd every floor.
- Shing Wong/Cheng Huang – Cleans the board much like T.Pascal, sometimes makes Hearts drop as Yellow (L) Bombs and makes 3 SCP drop every time it’s her turn. Good for bursting when paired with NYGang, also gains +2 taps when you break 15 CP meaning she’s good for bursting here. As long as you have good Heart RNG, you can even use her as the Board Clearer on Suyang’s first bar.
- Li He (KR Transfer/TW only) – a glass cannon version of S.Flem which lasts for 2 turns and gives Yellow Multichain but has 1 REC and cuts 50% HP off upon skilling. Other than that, her CP damage goes up tremendously the closer you are to death, but it is very risky so I suggest bringing a unit with HP recovery on their CP if you plan to use her. Human/Fantasy tribes make her a great target for synergies and is arguably better than s.Yeongsil here.
- Christmas Boole – Can be used for Timer clearing. ATK/REC up helps you avoid killers on Suyang’s 3rd bar and the extra tap + 2 turn handshake provides great offensive support, and her CP’s DEF boost slightly helps weaken YeonSanGun’s DEF killer making him safer to get through. Also provides some CP drops and her Fantasy tribe makes her benefit from NYGang’s skillhaste. With her being 6cd, xBoole’s skill should be very spammable. 20b helps but not necessary.
- Chinese Dress Schrodinger – Good recovery nuking and can act as a decent healer while providing nuke support with 2 turn long immense CP gen buff instead of just 1 like NYGang’s. While he doesn’t seem like he’ll provide much help without DP break he does an amazing job at keeping you alive and his Fantasy tribe + CP drop passive will help your party.
Confirmed units:
- Darkness (KonoSuba Collab) (TW only) – 13k base HP. With a proper comp (i.e. over 32k HP) you can get past the 1st floor without a barrier. Has passive DP break, converts timers to CP, DEF up CP, immense CP gen for party. Mitigates damage to self by 40%. Viable substitute for GilDong, even gets skillhasted by YakYong/BuYeoGu thanks to Human/Fantasy tribe.
- Hwang JinYi – gets shut down from any nuking on the boss floor, but up to that point she benefits from all skillhastes and acts as a healer + nuker through REC up CPs and racking up hearts via bomb explosions. It’s not exactly stable, but she can keep you alive significantly. I do not recommend JinYi unless you don’t have one of the recommended units to take lends with. Mandora initially posted a clear with JinYi as a meme-clear, it’s not as stable as you might think.
- Celsius – Much like JinYi, she can act as a pure healer but the flaw she has is that she doesn’t have DP break, making her a sitting duck for whenever there’s any DP spawns in this quest. If you place YakYong to the right of her, you can use a YakYong + Celsius combo to give you a board of mostly yellows + YakYong CP, which increases your attack stat by 7.5% every time you pop one.
- Vanir (TW only) – Two turns of 6k regen, and very decent heart drops. CP counters ATK down and has the ability to drop CP in his turn, meaning fodder for NYGang to enhance CP. He is also a Demon + Technical Type, so he benefits from YakYong’s handshake and gains DP break.
- Balmung – Gets DP break due to Demon Tribe. High base HP at 10k which might help with barrier-less runs in reaching the 32k+ HP cap. Cleans up the board a bit while giving you some better Yellow panel drops and a 1 turn handshake to improve bursts a bit. Also provides with a DEF buff that helps you survive YeonSanGun’s DEF killers a little better, and his CP provides a buff that heals you by 1.5k each turn if broken. At 40b he becomes more useful, providing a permanent chance to drop yellows as CP similar to xBoole and can add 1 tap during nuking when Yak/TPascal/Vanir/sKougei/etc. skill is active.
- Christmas Holmes – Short CD skill which helps with more Yellow drops, free ATK buffs. Not too interesting but due to Technical type he can trigger YakYong’s handshake helping him significantly with nuking. Also has Fantasy/Hero tribes which helps him benefit from skillhaste, and his 20b will definitely assist in nuking more easily.
- Summer Arthur & Tristan – FOR THE LOVE OF GOD DON’T TRY IT. They do next to nothing useful in this run besides help you clear out the timers in WuDong/SuYang bar 1. Their kit doesn’t contribute anything too useful to the team otherwise. The only redeeming factors about them is that he has the Hero tribe, which is affected by NYGang’s skillhaste, and that their Paint panels are sort of helpful in spawning Yakyong CP… (Why am I including him in this section, then? Simply because Jed was masochistic enough to try and clear it with this unit – literally just to get me to put him in here…)
- Halloween Pauli – Pascal/YakYong replacement, although a bit dangerous since she has no DP Break. Replaces non-special panels with Yellows and drops Large Bombs, which is useful for cleaning up the board during WuDong bar 2/Suyang bar 1 and a great boost in firepower to Fleming/LiHe users. At 10b, provides a barrier at the start of the quest letting you carry it over to F1B2 and tank the hit. Her good health pool also helps you out in that regard. Basically, a weaker but tankier version of T.Pascal without skillhaste.
Theoretically possible units:
Note: Most (NOT ALL. SOME JUST HAVEN’T BEEN USED IN A CLEAR YET.) of these are highly unlikely to clear the quest, for now only the units in the above list are stable until proven otherwise. PLEASE TAKE THE UNITS LISTED ABOVE INSTEAD IF YOU HAVE THEM.
Additionally, I’ve decided to mark them with a (+) or a (-) to indicate how useful they would be in the quest. Units marked with (-) are desperation units, the ones marked with (+) are very useful but have NOT been confirmed to clear yet.
- (+) Huang Daxian/Wong Tai Sin – Starts off with a 10,000 HP barrier. Passive DP break, DP and Junk conversion on skill, innate skillhaste through 10b and board drop manipulation. Makes blues drop as bombs and own CP which has healing + ATK up on it, meaning he meshes well with NYGang. Can also unlock Yellow/Heart panels when in a dire situation. No Fantasy tribe but has Technical type meaning he gets the handshake effect for YakYong. 10b highly recommended.
- (-) Gambanteinn (Valentines ver) – Technical type meaning she benefits from YakYong’s handshake, has passive DP break and, if bugged, supports NYGang’s nuking capabilities. Sadly no Fantasy tribe meaning no skillhaste from NYGang. 60b recommended.
- (-) Lasker (Neumann Ranked unit) – A barrier unit that has an incredible 14k HP stat, permanently reduces self damage by 25%, has a barrier on a 5CD. Also has Demon tribe, meaning she can break DP including the heart formation on HuiBin’s floor. She can help you get past the First Floor and act as a meatshield whenever you need to take a huge beating on later stages. However, is almost useless in all other aspects.
- (-) June Bride Maxwell – Another fodder unit for F1. Starts the run off with a Barrier, meaning that if you kill WuDong fast enough you can save it for Bar 2 and eliminate the need to save a skill to tank it. Has passive DP break and Demon tribe, allowing her to break DP even when her abilities are disabled. Bomb rates are decent enough for a 6CD2T skill, but she overwrites YakYong’s bombs and vice versa. This means you can’t skill Max->YakYong for large bomb laser spam.
- (+) Christmas Touka – Very good healing support. Short CD and provides a heart + DP absorption to clear the field and give you a high REC buff, and the CPLs she spawns will compensate for the hearts and heal a substantial amount. Greatly improves survival and should benefit a lot from her Human + Fantasy tribes with skillhastes from other units on top of her very short CD.
- (+)? Travel Nyarla
- (-)? Bridegroom Zhuge Liang
- (———-) School Baal – I highly discourage you from using him… His toolkit is very bad, he has a slow (and useless) skill and only 1.7k REC… So why do I include him? He’s a Demon, and his ability skillhastes all Demon/Deity turns by -2CD. Outside of him gaining DP break, he becomes a sitting duck and doesn’t provide anything to the party.
- (+) Azathoth Yellow ver.
- (—) d’Artagnan – a “budget” version of BuYeoGu. Her skill is almost the same, except instead of making Red and Hearts drop as bombs for 1 turn, she instead adds direct bomb drop, meaning you’ll get overall less bombs – however the skill effect lasts 2 turns instead. The extra tap also helps. But the biggest issue is that she gives a direct bomb drop buff – which overwrites both YakYong’s and T.Pascal’s skills, making her nearly useless for comboing. You can’t replicate combos like BuYeo + Yak with d’Art. Does not provide occasional -1CDs but at least has Hero tribe, which means NYGang can skillhaste her.
- (+) Artemis
- (-)? Hayato
- (-) Anchires/Ancille (Shield unit)
- (+)? CC Sunggye
- (-) Summer Bangwon
- (-)? Halloween Loki & Sobyeol Wang – Functionally very similar so I will address them under the same unit. Both of them can clean the board of timers and can break DP, drop large Yellow bombs at acceptable rates. But outside of this they don’t contribute too much to the quest. No Fantasy synergies or such meaning they’ll fall behind the other units, even with HLoki’s skillhaste. However, if you have no other options for Board Cleaning during the Timer sections – one of these units might be your last bet.
- (+) Nekomiya Hinata (Fes version) – A weird mixture of Buyeo and NYGangrim. Has DP Break and Junk Break but her Unknown Tribe and Offense Type are a bit lacking in synergies. She makes Red and Hearts drop as bombs and gives your party immense blast up for the rest of the turn. This works regardless of what colour you take to Suyang, which is good for burst. Unlike Buyeo though, her skill doesn’t heal you for using it and she converts those hearts away, so be sure to use her whenever you’re okay on health. 6cd and 3 SCP drop gives her a slightly better edge.
Example Teams:
BuYeo Gu/YakYong/NY Gangrim/YakYong
NY Gangrim/YakYong/NY Gangrim/YakYong
NY Gangrim/GilDong/YakYong/YakYong
BuYeo Gu/GilDong/NY Gangrim/YakYong
Balmung/BuYeo Gu/YakYong/GilDong
Vanir/YakYong/Darkness/YakYong
Galileo/YakYong/Galileo/NY Gangrim
S.Yeongsil/YakYong/YakYong/NY Gangrim
JinYi/YakYong/YakYong/NY Gangrim
Vanir/Vanir/YakYong/NY Gangrim
Vanir/YakYong/Balmung/YakYong
SeongGae/NY Gangrim/YakYong/Yakyong
BuYeo/SeongGae/YakYong/NY Gangrim
BuYeo/YakYong/Swan/YakYong
SuYang/YakYong/NY Gangrim/YakYong
Celsius/YakYong/NY Gangrim/YakYong
Rin & Len/YakYong/NY Gangrim/YakYong
XHolmes/YakYong/NY Gangrim/YakYong
Bug 99 options:
CONFIRMED options:
BuYeo Gu
Vanir (TW only)
Balmung (due to Demon tribe; HP could be used for F1)
Aether (…)
SuYang (lol)
Lee SeongGae
Wu Gang
Li He
Potential options:
Moriarty (extremely unsafe)
SoByeolWang, H.Loki (theoretically due to DP break and demon tribe / bombs)
Summer BangWon (short CD and bombs)
Fruitful Miku (Tech type / Vaccine / DPB)
If you ever wonder about what the best damage output source during nukes phases with a typical SuYang team is (i.e BuYeo / YakYong / NYGangrim / YakYong or other variations), then nuking on a Technical Type’s turn has the highest damage, then YakYong, then non-Technical Types.
Contents
Floor Guide
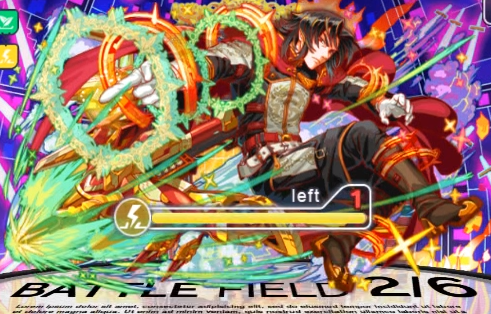
Stage 1 – UhWuDong (Eoudong)

Bar 1
She opens up with a preemptive lethal Samurai killer, dealing 1,524 damage with none on your party, and then she’ll spawn 16 red Damage Panels. Demon units gain DP break.
Then, her pattern is as follows:
1st: 10,704 AoE + 80% ATK reduction
2nd: 13,000 critical hit + convert 16 panels to red DP
3rd, 6th, 9th: Attack that gets weaker based on CP absorbed, 16k with none, 10k with 3.
Can also be replaced by one of the following attacks:
- 10,196 critical + spawns 10 timers (timers deal 100% HP each)
- 10,196 critical + spawns 10 junk
- 10,196 critical + inflicts virus to all units (2.5% per unit)
4th: 10,196 critical hit + convert 16 panels to red DP
5th, 10th, 15th: One of these 4 moves, chosen randomly:
- Converts 12 panels to timers, rest of the board to DP
- 10,196 critical + spawns 10 timers (timers deal 100% HP each)
- 10,196 critical + spawns 10 junk
- 10,196 critical + inflicts virus to all units (2.5% per unit)
7th: 10,704 AoE + 80% ATK reduction
8th: 13,000 critical hit + covert 16 panels to red DP;
etc…
The stage opens up with a hard-hitting start, as WuDong has a max hit of 16k. While this is not Moriarty-levels of cancer with 27k crits, it still packs a punch.
Stall until at least one of your YakYongs and NYGangrims are ready, use the red DP chains to form SCPs and blow up the board to deal damage. Take note of which turn you are on and pop hearts before she ruins your heart chain by spawning DP in the middle of it. If you get hit by a virus, try not to panic and save your YakYong skill for bar 2. Fever when necessary to heal up and deal damage.
You will require a barrier for the second bar, so when she’s low on HP, feel free to NY Gangrim her and finish her off. If she still lives, pray that she does not hit your barrier and Fever, since it will get drained at the start of the next bar.
Bar 2
She will preemptively put up 50% damage mitigation for 1 turn, convert all attribute panels to 1-turn red timers and drain your Fever gauge to 0.
Her pattern is now as follows:
1st: Fixed damage AoE, 8k per unit (32k each)
2nd: No DEF buff AoE killer (17,672 without buff / 12,236 with buff)
3rd: 12,066 single-target attack + Convert board to blue + heart shaped red DP pattern
4th: Absorbs bombs to weaken AoE attack (18,000 with no bombs, reduces by 800 per bomb)
5th: Non-ATK up killer AoE (12,236 if all 4 are buffed, 17,672 when unbuffed)
6th: 14,952 AoE attack; instant death attack announcement
7th: Instakill.
This is where you’re required to have a barrier skill. If you don’t have one, then your run might as well be over unless you’ve somehow formed a comp with over 32k HP, which sounds unlikely and unoptimal considering how much of an off-meta comp you’d be carrying. Anyways, the first thing you should do is get the Timers out of the way, which can be dealt with in 2 ways. Either you save some SCPs from Bar 1 and blow some timers up, then chain them together with an attribute panel, or, more commonly, skilling YakYong. Let her laser away at the Timers, but don’t go all out just yet or you’ll waste your entire party’s skills on her while she still has 50% miti up. After eating the fixed damage, the best approach would be to nuke her, probably with NYGangrim skill. The second turn attack can hit quite hard as the “cheese” comp usually doesn’t take GilDong. If you’re not using skill-hasting units, you could try to stall a few turns before you move onto the next floors. Either way, you’re going to be taking high damage like this through the entire Quest. Hopefully during your nuking phases you can heal through most of the attacks back to full health.
Stage 2 – Yi SeongGae
This is just a cutscene floor. It doesn’t cause any harm, so just take this as a chance to proc your skillhaste-per-floor abilities on your YakYongs and other units.
He will then set you up for Yeon SanGun – by reducing your taps to 1 for 3 turns, then automatically leaves.
Stage 3 – Yeon SanGun
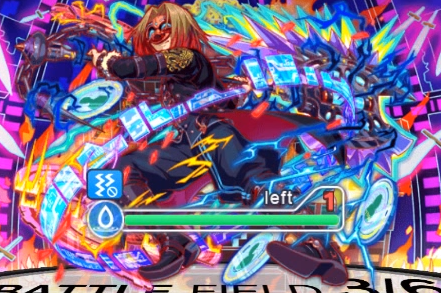
Bar 1
This floor will start off similarly to the way SanGun’s actual stage works. He will convert your board into 4 sets of panels, and you have to pay attention to his dialogue. Depending on what he says (like “Code Red”, “Code Blue”, “Code Green”, etc.), it will indicate which panels he will absorb that turn. If you tap the wrong one, he will instantly kill you.
At the end of the first turn, he’ll absorb them, dealing 1,000 damage with no panels absorbed; instakills otherwise. On the second, he will put you to sleep then reset the board to 4 different colours again. Once again, pay attention to the dialogue and erase the colour his keyword represented. On the third turn, he’ll absorb the colour he hinted and then move onto a modified version of his Ult pattern.
1st: 11,088 AoE attack + spawn 20 junk + 8 turn semi-lethal counter (19.4k per unit)
2nd: AoE with high damage to units that don’t have DEF up (16,440 total without buff, 12,232 with buff)
3rd: Absorbs all non-yellow, bomb, CP to deal AoE damage (7,880? base damage, goes up by 128? per panel). Announces strong green absorption attack.
4th: Absorbs greens for AoE attack (10k base damage, goes up by 1.5k per green). Instakill next turn.
5th: Instantly kills you.
If you don’t have GilDong, or at least she isn’t ready, don’t even try to risk it – as soon as the 3 “quiz” turns are over, you should nuke him and get to bar 2. That counter is going to ruin your run. If you do have GilDong, you can quite easily stall through all of the attacks from the board you get after he spawns junk. Just remember to kill him in 4 turns or else you’ll get instakilled. If you skill her on this bar then you better prepare to nuke bar 2 since he will put up a semi-lethal counter there as well, along with 50% mitigation. If you can’t burst through the mitigation, save GilDong’s skill.
Bar 2
Preemptively puts up semi-lethal counter (19.4k each) for 3 turns and 50% mitigation for 2 turns.
1st: 7-hit combo (12,040 damage total)
2nd: Non-DEF up killer 2-hit AoE combo (15,676 total without DEF buff, 11,772 with DEF buff)
3rd: Non-ATK up killer 2-hit AoE combo (15,676 total without ATK buff, 11,772 with ATK buff)
If he is above 70% HP next turn, he will instakill you.
4th: Above 70% HP, Instakill. Below 70% HP, Non-ATK up killer 2-hit AoE combo (16,440 total without ATK buff, 12,232 with ATK buff)
5th: 7-hit combo (13,760 damage total)
6th: Non-DEF up killer 2-hit AoE combo (16,440 total without DEF buff, 12,232 with DEF buff)
7th: Instakill.
SPECIAL:
- When below 40% HP: 38k AoE + self-destruct
- When below 15% HP: no damage, retreats
You can handle this floor in three ways. Either you nuke it outright with NYGangrim + 2 YakYong skills, or skip 2 turns to make his mitigation go away (safer if you’re running BuYeoGu and wanna preserve skills) then nuke via NYGangrim + YakYong. The third way would be to skill GilDong and gradually scrape this bar down. If you’re planning to do this bar legitimately then you should be careful with damage control.
Don’t let him fall down to 30-15% HP unless you have a lot of defense and/or NYGangrim’s barrier and high HP to tank the instakill, and DON’T ATTACK DURING THE COUNTER UNLESS YOU’RE SURE YOU CAN ONESHOT HIM.
On HuiBin’s floor, your abilities will be disabled and she will spawn some Heart DPs. The only way you can break those is with a Demon in front, or by skipping your turn and tapping it normally. Pre-warning due to the ability lock, make sure NOT to mindlessly tap the DP on YakYong’s turn right after you’re done with this floor.
Stage 4 – Yi BangWon

Another cutscene floor, like F2. It just means that this allows you to proc your Floor-skillhaste abilities twice. On the next floor, your taps will become time-limited so make sure to read ahead to understand how to deal with this.
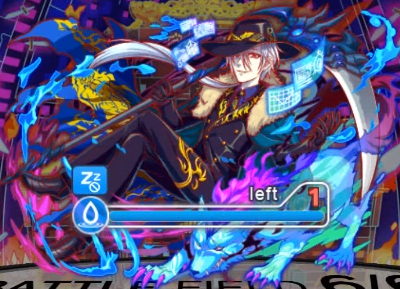
Stage 5 – Jang HuiBin

Bar 1
As her preemptive action, she will turn your board into a heart-shaped DP formation, reduce your HP by 99%, reduce your taps to 1, limit your tap time to 5 seconds and ability + skill bind you for one turn.
DON’T TAP THE DP IF YOUR LEAD UNIT ISN’T A DEMON. FEVER AWAY. If you do have a Demon, tap the DP right away to recover to full HP. If you have neither of these things, skip and pray for the best. She will follow it up with this moveset.
1st: Applies the following effects:
- Virus to all units (1% per unit) for 7 turns
- Tap time limited to 10 seconds for 7 turns
- 100% ATK down for 7 turns
- Low chance Junk drops for 7 turns
- Low chance Timers drop for 7 turns
- Low chance Damage Panels drop for 7 turns
- Low chance panels drop protected for 7 turns
2nd: 12,436 single-target attack + 100% ATK down for 3 turns + spawn 15 junk
3rd: Absorbs junk to attack 1 unit. (12.3k when 2 absorbed) + skillbind one unit for 2 turns + lock blues for 4 turns
4th: 12,436 single-target attack + skillbind one unit for 2 turns + spawns 7 red DP
5th: Randomly debuffs 1 unit with Sleep + Instakill announcement
6th: Instakill.
You must get to the next floor with the Tap Time Limit debuff, or else you’ll die. That means you have a total of 7 turns to reach SuYang. Nuke her straight after turn 1 or turn 2, via BuYeoGu YakYong combo or YakYong NYGang. If you stay on this bar for too long then you will be in trouble, if she binds a specific unit then it might just ruin your run. If she still lives after turn 2, fever her to reduce the Junk Absorption damage. You can go past turn 3 if you get lucky with skillbinds, but I highly advise against it. Kill her.
Bar 2
Preemptively puts up 50% mitigation for 1 turn and randomly skillbinds one unit for 2 turns.
Recommended to stall it out before you nuke her.
1st: 13,057 single-target attack + applies sleep to 1 random unit
2nd: 13,057 single-target attack + 100% ATK down for 3 turns
3rd: 13,599 3-hit combo + convert up to 3 blues to blue timers
4th: Absorbs Damage Panels (9,000 base, increased by ? per DP) + protects all panels
5th: 14,508 AoE + skillbinds all units for 1 turn
6th: Instakill.
Once again, you should kill her as soon as possible as you have to reach F6 with the Tap Time Limit debuff intact. Wait out the 50% mitigation, then use your second set of NYGang/BuYeo + YakYong skills as soon as you can to take her out. If one of them gets skillbound, then spending around 3 turns is fine, make sure to Fever if you need to recover. Before you move on, make sure that – after counting your skillhaste abilities – at least one of your YakYongs will be ready on SuYang’s substage, or at least 1 CD away from ready. And make sure to have at least 1 turn left on Tap Time Limit before you enter the boss.
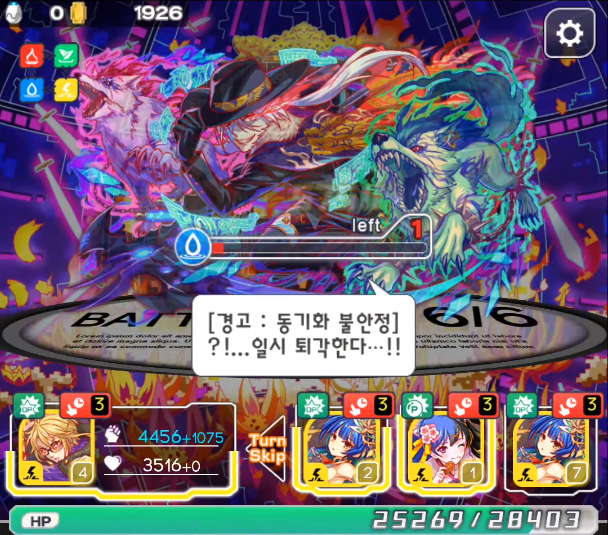
Stage 6 – SuYang (Sejo of Joseon)
Bar 1
Welcome to hell. His first action will be to reset the board, reset all effects, empty your Fever Gauge, ability lock + skillbind + hinder CP spawning + stop hearts from falling and strengthen all panels for 4 turns. If you did not reach him with the Time Limit debuff, he instakills you.
For the next 4 turns, you must get him to 70% HP or lower with just panel damage. If you do not reach 70% HP in the next four turns, he will instakill you. You’re skillbound for the entire duration and you can’t make any CPs. Just try to chain 12+ panel long chains as they have the highest panel damage multiplier.
On the 3rd turn, he will hasten all unit skill turns by 1. Once four turns pass and he’s below 70%, his moveset is as follows:
1st: 100% Mitigation for 4 turns + Converts the entire board to blue timers + announces lethal timer absorption attack
2nd: Resets specific buffs + skillbinds all units for 3 turns + Timer absorption attack (4 base damage, goes up by 200k per timer absorbed). Announces red, green, yellow, heart, then bomb absorption (7 each) next turn to reduce damage
3rd: Absorbs up to 7 reds, then 7 greens, then 7 yellows, then 7 hearts, then 7 bombs each to reduce damage. (4 damage per colour absorption, goes up by 10k each for each panel not absorbed.) Announces CP absorption to reduce damage next turn.
4th: Absorbs up to 5 CP to reduce damage (4 damage base, 50k if none absorbed), then converts the entire board to 1 tick timers
5th: Skips to bar 2.
This bar is basically an instakill followed by instakill. Bursting is useless and the only unit that you wanna skill during this floor is YakYong, when he converts the board into blue timers.
Just make sure to clear every single timer after skilling her and reach 100% Fever. DO NOT SKILL BUYEOGU FOR THE BOMB DROPS. NO REDS = DEATH.
If he doesn’t absorb up to 3 (or 4 depending on your HP cap) panels during the red/green/yellow/heart/bomb absorb, you will die. What I will say is that he does the absorptions in order. He does not absorb all of them at once, so if you don’t have enough panels for him to absorb a specific colour, RNG might bless you and maybe the last 7 panels you need will fall from the top.
After the storm of 7 panel absorptions, make as many CP as you can on the board. It’s survivable with only 3 CP as long as you have 20k HP.
After the CP absorption attack, you must Fever.
Once you make it past it, that’s when the cancer begins.
Bar 2
Preemptively mitigates all non-yellow damage sources and completely stops panel conversions.
From this point on, he has a very split pattern and can randomly convert into different attributes except green. I will colour-code the different damage values for these attributes.
(And yes, he can change into the same attribute he is currently using)
PROBABILITY OF CHANGING INTO EACH COLOUR:
35% / 30% / 35%
1st: Converts to Red, Blue or Yellow attribute randomly + AoE (17,456 / 8,728 / 17,456)
2nd: AoE attack (19,952 / 9,976 / 19,952) and one of the following actions:
- Change hearts to heart timers (random tick amounts, all lethal)
- Apply virus to all units (2.5% HP per unit)
- 15 panels to Damage Panels
3rd: 8-hit combo + changes into Red, Blue or Yellow attribute randomly (Uses previous attribute as damage value, 19,952 / 9,976 / 19,952)
4th: AoE with randomly chosen killer:
- No ATK up killer (19,952 / 9,976 / 19,952 when buffed, 29,928 / 14,964 / 29,928 when unbuffed)
- No REC up killer (19,952 / 9,976 / 19,952 when buffed, 29,928 / 14,964 / 29,928 when unbuffed)
No DEF up killer (19,952 / 9,976 / 19,952 when buffed, 29,928 / 14,964 / 29,928 when unbuffed)
5th: AoE attack with previous attribute’s damage (17,456 / 8,728 / 17,456) + changes to Red, Blue, Yellow attribute randomly
6th: One of the following attacks:
- AoE attack (19,952 / 9,976 / 19,952) and one of the following actions:
- 15 panels to Damage Panels
- Apply virus to all units (2.5% HP per unit)
- 8-hit combo + changes into Red, Blue or Yellow attribute randomly (Uses previous attribute as damage value, 19,952 / 9,976 / 19,952)
7th: Instakill.
These are just strong bursts after strong burst. The only real thing to look out for is on Turn 4 if he changes to yellow or red. If you don’t have GilDong and he uses the DEF killer, you might not survive unless you have a Barrier up. As long as he keeps converting to blue, you won’t have to worry about damage too much.
Stay aware of the fact that Panel Conversions have been blocked, meaning you can’t spawn GilDong CP/hearts via skill nor spawn BuYeoGu SCPs, but the rest of their skills function like normal. Demons no longer have DP break.
If none of your YakYongs are up, try to survive the beatings he dishes out until you can use your NYGang/BuYeoGu + YakYong combo again. Make sure to save hearts and as always, don’t take too long or else you’ll get instakilled.
Bar 3
Once again, he will put up 100% mitigation from non-yellow attack sources, and completely mitigate Attack Skills.
There are no instakills in this bar. Instead, it will pick from a list of 30 different attacks and use that. Expect him to shave half of your HP off every single turn.
Just expect the same measures you’d take while normally dealing with an Ult boss. Heart prep, fever when necessary, unleash skills when your combos are ready, etc.
There is not much I can really say. You should adapt to the attacks he does and work from there.
At random:
- 4,988 single-target attack + 3 turn virus (7.5% per unit, 30% total)
- 14,964 3-hit combo + convert 10 panels to DP
- Non-ATK up AoE killer (17,144 with ATK up, 34,292 without ATK up)
- Non-DEF up AoE killer (17,144 with DEF up, 34,292 without DEF up)
- Non-REC up AoE killer (17,144 with REC up, 34,292 without REC up)
- 14,964 3-hit combo + chance DPs drop for 3 turns
- 14,964 3-hit combo + immense CP generation debuff for 3 turns
- 14,964 3-hit combo + locks CP for 2 turns
- 14,964 3-hit combo + locks red, green and blue panels for 2 turns
- 14,964 3-hit combo + Red, Green and Blue Panel Power down
- 14,964 3-hit combo + Protects all panels
- 14,964 3-hit combo + Drains Fever Gauge to 0%
- 14,964 3-hit combo + Weakens hearts for 1 turn
- 14,964 3-hit combo + Chance panels drop protected for 3 turns
- 14,964 3-hit combo + Chance junk panels drop for 3 turns
- 14,964 3-hit combo + Spawns 10 junk
- 14,964 3-hit combo + Sets tap time limit to 10 seconds for 3 turns
- 14,964 3-hit combo + Stops yellow panels from dropping for 1 turn
- 14,964 3-hit combo + Locks yellow panels for 2 turns
- 9,976 2-hit combo + Hearts drop as Heart Timers for 1 turn
- 14,964 3-hit combo + Drop timers for 3 turns
- 9,976 2-hit combo + 1 turn Counter (lethal)
- 4,988 single-target attack + sleep on the entire party for 1 turn
- 9,976 2-hit combo + Locks party abilities for 1 turn
- 9,976 2-hit combo + Skillbinds party for 1 turn
- Reduce party HP to 1%
- 9,976 2-hit combo + Stops hearts from dropping for 1 turn
- 9,976 2-hit combo + Locks hearts for 1 turn
- 14,964 3-hit combo + Reduces yellow unit damage by 100% for 1 turn
- 14,964 3-hit combo + Weakens Yellow panels for 3 turns
Whenever possible, try to unleash your BuYeoGu/NYGangrim + YakYong combos to burst him down, assuming he’s not using any detrimental attack patterns like 100% mitigation or lethal counter. Thankfully, he does not have any regeneration attacks so as long as you’re dealing damage, you’re slowly progressing. There is no rushing here since there is no instakill, but it hits very hard non-stop every turn. If you can squeeze even a little bit of HP out of every Fever or chain… You should probably do so.
When you finally manage to defeat him… Congratulations.
Now here’s your options!
You either go through the pain of running this ultimate until you get 98 more drops, grind him in Omega mode (good luck, whales), or… Just use Cost 50 nurupons to get him to bugmax. Personally, I’d just bugmax a BuYeoGu, get a 2 YakYong + 1 NYGangrim lend and clear him once. NRNR style.
:whalethink:


