Creating a formation of ships with complementary buffs and stats is one of the most important and subtle skills one must learn while playing Azur Lane.
It requires reasonably exhaustive research and consideration, but it’s the difference between forming an acceptable fleet and a superb fleet. Often, ships’ stats will cancel one another out or make one or the other redundant. For example, if one were to put the Saratoga in their formation, there would be no need to include the Lexington, as both possess the Fleet Carrier stat, but only one of them can use it in the same formation.
With only six ships in a formation, not a single stat should be wasted. Different formations will make a player adept at accomplishing other goals, but understanding the base principles of formation creation is vital.
Contents
Anchor Ship
The first step in choosing a formation is to choose one’s “anchor ship.” This ship should be the root for all the other selected ships in a formation, a ship with buffs that can benefit the largest number of ships. All five of the other ships in a formation should complement the anchor ship directly.
One of the most popular and effective formations is the so-called Fletcher Fleet. Fletcher is the anchor ship with her “Sister’s Temperament” buff that increases Firepower and Evasion for all fletcher-class Destroyers. This makes for a highly mobile, fuel-efficient, and hard-to-hit fleet, particularly popular among beginners.
A more complex example is using one but two anchors: Z1 in the front line and Graf Zeppelin in the backline. Z1 includes the buff “Z Vanguard,” which increases Firepower and Evasion for all z-class Destroyers. Graf Zeppelin consists of the “Iron Blood Wings” buff, decreasing the damage a ship with the Iron Blood buff can take. So if a player also adds Z23 to their formation, Z23 by itself gets increased Firepower and Evasion and decreased damage–buffing both offensively and defensively.
One of the best hints for finding a stable anchor ship is observing if the buff in question benefits all the class ships, as Z1 and Fletcher do. This allows the anchor ship to buff herself alongside the other ships, making for an optimally effective buff.
Secondary Ships
In addition to complementing the anchor ship, the most crucial aspect in choosing a ship for a formation is to make sure the ships complement one another and their roles.
For example, it’s a good idea to include
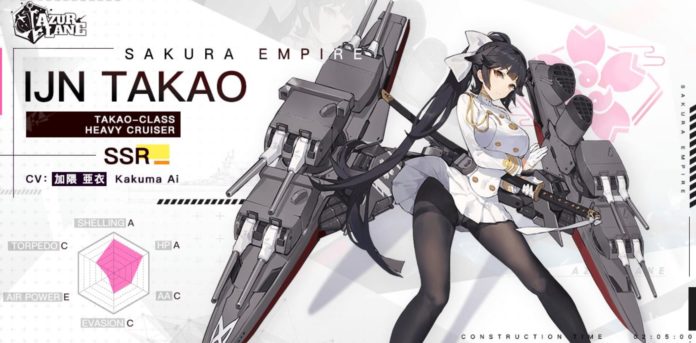
- Tank with Hit Points and defensive stats to absorb damage such as Takao or Portland Retrofit.
- A ship with heavy offensive capabilities (the damage dealer) such as Queen Elizabeth or Hood.
- A repair ship to fix damage (the healer) such as Unicorn or Akashi.
- An aircraft carrier, for enemies with lower Anti-Air stats, like Enterprise or Essex.
- Or a ship with a specific tool for specific purposes (the skill monkey) such as Helena, who makes all on-screen enemies take extra damage, or Phoenix, who can regenerate from damage.
Which skills one needs will depend on the type of mission one plays. However, creating the most balanced fleet by using ships with the most diversity tends to be the safest strategy.
Positioning
Once one has chosen the ships to make up one’s formation, the next step is to be very careful about where to place the lineup ships. For example, some battleships have a barrage weapon that is most effective when the ship is shooting from the middle position; placing the ship on the right or the left makes the barrage much less accurate. Or for the vanguard group of the formation, the leftmost ship tends to take the most damage, making it the best spot for a tank or at least the worst spot to place one’s weakest ship, while the middle position tends to take the least damage.
One also wants to be mindful of which types of the ship go in which group of the fleet. The main fleet, or the backline, is prudent to include one battleship or battlecruiser (deal heavy damage in a small area) and one aircraft carrier (deals moderate damage to a large area). For the vanguard fleet, or the frontline, it’s best to, at minimum, include one battlecruiser and one destroyer, as the latter deals heavy damage but with lower defenses while the former deals moderate damage at higher consistency and with stronger defenses.
Similarly, the best strategy is to mix up offensive capabilities depending on one’s opponent’s defensive strategies. When an enemy spreads their ships far apart, airstrikes are the most effective attack, but when against a single enemy with high Hit Points like a boss, salvo attacks are the smarter tactic. And torpedoes are the preferred attack for an up-close enemy.
One final aspect that has previously been mentioned but easy to overlook is fuel efficiency. While the Cost stat is not as glitzy or glamorous as the defensive capabilities, the weapons, or the buffs, fuel efficiency is the method one uses to level up. It’s how a player outlasts an enemy, the key to winning the long game. However, when against less fuel-efficient teams with heavy hitters, fuel-efficient teams can also get stuck and stagnate, so it is smart to have a backup team of gas guzzlers to win the big battles. If one wants a single team, it is probably smartest to include one heavy hitter and make the rest of the team fuel-efficient.
Types of Formations
There are three different formations one can use, and one should know which style of formation they are using and for what purpose.
Single Line Assault: increases Firepower and Torpedo 15% but decreases Evasion 10% [vanguard only]
Double Line Advance: increases Evasion 30% but decreases Firepower and Torpedo 5% [vanguard only]
Circular Defense: increases Anti-Air 20% [no penalty, whole formation benefits]
Stats
Hit Points – Firepower – Anti-Air – Anti-Submarine Warfare – Luck – Armor – Torpedo – Aviation – Reload – Evasion – Cost


