Sync Grid Build Guide + Autofarm Guide
(Please be patient for the 7 new ones, autofarm covered already)
Hello, Hugo here again to share some info about the newly added feature Sync Grid. This article will illustrate the priorities you should draw regarding how to spend you energy in the most efficient manner. Feel free to mix n’ match as this is personalization in the end.
As a general rule of thumb, aim for the “big perks” like additional passives and draw a pathway such that you can reach as many of the most advantageous ones (e.g. Flint’s Endurance) as possible.
When paving the pathway, keep in mind that move power is generally > stats in terms of additional damage so you might want to focus on those. If you want further explanation, check out this link that gives a rough idea of the damage formula in this game: https://pastebin.com/VNGeF8AH
As for grids to avoid, probably those with (insert buff) MP refresh, as more than 2 buffs is for the most part superfluous, with +4 being not much different from +6 and only a 20% increase in crit rate for +2 vs +3, and it’s a “chance” for a limited thing. (51% chance to get at least 1 extra buff, which isn’t reliable to say the least, assuming level 3) Unlocking those would be wasteful energy usage unless on specific support pairs. (This is not true for Battle-Villa-oriented builds)
There are 4 “major pathways” you can choose for each character and perks on the same pathway offer similar stat benefits for the most part. For 60 energy, you should be able to have 1 major pathway (that you can have all the big perks) and 1 minor pathway (where you can get 1~2 big perks)
Contents
Flint Priorities
Flint is a mixed attacker that utilizes both of his attacks so I would suggest against heavily investing into one move. Meanwhile, the other perks he gets are extremely helpful, so the main focus would be to get more passives for him. (DeNA defo has some sort of bias for this dude)
- Endurance (7 energy + 8 to reach that point, avoiding the 7 energy for MP refresh). No questions here, one of the most broken abilities in the game and part of what makes Kris (the only good striker to have this ability) so good. Surviving an additional hit is huge and makes him deal 1-2 more big hits or even get in a sync move.
- Sharp Entry (15 energy + 5/7/8 to reach that point dependent on preference, 5 energy is cheaper and requires 4 to be unlocked in conjunction but 7/8 offer more desirable stats). This allows Flint to reach 80% crit in just 1 turn and allows him to max his crit. Extremely helpful in helping him get onto the field quicker.
- Speedy Entry (5 energy). A sharp increase in speed helps Flint get in 1~2 more attacks in and bolsters his already high damage output in the long run. It also makes him completely self-sufficient and makes him a Pseudo-Kris if the previous 2 abilities are unlocked.
- Critical Strike (12 energy, only get this if you get 2). Not as prominent as Bruno’s passive which makes his damage rival even Olivia’s, but flat multipliers like this are extremely prominent nonetheless. Should (theoretically) boost his overall damage output by 10% for all crits (which is bolstered by Sharp Entry)
(Leftover energy = 8 or 6 or 5, choose whatever stats / move power)
- Power Reserves (7 energy + 5 to reach that point). Much more helpful now thanks to Endurance passive, though there might be insufficient energy to reach there.
- Fire Blast Accuracy (5 energy + 4 to reach that point).
- Fire Punch Move Gauge Refresh (6 energy + 7 to reach that point). Allows him to somewhat spam powerful 2-bar moves, which is a decently useful niche. More valuable if used in conjunction with the move power increase.
- Agile Entry (7 energy). A +2 to evasion is only ~25% dodge rate, and while it works well in conjunction with Endurance, co-op enemies switch target every 3 turns so you won’t be getting attacked after Endurance in most cases anyway.
Personal pathway (edited, due to miscalculation): 1 + 2 (8 energy route) + 3 + 4 + (Defense +10, Speed +5) for the 5 energy surplus
Alternatively, if you care for accuracy: 1 + 2 (7 energy route) + 3 + 6 x2
If you like punching: 2 (5 energy route) + 3 + 4 + 7 +
(Fire Punch Power x5, excluding the most expensive one)
(Dedicating a build for Fire Blast is bad because you can’t spam it unlike Fire Punch and Crits offer much more than say, MG refresh on Fire Blast because you can’t get the return as often, which rounds up to be just 0~1 fire blast(s) of extra damage, which is a lot less value than what crit buffs give you, as well that BP boosts on Fire Blast have marginal effects compared to other multipliers as Fire Blast has an already high BP. This is however a valid substitute set as of being stuck at 2/5)


People who gamble Careful investors Mike Tyson
Flannery Priorities
There are mainly 2 approaches for Flannery. First is Ember spam to deal as much damage as possible and second is using the nifty Pass it Up ability she gains from the grid to support the team, which forms a dangerous combo with Impervious (some of you forgot she had that probably lol). However, she can’t kill herself for momentum like Phoebe which is an issue. As for ember, with investment on her grid, she can potentially do an incredible amount of damage by spamming high-powered embers (thanks to her board being filled by ember power-ups) if the stage allows her to do so and if the enemy is burnable (which increases her damage further due to Burn Synergy).
- Pass it On (10 energy + 9/13 to reach that point). A very unique trait that makes her take on the support role much better by passing stat buffs onto teammates. She also isn’t very replaceable in this niche which is nice (Phoebe is still superior due to reasons mentioned above but she doesn’t have Impervious).
- Will-O-Wisp Accuracy (7 energy + 3 to reach that point). Makes her do her designated job that much better (which is to burn people) without having to worry about misses.
- Fortuitous (10 energy + 15 to reach that point). Can give nice boosts to team members if lucky, other than just spA, crit and defense. Also works well with Impervious if she survives long enough.
(Leftover energy = 9 or 5, dependent on pathway, can get a big perk)
- X Sp. Atk MP Refresh (7 energy + 4 to reach that point). In conjunction with Pass it On, can potentially give +3 spA to team members instead of the usual +2. Unfortunately there isn’t enough energy to grab this if the first 3 is chosen.
- Too hot to Handle! MP Refresh (7 energy, on one of the pathways for Pass it On). Worse than 4 as only +1 crit boosts can be passed even if Flannery is at +3. More Defense isn’t terribly necessary but this is chosen as the pathway to Pass it On allows us to have this.
- Ember Move Gauge Refresh (6 energy + 7 to reach that point). Makes her essentially able spam moves with only enemy turn as the limitation. Helps in getting the sync move up faster for allied pairs.
- Will-O-Wisp Move Gauge Refresh (5 energy). “Nice to have” and makes her be able to do something occasionally after burning the enemy.
Support route: 1 (13 pathway, which gives us 5) + 2 + 3 + (Speed +5) for the 2 energy surplus
Ember spam: Increased priority on Ember Power, Burn Synergy and Critical Strike in order to maximize her damage. The objective is to burn an enemy and spam hyper-powered Embers and Sync on it if lucky. Go for this if you prefer doing things the Scandinavian way (more damage).


Fun and Games Mom Scandinavian
Steven Priorities
Behold our gachas’ first expanded grid, and a pretty good one too! While not as flashy as other expanded grids at first glance, Steven’s grid gives him a lot more versatility than one would expect. Aside from powering up his already powerful mega, he has access to a great pre-mega phase too thanks to the grid, which solves the fundamental problem of mega-reliant pairs like him. There are mainly 2 routes to choose from, which is powering up his pre-mega phase so he can stay in for the whole battle, in which case you invest in Meteor Mash for a semi-spammable move to build up sync while grabbing some potential attack boosts or powering his mega phase up even further, by investing into Iron Head.
Pre-mega Phase route
(Pick this if you plan to lead with Steven, BV-friendly)
- Bullet Punch: Eagle’s Eye (10 energy + 6/18 to get to that point). This one is a must-grab regardless of what kind of build you’re doing, as it makes Bullet Punch essentially an attack and Dire Hit in one. This solves Steven’s problem of limited crits from his trainer buff, and makes his total damage output much higher in the long run. 3 uses of Bullet Punch boosts his crit rate to 100%, which then he can use the gauge regenerated in the meantime to use crit iron heads even after his trainer buff uses are gone.
- Haymaker (10 energy, on the pathway to 1). Is very valuable in this build as it works splendidly with Meteor Mash spam. At +6 Attack, the sync move power is doubled, and reaches an overwhelming 384 power at 5/5 (To put it into perspective, Explosion has 400 power in this game) that uses Mega Metagross’s gargantuan Attack stat and at +6. Should you feel safe, you can even forgo one endure use to make the sync sure crit, which makes it deal an absolutely astronomical amount of damage.
- Meteor Mash: Move Gauge Refresh (6 * 2 energy + 4 energy to get to that point). Is mandatory in order for Steven to spam Meteor Mash properly due to the lack of speed buffs and move gauge refills. Also greatly helps out his pre-mega phase should you decide to lead with him, as using Iron Head will make him run out of gauge in 2 turns flat.
- Meteor Mash: Swag Bag (10 energy, accessible if you get 3). Makes it that much easier to gather Attack boosts early from Meteor Mash and boosts Steven’s contribution early-to-mid game if you were to lead with him.
- Meteor Mash Power (14 energy to take them all, 2 nodes are forgone in the recommended build in favor of 1). Self-explanatory, Meteor Mash is used in favor of Iron Head to build up sync move and try to gather attack boosts pre-mega. Boosting Meteor Mash’s power makes Steven have serviceable damage output in his slow startup phase.
- Recuperation (8 energy, on the pathway to 1). Useful in situations where Steven has taken quite a few hits pre-mega and makes him less reliant on the endure on his buff to survive in the mega phase.
- Sync Move Power (5 energy, on one of the pathways to 1). Works very well with 2, and you’ll be using sync with Steven anyways, as well that this provides a good pathway so this will be the first time I recommend grabbing this on anyone.
- Force Field (8 energy + 12 to get to that point). Boosts Steven’s survivability in pre-mega and mega phase as well as teammates’, but is too far away to grab which gives it a huge opportunity cost.
Personal Pathway: 1 (18 energy route, which gives us 2 and 6) + 3 + 4 + (4 nodes of MM power)
Mega Phase route
(Pick this if you’ll switch Steven in mid-battle to sync)
- Bullet Punch: Eagle’s Eye (10 energy + 6 to get to that point). This one is a must-grab regardless of what kind of build you’re doing, as it makes Bullet Punch essentially an attack and Dire Hit in one. This solves Steven’s problem of limited crits from his trainer buff, and makes his total damage output much higher in the long run. 3 uses of Bullet Punch boosts his crit rate to 100%, which then he can use the gauge regenerated in the meantime to use crit iron heads even after his trainer buff uses are gone.
- Iron Head Move Guage Refresh (6 energy + 12 to get to that point with 2 Iron Head Power nodes). Steven primarily uses Iron Head post-mega, and this helps out with his lack of speed buffs and gauge refill (after exhausting Bullet Punch).
- Iron Head Power (10 extra energy to get them all, accessible via 2)
(Leftover Energy = 16, choose desirable stats or pick up 1 or 2 passives)
- Haymaker (10 energy). Still good here as Steven can get his own attack to +4 which raises sync move’s power by ~60%. Though not as prominent here as in the first build, so stats can be picked instead depending on choice.
- Buffs MP Refresh (7 energy + 4 to get there for either one). 51% for either +6 Attack instead of +4 or an extra Endure.
- Unyielding (10 energy)
Personal Pathway: 1 + 2 + 3 + 4 + (Attack +5 * 2, HP +10) for the 6 energy surplus)


Meteor Prod Basically Blue
Synga Elesa Priorities (Incomplete)
Synga Elesa is a unique support indeed. Many playstyles are given rise just by Breathtaking! alone, and her own grid is catered towards evasion that works alongside her passive Look Alive. Due to Thunder’s high power and her ability to boost accuracy as well as spA + crit buffs, she isn’t too bad in dealing the pain herself despite her support status. Still though, she couldn’t really measure up to top strikers so her supportive properties are usually focused on instead. Thanks to her access to Ridicure, she can play a role of an evasion tank, while trying to support the team by drawing aggro and/or spreading paralysis, or even try to deal damage. Still, bolstering her supportive capability is often the biggest priority, as Breathtaking! is the biggest reason to use her in the first place.
- Breathtaking! MP Refresh (7 energy + 4 to reach that point). Mandatory on all builds, even offensive builds. Breathtaking! is the biggest reason to use her in the first place, and a faster sync = more damage because you get a 1.5x damage boost after sync move. Besides, having +2 or +3 accuracy by using BT! on yourself twice is very good for Thunder’s bad accuracy, especially if you forgo Thunder Accuracy grid (which she can afford to do so).
- Third Act (10 energy + 15/16 energy to reach that point). Makes quite an impact in co-op where all allies benefit from a faster sync, and mega pairs especially appreciate that. Bolsters her overall support prowess, and can be used in conjunction with Ridicure and Breathtaking! Selfless to try to proc it again if you miss the chance (heal past “pinch” point and get back from an enemy attack, aggro is guaranteed thanks to Selfless).
- Breathtaking! Selfless (5 energy, accessible via 1). Makes her contribute even more by soaking up hits for teammates. With the help of MPR, she may even be able to proc it a second time after aggro goes away from her, making her soak up even more hits.
- Leg Up (10 energy, acessible via 2). Helps sync
Oak Priorities
I am gonna be honest here. This grid, while it looks flashy, is a tad overrated as it doesn’t really fix Mew’s problem of not being particularly good at anything which makes it end up being mediocre. It lacks a strong and uncontested specialization that the grid doesn’t really provide. It is advised to invest in the grid such that Mew can be as unique and not outclassed as possible, and there are two approaches to do so in my opinion, which is sync nuking and Thunder spam, which are semi-unique options for Mew.
Why is Thunder the choice instead of Blizzard or Fire Blast? To put it simply, there are better options for Ice AOE attackers and Fire ST attackers, while there isn’t a better Electric ST special attacker (Pikachu’s power only comes when he reaches low health). For Fire, we have Infernape who boasts a much higher SpA stat, have access to crits and a lot of perks from his grid. For Ice, Pryce does more damage from crit, and has higher accuracy. But the actual problem lies in the fact that they can deal the pain immediately as opposed to Mew needing to wait 9 turns before any solid contribution (the dilemma of mega pairs again). Plus, Thunder has higher base power than Fire Blast, and has a high paralysis chance with HE access (40% total) to work with Dirty Fighting.
Sync nuke route
- Inertia (8 energy, accessible via 2). Mew itself has a speed buff, so by default this ups the sync move power by ~60%. If you’re lucky with the random stat boost from A World of Dreams! you can even double the sync power for even more damage.
- Sync Move Power [(5 energy + 3 to get to that point) * 2]. Self-explanatory. The aim of the build is to deal as much damage as possible with the sync move.
- Blind Spot (8 energy, accessible via 2). Thanks to Mew’s access to Agile Entry, it changes from just having a chance to boost sync to guaranteeing at least a 33~40% buff. If you’re lucky to get 1 evasion buff (or 2 which maxes it out), you’ll be looking at +5 evasion, which will grant a >80% buff to sync move power. Combined with 1, it makes the sync move incredibly powerful.
- Agile Entry (10 energy + 6 to get to that point). Works well with 3 as stated before, and somewhat boosts Mew’s survivability thanks to its natural bulk allowing it to stay in and take a few hits.
- Special Reserves (6 energy + 6 to get to that point). Might get spA to +6 before sync in certain situations, however can be hard to proc due to Mew’s natural bulk.
- First Aid (7 energy, accessible via 3). The ability itself is very useful for Mew who can stay in for even longer thanks to its bulk making enemies have difficulty chipping it down, but is all but unnecessary to this build’s purpose, since Mew is disposable after the sync nuke and doesn’t really need to stay in.
- Swift Move Gauge Refresh (6 energy + 2 to get to that point). After a bit of testing, I found out that with 2 speed buffs + 2 spare turns to buff instead of attack, Mew never runs out of gauge before sync as long as the enemy attacks once during the entire early game.
Personal Pathway: 1 + 2 (both nodes) + 3 + 4 + 5
Thunder Route
- Thunder Accuracy (7 energy + 6 to get to that point). Mandatory for this build for obvious reasons. Boosts Thunder’s accuracy to a reasonable 90%.
- Thunder Power (6 extra energy to get them all, one node is covered on the pathway to 1)
- First Aid (7 energy, 5 to get to that point from 2). 40% HP means a lot more survivability and staying power thanks to Mew’s natural bulk. Works especially well with Special Reserves so that Mew can live longer to utilize +6 spA, especially if Mew got a defensive buff via A World of Dreams!. Mew’s speed buff also makes him be able to somewhat sustain its gauge while it is staying in.
- Special Reserves (6 energy, accessible via 2). Combined with 3, Mew gets a lot of mileage from being able to pump out a few attacks with some more extra spA. Though +6 isn’t too different from +4, Mew being able to survive for a long time in addition to having speed buffs makes the extra damage accumulate.
- Dirty Fighting (7 energy + 7 to get to that point). Ironically enough works much better with Thunder than its neighbouring Fire Blast nodes due to Thunder having 30% paralysis rate vs Fire Blast’s 10% burn rate. Can be combined with 6 to great effect, as Thunder will then have a 36% chance to Paralyze the target immediately after factoring in accuracy (40% if Mew gets an Acc buff).
- Hostile Environment (8 energy, accessible via 2). Works well with 5, and makes Mew support the team better with status spreading.
- Weather Surge (7 energy + 7 to get to that point). Situational at best and not recommended.
Personal Pathway: 1 + 2 + 3 + 4 + 5 + 6


Erika Priorities
Our second Tech grid to drop, though not as influential as the 1st one. It still saves Erika from being extremely situational to being somewhat usable (though still situational). Thanks to her only having 1 attacking move, there are buffs for energy ball everywhere throughout the grid, and that helps her a lot in the damage department. As a tank, she has high staying power thanks to her great bulk and defensive buffs and can do a bit of damage now too thanks to grid boost and spA buffs of her own. Since she is kind of a one-trick pony, we’ll have to focus on that one trait so she gets the most mileage out of it (which is to paralyze someone and stay in as long as possible while doing damage with energy ball, potentially getting to sync). Stun spore is only ever used once to paralyze the enemy so any buffs on that is not worth it.
- Paralysis Synergy (10 energy). Lets her deal up to 50% extra damage while being self-sufficient thanks to her access to reliable paralysis. A must take in order for her to do more than just paralyzing a mon.
- Energy Ball Move Gauge Refresh (5 energy * 3 + 5 to get to that point). Getting multiple Move Gauge Refresh nodes is slightly different to what is known on paper as the chance is rolled separately (credits to Faction for confirming this) which means instead of having a 60% to refill one gauge if you get all 3, you have a 48.8% to refill at least one gauge instead, with 0.8% chance to refill 3 gauges, 9.6% chance to refill 2 gauges, and 38.4% chance to refill 1 gauge. Taking these are crucial to let Erika deal as much damage as possible during her period of stay as she has no speed buffs, meaning that she’ll have to rely on this in order to spam energy ball. The gauge refresh can also potentially snowball as recovering gauge = more energy balls = more chances to recover gauge, especially since one energy ball can potentially recover more than one gauge (albeit rarely).
- Energy Ball Power (18 energy to get all of them).
- Energy Ball On a Roll (8 * 2 energy, path covered by 3). Raises the chance of dropping spdef to 50% if both spaces taken. Actual effect on damage is however skeptical due to enemy mitigation passives. Still, it is a nice boost to her damage given the right circumstances.
Personal Pathway (and really the only good one): 1 + 2 + 3 + 4 – one of the Energy Ball Power spaces due to 5 energy malus.
Additional note: Flabbergast on Stun Spore may sound good, but it’s only a 20% chance (occasionally) on a move you’ll only use once. You can’t spam SS either as it only rolls if the move is successful (i.e. if the enemy isn’t already paralyzed). By extension, Confusion Synergy is also bad due to relying on this ability. Even if you somehow proc the 20% chance, you can’t re-apply it which is another issue. Same goes for Satisfying Snarl, which can only be proced once.
Note #2: Her energy ball spam is greatly limited at 2/5 due to 2 of the refresh spaces being locked behind 3/5, so you might want to take that into consideration while prioritizing which grids to focus on first.

The one and only
Pikachu Priorities
This one is a very tough call as different pathways offer drastically different results. There’s the healer role, the gen 6 endure BS role, the annoyer / paralyzer role and the machine gun role. The bigger issue here is “Master of None” so I will try to gather every useful and unique traits on each pathway. No actual “Priority” will be given here as it heavily depends on playstyle and there’s no objectively good ones. Each role has severe downsides that keep it from being sublime.
Healer + Annoyer role (role compression, BV-friendly)
Downside is you can’t do much because you are still a Pikachu, and omnipresence of immunities (Tech problem). You are to spam Thundershock in order to maximize the chance to paralyze the enemy.
- Potion Master Healer (10 energy * 2 + 18 to get to that point)
- Potion MP Refresh (7 energy, but on the pathway to 1)
- Thundershock Hostile Environment (5 energy * 3 + 6 to get to that point)
- Unyielding (11 energy, but on the pathway for 1)
Endure BS role
Downside is chance. You want 1 Potion Master healer so that 2 potions can get you up to full, letting you regain endurance as you switch out. Unyielding for obvious reasons and slap in Power Reserve 9 so you can do some damage.
- Unyielding (11 energy * 2 + 7 to get to that point)
- Potion Heal Master (10 energy)
- Potion MP Refresh (7 energy, on the pathway to 1). Allows for multiple endurance chances if you’re lucky.
- Power Reserve 9 (12 energy + 7 to get to that point)
- Speed +5 (2 energy surplus)
Machine Gun role
Heavily dependent on low health to deal damage, and there are much better strikers. Go guns blazing by investing heavily into offense and deal as much damage as possible in a short time. Power reserves are a must. Thunderbolt gauge refill to significantly bolster attack spammability. Para syn gives a hefty but situational boost.
- Power Reserve 9 (12 energy + 14 to get to that point)
- Power Reserve 5 (10 energy, on the pathway to 1)
- T-bolt Move Gauge Refresh (6 energy, + 9 to get to that point)
- Jump Start! MP Refresh (7 energy, reached via pathway to 3). Allows Pika to potentially get to +6 spA / +3 speed for more damage output potential.
- T-bolt Power (get all but 1 of them with the 12 energy surplus)


Pacifist Neutral Genocide
Clair Priorities
As things stand right now, Clair is hopelessly outclassed by Lance in most of if not all of the situations she’ll be of use in. As such, we need a distinct and unique niche for Clair to abuse in order for her to sometimes be used instead of warming the bench for all eternity. Luckily, the extended grid provided us with just that, allowing her to abuse rain similar to Kingdra’s main-game counterpart. We’ll be focusing on Rain abuse for her even though it’s situational at best, as pumping her with standard move/stats upgrades wouldn’t make her measure up to Lance’s power either. Zinnia may be another weather abuser of similar role but she also lacks crit, which is a huge point in Clair’s favor. Paralysis synergy on Draco Meteor may sound good on paper but it is not worth it to waste 1-3 Dragon Breaths’ worth of gauge to try and paralyze something (if it isn’t immune to it anyway) when you can just use another draco meteor or two to offset any bonus damage from the para synergy.
- Raging Rain (9 energy + 5 to get to that point). Makes her do 50% more damage in rain which makes Draco Meteor reach the power of Hyper Beam at +2 and in rain. Combined with crit (Dire Rain and/or her trainer buff) it can even surpass Lance’s damage. Of course, rain is still situational. Not award-winning, but redeems her somewhat and thus focused on.
- Dire Rain (10 energy + 4 to get to that point if you take 1). Ditto, and lets her crit without any prior setup. With 1 extra turn of setup she reaches a comfortable 80% crit rate which even allows her to offset/ignore Draco Meteor’s SpA reduction.
- Draco Meteor Accuracy +10 (8 energy + 5 to get to that point). Makes Draco Meteor 100% accurate and is relatively cheap which wouldn’t make you miss out on any Draco Meteor power boost. Makes you plan your buff / attack flow better as a side benefit as you don’t have to worry about missing and messing with how you would want to manage spA / utilize the rain as much as possible.
- Draco Meteor Power (20 energy to get them all, just 15 extra energy needed if you take 3). Taken over Dragon Breath power by virtue of being significantly stronger and gauge-efficient.
- Special Reserves (7 energy + 7 to get to that point). Theoretically gets her a +6 spA boost in a pinch. Very helpful under normal circumstances, but leads to wastage if spA is not managed well (such as triggering it at -4 spA, leading to only a +2 spA boost). Should be triggered normally if Clair doesn’t get one-shot or barely gets 2-shotted (which isn’t often thanks to her okay-ish bulk)
- Draco Meteor Move Gauge Refresh (6 energy + 10 to get to that point). 40% this time around which makes it quite a bit better than what we get for Flint, also cheap for what it is but passed due to better options. Can help Clair dish out 1~2 more Draco Meteors.
- Draco Meteor Stat’s Quo (10 energy + 12 to get to that point). Can be useful for Clair to maintain a buffed spA and deal ~1.2x damage next turn, but is only 40% and isn’t very efficient if put into perspective. Also high opportunity cost due to the 22 energy spent.
- Stamina Reserves (7 energy + 16/17 to get to that point, 10 if you take 5). Very helpful in helping her dish out 2 more Draco Meteors but takes a significant amount of energy to get there, and too much is forgone if we were to consider this option.
- Defensive passives (Dragon Guard / Rain Gear). Dragon Guard makes her have effectively no weakness, but she isn’t meant to take hits anyway and Dragon-type attacks are way too far and between (and often too powerful so she gets one-shot anyways) for this to be of any worth. Rain Gear is a situational defensive buff that grants Clair close to nothing unless she is prone to being one-shot (which again, isn’t often thanks to her okay-ish bulk and nothing that lowers her own defenses). She also has no sustainability to speak of so defense doesn’t mean much for her.
Personal Pathway: 1 + 2 + 3 + 4 + (SpA +5 * 2) for the 4 energy surplus
Special Reserves: 1 + 3 + 4 + 5 + (SpA +5 * 2) for the 4 energy surplus
Gimmick Set: 5 + 8 + Dragon Breath Hostile Environment (shortest route) + Draco Meteor Para Synergy (on pathway to 8) + (Draco Meteor Power +4, Speed +2) for the 6 energy surplus
(How it works: try to paralyze the boss, set up crit rate while using Draco Meteor if possible, get hit to low health, start spamming +6 crit para- boosted Draco Meteors with the Reserves Passives)


Hope you get a Winona Pika 2.0 Screw the Rain, team IGN
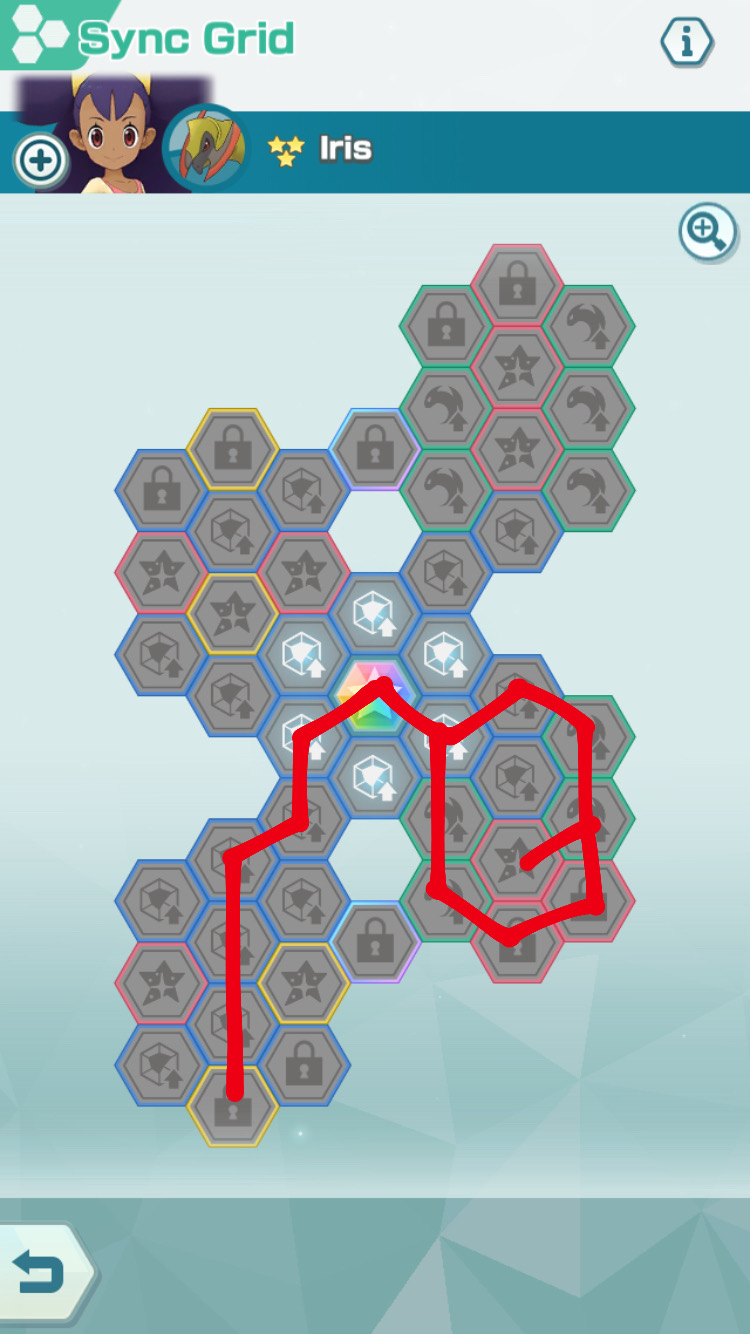
Iris Priorities
Iris’s grid is weird, as in there are many tools for her to utilize but the tools themselves have bad synergy. It’s somewhat similar to Pikachu’s situation except her potential isn’t as hard to exploit (Pikachu needs low health and/or paralysis) but the payout is slightly less effective/valuable. Her buffs were phenomenal but Outrage had such a serious drawback, and the grid doesn’t alleviate this a lot, so she’ll have to take advantage of whatever she can. There are mainly 2 routes for us to choose, namely the Dragon Claw spam and the Outrage route.
- Speed Entry (5 energy + 13 to get to that point). Gets her to +3 speed and +2 crit after just 1 buff which makes her good to go on the offense after just 1~2 turns of setup (with X attack or not).
From here, you can focus on either Dragon Claw or Outrage.
Dragon Claw route (consistency, less effective output):
1 + Everything in the top right part of the grid except the bottom Atk +5 (18 + 42 energy)
Outrage route (high-risk, high-reward):
1 + Everything in the bottom right part of the grid except one Spd +5
(18 + 42 energy)
To give you a perspective of Dragon Claw vs Outrage, an Outrage in confusion does around 3 times the damage of a Dragon Claw (assuming both were fully buffed by grids). However, Dragon Claw has a higher crit rate and can be maxed in 1 buff vs Outrage’s 80% if you have 1 buff on. Meanwhile, you have a ~30% chance to hit yourself with confusion, wasting 3 gauges in the process. Outrage also costs 1 more gauge but has a higher chance to refill move gauge (51% chance to refill at least one gauge vs 36% chance to refill at least one gauge, but you might use Dragon Claw more frequently). In simpler terms, take Outrage if you feel like playing risky, Dragon Claw if you prefer consistency.
Should you want other options:
- You’re going Down! Durable (7 energy + 8/10 to get to that point). Gives a rather high chance to grant Iris Endurance (64% between using two trainer buffs to proc at least once) but contradicts with confusion (Fainting oneself due to confusion damage at 1 HP). Better used in tandem with Dragon Claw, and can be grabbed while forgoing some move power (but move power is important for Dragon Claw) or Speed Entry.
- Quick Cure (7 energy + 5 to get to that point). Grants Iris a free turn of Outrage, but doesn’t synergize well for confusion’s damage boost granted by Confusion boon. Does nothing for Dragon Claw builds. Great for hit-and-run strats where Iris is only used to clear sides and then switched out / sacced to enemy sync (such as in Rosa EX).
Avoid: Carry On/Unhindered. Don’t get these as they bring very little to the table. Carry On is basically Moxie, but Iris can already buff her own Attack, and waiting for a side to faint is bad when you want to buff right away to maximize damage. Unhindered is just bad when Iris has a strong crit buff and crits ignores damage reduction anyway.

Useless on auto You punch yourself
Rosa Priorities
The first ever support grid to have dropped. The sensible thing to do would be to focus on bolstering her supporting prowess, but surprisingly enough she does decently for the damaging field too thanks to the high power of Giga Drain, and her atrocious SpA being (somewhat) fixed by gears. Anyhow, she doesn’t measure up to other strikers so the best option would be full support or a mix of offense and support (with sustainability added thanks to Giga Drain’s heal and the Master Healer grid for said move). Her job is still the same, buff SpA, energize and then do whatever is best for the team. The taunt works very well for her in this regard, allowing her to sponge hits while supporting.
(Due to Giga Drain: Master Healer being locked at 2/5, we’ll assume it heals 30% of damage dealt for now)
- Time To Energize! MP Refresh (7 * 2 energy + 3/6 to reach that point). Simply makes her do her primary role better, which is to refill move gauge for teammates. With both spaces unlocked, she has a 36% chance to refresh at least one more time, and a 4% chance to refresh two or more times.
Honestly at this point you don’t need any more things on her grid for her to do well, you can get her as tanky as possible with the remaining energy, but the build I suggest gives her an extra niche.
- Time To Energize! Selfless (5 energy, accessible after getting 1). Makes her able to taunt the enemy at 33% or lower HP once in a battle if she still has TTE uses remaining. Sounds like suicide at first but she can actually get dropped after energizing twice since she did her role already. However, if working in conjunction with 3 (and 4 or 5 if possible) she may be able an extra hit or two despite being in low health (also thanks to her immense bulkiness). With this, she acts as a gauge refiller and a damage sponge in one, allowing teammates to go to town. The bigger issue is to actually get her down to low health to make use of this passive.
- Giga Drain Master Healer (6 energy + 6/14/20 to get to that point). This seems useless on her due to her attacking stat being so low at first glance, but the high base power on Giga Drain helps quite a bit, allowing her to reach 200 damage even in Pryce EX, an environment with one of the highest SpDef (without any grid investment). With the 30% healing, even if Rosa only do ~200 damage, she’ll still recover 60 HP which is 10% of her health per turn. This gives her decent sustainability and can help her sponge one or two more hits after triggering Selfless.
- On the Ropes (10 energy, accessible after getting 2). Self- explanatory, and works well in conjunction with 2 and 3. However this is skipped due to getting this forgos a lot of Giga Drain damage which considerably powers up the healing, plus it only works on physical attacks.
- Power Flux (10 energy, on the pathway to 3). Gives a 25~30% boost (test pending on exact number) to Giga Drain and thus the healing. Combined with +4 spA and unity bonus makes Giga Drain do semi-relevant damage and works well with the taunt role as a result, allowing her to heal more thus having a better chance to take extra hits after the taunt.
- X SpA MP Refresh (7 energy (* 2) + 3 to get to that point). +6 SpA is for the most part superfluous, but is an option for her as a pure support role, since her job wasn’t to attack anyway (might end up not using the 3rd anyways in favor of unity building with an attack, though)
Personal Pathway: 1 + 2 + 3 (20 energy route, which gives us 5) + (SpA +5, Giga Drain Power +3) for the 4 energy surplus (BV-friendly, swap out 5)
Pure Support: 1 + 6 + (HP +20 on a route) + (HP +20, Def +10, SpDef +5) for the 12 energy surplus


Juggernaut(?) More Rosa than ever before
Additional notes: Most people opt for pure support role, but really with that you can just get the TTE Refreshes and be done with it. The full grid really only optimizes her bulk, but does nothing for her since she’ll be switched out before fainting in most cases. The build I personally suggest gives her another role that makes her playstyle a bit more varied, instead of just a bulky gauge bot.
Synga Red Priorities
Red is a powerful character, but his grid is so catered towards Flare Blitz, a pretty-much-pointless move, that it can’t really provide much aside from huge Sun potential. Stat’s Quo also remedies his survival issues, albeit randomly. Otherwise, move power is the way to go to attempt to beef up Red’s damage as much as possible, and effects are marginal at best on Blast Burn which has high base power. Still though, it’s better than what offensive stats give you. On the other hand, defensive stats are of huge value to Red due to his immense frailty, and him being HP-oriented. The best thing you could aim for is probably a Sun build or a defensive build. For Battle Villa, a Sun build or a buff refresh build is highly effective for potential damage or recyclability.
A build dedicated to reset-procing MPR in BV is in the images.
Sun / Heat Wave Build (Recommended for no-reset BV)
- Solar Flare (10 energy + 7/13 to reach that point). Boosts Red’s sync move damage into astronomical levels after Sun’s innate boost to fire moves and a 50% boost here on top of that. The huge boost is the sole reason to go for the Sun build (and a lack of other good options, really). In Battle Villa where any warranted support is easily granted, Red’s potential with this build is remarkable.
- My Destiny! Stat’s Quo (10 energy, on the pathway to 1). Very crucial for Red who has severe survival issues, albeit it saves him randomly. If you’re lucky to not get hit after the first buff, and activate this on your second time using My Destiny!, you can get back to neutral defenses, as it returns all lowered stats to normal, even -2. This remedies his issue remarkably, saving him from being 2HKO’d by AOE and sometimes 1HKO’d by strong hits.
- Speeding Sun (8 energy, accessible via 1, or 7/13 energy to reach that point). While Red’s speed at +6 is already impressive, it’s still not enough to spam high-powered moves. This passive helps with that, if only barely, and facilitates him dishing out pain under Sun.
- Heat Wave Power (27 + 2 energy to get them all). Powering up Heat Wave in favour of Blast Burn is to dish out the most damage per gauge (assuming there are 3 enemies), which is very important in Battle Villa.
Pathway: 1 (13 energy route, which gives us 2) + 3 + 4
Sun / Blast Burn Build (Highest Potential Damage)
- Solar Flare (10 energy + 7/13 to reach that point). Basically ditto from the last build.
- My Destiny! Stat’s Quo (10 energy, on the pathway to 1). Basically ditto on every build, and is pretty mandatory on Red’s grid due to lack of worthy options.
- Speeding Sun (8 energy, accessible via 1, or 7/13 energy to reach that point). Basically ditto from the last build.
- Power Reserves (10 energy + 4 to reach that point). Gives Red a nice boost at low health, and easily finds use due to his frailty (not if attacks barely 2HKO him though, which isn’t uncommon, and makes the value of this ability ambiguous). Forgone here in favor of 3 and insufficient energy.
- Blast Burn Power (20 energy to get them all, accessible via 4, or 8 extra energy needed to get to them all). Have marginal effects due to inherently high base power, but still a boost to Red’s most powerful (and most used) attack nonetheless.
Pathway 1: 1 (13 energy route, which gives us 2) + 3 + 5 + (Speed +10 * 2, SpDef +5 on the routes)
Pathway 2 with PR: 1 (13 energy route, which gives us 2) + 4 + 5 + (Speed +10, Speed +5 on the routes) + (Def +5) for the 3 energy surplus
Rejuvenate Build / Defensive Build (Typical co-op build)
- My Destiny! Stat’s Quo (10 energy + 3 to reach that point). Ditto from other builds, remedies Red’s survivability well.
- Power Reserves (10 energy + 4 to reach that point). Gives Red a nice boost at low health, and easily finds use due to his frailty (not if attacks barely 2HKO him though, which isn’t uncommon, and makes the value of this ability ambiguous), taken here due to abundance of energy.
- Blast Burn Move Power (20 energy to get them all, accessible via 2, or 8 extra energy needed to get to them all). Have marginal effects due to inherently high base power, but still a boost to Red’s most powerful (and most used) attack nonetheless.
(Leftover energy = 13, choose which of the two is more desirable)
- Rejuvenate (10 energy, accessible via 2). Helps Red dish out extremely powerful Blast Burns immediately post-sync, though Red living to that point is more often than not the issue. However, it is still worth it even if Charizard faints right after sync + 1 Blast Burn since it’s just that powerful. Without this, Red could very easily fall without being able to do any damage after sync due to his pitiful defenses that are further reduced.
- Defensive Stats (12 extra energy to get them all). Red has 120 base defenses which is pretty terrible (that’s ticketed mewtwo’s defenses). Grid can help him with that and make him live 1 or even 2 more hits than usual, allowing him to dish out more damage.
Rejuvenate: 1 + 2 + 3 + 4 + (Def +5 for the 3 energy surplus)
Defensive Grid: 1 + 2 + 3 + 5
(I perfer this as a general-purpose build)
Essentially Cynthia Zard X trying to be Zard Y


Pray (or Whale) to not (Dedicated reset BV build)
die pre-sync Offensive stats suck Become RNGesus


Pryce Priorities
Absolutely nothing of interest here except icy wind accuracy +5. There are 2 major route options but both of them are very gimped gimmicks. Freeze Synergy may seem nice with 80% boost, but it’s never going to proc. Reason? Freezing is very short on enemies, and freeze damage boost is only good enough for 1 or even 0 icy wind (especially if its animation takes so long). But the biggest problem is, only ice beam can freeze (with Hostile Environment if you so choose to) but you’ll never use ice beam when you can deal damage with icy wind instead. Freeze is also single-target if not Blizzard, so the extra damage on one target amounts to “why not just use icy wind”. And then there’s hail, which could be nice but the only place where Pryce is prominent is when 3 Pryce leads are the go-to choice (event pugs, and there’s no point to doing events in organized groups) which means no one will be there to setup the hail (and things go bad when there are 2 hail leads). Best things to go for? Just straight up Icy Wind upgrades and stats.
- Icy Wind Accuracy +5 (10 energy). Fixes Icy Wind’s 5% miss rate to a perfect accuracy, pretty much the most Pryce can get out of this gimmicky grid. Why did DeNA lock it to sync level 3
- Icy Wind Power (15 energy to get them all). Pryce pretty much is only going to be using Icy Wind (auto or not) so there’s little to no point in investing into ice beam instead.
- Icy Wind Move Gauge Refresh (8 energy). Useful in letting Pryce whip out more Icy Winds by shortening wait time. Also is 40% instead of 30% for Flint’s Fire Blast so that’s nice (Pryce is slower than Flint so I guess that’s why they did it).
- SpA and Speed. (29 energy to get them all) Pryce is meh-ish on both fronts so some of those extra stat could help him out, if just for a little bit.
- (Optional and very dependent on preference) DH MP Refresh and I’ll Teach You a Lesson! MP Refresh (7 energy each) Maxes out his crit and spA to +3/+6 respectively which is nice BUT may mess up auto and/or unity building for 3 Pryce leads as the AI will want to use all buffs possible which leads to sitting on full gauge and slower attacking for Pryce (basically overbuffing)
Personal Pathway (Just Icy Wind and stats, why would you want anything else):
1 + 2 + 3 + whatever stat tiles that are the most desirable
Build 1 vs Build 2: +10 spA vs +17 speed (I prefer spA as I don’t feel 17 more speed would make Pryce build up 1 more icy wind than usual)
Build 3: Takes DH MP Refresh in favor of not-so-important stats, but messing up auto is the dealbreaker for me


Screw those Gimmicks, Pryce doesn’t need no stinking grid
Additional Info
- Every damage-boosting passive = (level * 10)% bonus damage, for example, Flint’s Critical Strike 1 boosts the damage of all his crits by 10%. (Proven from previous tests)
- Any MP/Gauge Refresh has a (level * 10)% chance of activating, which is = 30% (moderately good chance) at level 3. Flannery’s Fortuitous 4 has a “good chance” of activating, which is = 40%. (Not completely confirmed, may be 10% higher than listed)
- Multiple Move Gauge Refresh nodes rolls for the refresh chances separately. This means 2 refresh nodes can potentially refill up to 2 move gauges if you’re lucky instead of an additive chance, but it offers a lower chance overall to refill at least one gauge.
- Multiple passives of the same name on one pair have effects that are additive (not multiplicative): Pikachu’s Power Reserves 5 & 9 give them (50 + 90)% = 140% bonus damage instead of 1 * (150% * 190% – 1) = 185% bonus damage. Test pending on how stacking works with different passives.
- Pikachu’s Potion Heal Master increases potion healing by 10% each, so Potion can potentially become (40 + 10 + 10)% = 60% heal if you invest in both Heal Master passives. (Tested)
- Pikachu’s Unyielding has a 10% chance to activate (small chance = 10%), and increases to 20% if both is unlocked. The extra endure can proc continuously if you are lucky, so assuming you have both Unyielding passives unlocked, you’ll have a 4% chance to survive 2 extra hits after Endurance, and a 0.8% chance of surviving 3. (Tested)
Sync moves based on stat buffs
(For TL;DR skip to the end)
Current list of passives that fall into this: Inertia, Blind Spot, Haymaker
This is a test to find out how “inertia” or “blind spot” works on Mew. Since Skyla (Marley)’s sync/Mina’s sync depends on stat increase/enemy stat decrease, we can assume Mew’s passives on the grid work this way too.
Mina’s sync damage vs UH Tech: 411
Mina’s sync when Brycen at -2 attack: 508 (23.6% increase)
Mina’s sync when Brycen at -4 attack: 692 (68.4% increase)
Mina’s sync when Brycen at -6 attack: 771 (87.6% increase)
Skyla’s sync damage vs UH Tech: 297
Skyla’s sync at +2 speed: 383 (29% increase)
Skyla’s sync at +4 speed: 479 (61.2% increase)
Skyla’s sync at +6 speed: 627 (111% increase)
Marley’s sync damage vs UH Tech: 338
Marley’s sync at +2 speed: 423 (25% increase)
Marley’s sync at +4 speed: 540 (59.8% increase)
Marley’s sync at +6 speed: 608 (79.9% increase)
Skyla’s results seem to have an overall larger increase compared to the other two, so we’ll redo Skyla’s experiment to minimize the impact of damage range:
Skyla’s sync vs UH Tech: 303
At +2 speed: 421 (40% increase)
At +4 speed: 479 (60% increase)
At +6 speed: 627 (106% increase)
Results seem to point to that +4 equates to a 60% increase and +6 equates to a 100% increase. The results of +2 seems very varied, so we’ll try once more to try verifying the result.
Skyla’s damage at +2 speed: (421 for the 3rd time in a row vs 284, pointing to a 48% increase)
Judging from the results from Marley/Mina, 48% seems impossible to be the answer, neither does 23~25%. As a result, +2 is presumably either 33% or 40% increase if we take into account the minimum/maximum impact of damage range.
The most logical conclusion we can make from this chunk of data would be +2/+4/+6 stat -> 33%/66%/100% increase of sync move power. (Edit: credits to u/nothlione for pointing it out, the formula is {Damage * [1 + (Stage / 6)]}, which confirms the aforementioned conclusion. Passives that work in this manner stack with each other additively.
Sync Grid Rankings
(in terms of how much the grid benefits the unit itself):
| DeNA’s son | |
| Phenomenal | |
| Great and integral for optimization | |
| Good and brings huge improvements | Sabrina, Synga Elesa |
| Decent and gives somewhat of an improvement | |
| Okay and provides specialization to warrant usage or improve (still niche if the pair itself is niche) | Synga Red |
| Might as well not have the grid |
Auto Orb Farming Guide
All listed are 100% reliable and work regardless of dupes and potential unless otherwise stated. Will teams may occasionally fail on Tech UH.
Flint: Flint / Torchic / Will (Any UH, no psychic bandana if Tech UH)
Flannery: Flannery / Torchic / 4* Korrina (Tech UH, not always reliable but fast and multi-purpose)
After Ember Power-ups: Flannery / Torchic / Blaine (Any UH, any gears)
Steven: Steven / Hilbert / None (Any UH, any gears)
Rosanta can substitute Hilbert, or Maylene which makes it slower.
Oak: Oak / Torchic / Rosa (Order matters, any UH, preferably Psychic Bandana, replace Rosa with Lyra for faster clears after getting Inertia)
Pikachu: Pikachu / Roxanne / Lt. Surge (Any SH except Support, any gears, UH if gridded)
Clair: Clair / Torchic / Will (Any UH, no psychic bandana if Tech UH)
Iris: Iris / Hilbert / Lt. Surge (Any UH, any gears)
Rosa: None / Rosa / None (Strike VH, no gears, fastest possible setup but still kind of slow)
Erika: Erika / Torchic / Roxanne (Any SH, any gears, UH if gridded)
Pryce: Pryce / Torchic / Will (any UH except Strike, no bandana)
Karen: Karen / Torchic / Will (Any UH except Strike, no gears, if Will is 5/5 Karen must be at least 2/5; 5/5 2/20 or Will gridded, 3/5; 5/5 5* Will, 4/5) Otherwise, replace Will with Roxanne which is slower.
Acerola: Skyla / Acerola / Kris (Support UH, any gears but Flying Bracelet)
People who don’t have Kris: None / Acerola / None on any Hard courses, maxed bracelet of any type, quite slow so it is recommended to just manually farm her
Hau: Hau / Torchic / Will (Any UH, any gears)
Grimsley: Grimsley / Marley / None (Level-Up SH, no gears)


