

Universal System Mechanics
In Dragon Ball FighterZ we are given a great amount of universal mechanics shared by every character in the roster. The goal of this doc is to examine and explain them in great detail.
(Please don’t take this document as “absolute truth”, as any given information here can change on the game’s release, due to most of it being taken from the Closed Beta in September)
(This doc is not focused on individual characters)
(Help is always appreciated if you spot a mistake)
Please credit the authors should this document be referenced.
As of January 22nd this document is undergoing revision against the official release build of the game.
Index
Ways to increase the Ki Gauge 7
Breaking free of Hard Knockdown (being forced to lay on the ground): 14
Dragon Rush (Universal Throw) 23
Contents
Buttons and Directions
First things first, we are going to introduce here all the individual buttons in the game that will allow us to use the different mechanics available to us.
Buttons:
- Light Attack (L): Basic attack. Short but fast.
- Medium Attack (M): Medium attack, usually with good range.
- Heavy Attack (H): Heavy launching attack (Smash).
- Special Attack (S): Ki blast button.
- Z Assist 1 (ZA1): Assist button, allows us to call our first assist character.
- Z Assist 2 (ZA2): Assist button, allows us to call our second assist character.
Shortcuts:
- Dragon Rush (L+M): Universal throw with long startup.
- Super Dash (S+H): Automatic, homing dash that tracks the opponent.
- Ki Charge (L+S): Charges the KI Bar.
- Vanish (M+H): Teleports behind the opponent
- Sparking Blast (L+M+H): One use comeback mechanic that enhances the character)
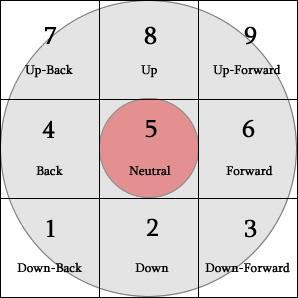
(Directions)
(An airborne move is described with “j.” for jumping)
Mobility
Every character shares these universal mechanics
- Jump: (7, 8 o 9) Jumps towards the chosen direction
- Super jump: (pressing 27, 28 o 29) Jumps towards the chosen direction but with more height.
- Double jump: (press 7, 8 o 9 after a jump or a super jump). Jumps twice in the given direction
- Forward dash: (press 66) forward sprint limited in distance. You can block immediately after using it.
- Back dash: (press 44) every character has a backdash, but it remains to be seen if they have invincibility (which I doubt due to the long distance they cover)
- Air Forward Dash: (66 while airborne) Universal airdash. You can block or perform an action immediately after doing it.
- Air Back Dash.: (44 while airborne) Every character has a universal backdash, but compared to regular air movement these backdashes have a small downward angle that allows the character to land faster than from a regular front dash.
Airdashes seem to have very short startup, which allows to hit opponents almost immediately after using them.
The direction system when a character turns around in the air works similarly to Guilty Gear’s and BlazBlue’s. Let’s explain it.
- If your character used a regular jump, he or she will not turn around to look at the opponent if they’re on the other side (if you cross each other)
- If your character used a super jump, or a double jump (7,8,9 while airborne) he or she will turn immediately if the opponent switches sides below him
- If you character used an airdash during a regular jump or a superjump, you will have a couple of recovery frames, but past this short amount of time he will turn around if the opposing character is behind you.
Health Gauge

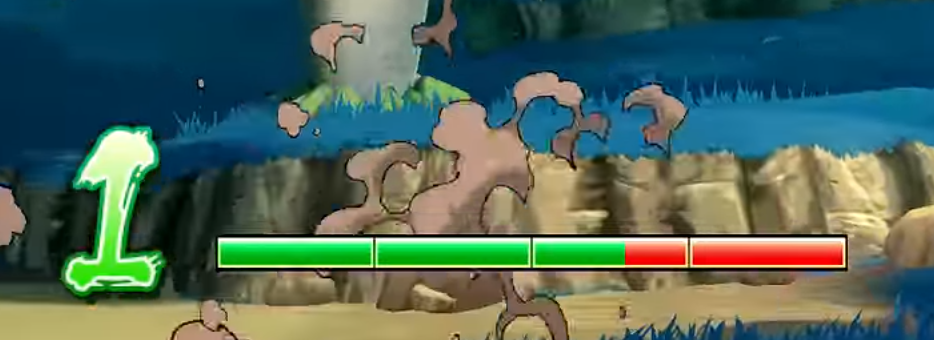
As you’d expected, there is a health bar for every character we choose to play. This bar starts with a green color as long as it’s at 100%, but once it goes down it will become yellow.
- During a combo we can see a part of it becoming red.
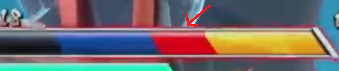
This red bar shows the damage we take in a combo.
- We can also see a portion of it can be displayed in a blue color.

This blue portion shows us the amount of health we can restore when we switch our current character. However, if an assist character with remaining blue health enters the battle once again, all blue health will be lost with no chance of recovery.
If the combo was started using a non-invincible move, the recoverable gauge will be equal to 50% of the damage dealt. However, if the combo used an invincible move as a starter (DP or a level 3 super), the damage will always be dealt as 100% blue life.
Important!
If the combo starts with a hit that does not have frame 1 invuln, the blue bar will be equivalent to 50% of the total received damage. If it does have frame 1 invuln, all the damage received will translate to the generated blue bar. This means that the damage from a level 3 reversal super can be fully recovered by switching.
If our character blocks special moves and supers he can receive chip damage. However, said chip damage can’t kill the opponent, no matter the move used.

Ki Gauge
This ki indicator allows you to use different EX Moves, Supers and some defensive tools such as switching characters while you’re on blockstun
The KI Gauge is divided in 4 sections which seem to be just an aesthetic choice, and it can store up to 7 bars.
Ways to increase the Ki Gauge
- Move forward by walking, dashing, jumping or airdashing
- Using L+S (Ki charge) charges your KI steadily. However, the early part of the animation has a very slow KI Build up and a high recovery, which will most likely get you punished by the opponent
- Blocking (great amount of KI per blocked hit)
- Hitting (great amount of KI per landed hit, a bit more than a blocked hit)
- Receiving damage (short amount per hit)
- Some KI absorption moves (for now, A18 only)
Note : If you use moves that use Ki (EX moves, Supers or Vanish) , the amount of Ki you receive from the combo will drastically be reduced from that point until the end of the combo.
AutoCombo
Every character in the game can repeatedly press the 5L and 5M buttons the execute an automatic combo with unique hits on the 5L version. These combos can be used to maximize damage when hitting the opponent in an easy and effective way, but they won’t be too long or will use the characters full potential
5L Version
The 5L version of the autocombo can cancel the first three hits into themselves even on whiff. They will also be redirected if the opponent switches sides.
We can prevent their automatic execution by holding 4 , which will cause the followups not to occur.
This is the universal sequence every character will execute on hit:
5L → (unique move) > (unique move with Smash Property) → S+H → j.5L → j.5M → j.5H
And this is the universal sequence on whiff
5L → (unique move) → (unique move with Smash Property)
5M Version
This version can be perfectly mimicked with a regular sequence (as in doing the actual inputs) and it is not whiff cancellable.
Universal sequence :
5M → 2M → (Special Move) → (LVL 1 Super)
On Block:
5M → 2M
Vanish

Vanish is a tool for both offense and defense that allows you to teleport immediately right behind the opponent and hit them, launching them across the screen.
Main Properties.
- The input is M+H
- Requires 1 level of the KI Gauge.
- Can be performed in the air or ground.
- It teleports exactly behind the location where the opponent was when we used it. If he moves during vanish startup, they will probably avoid getting hit by vanish. This means we can dodge it by moving horizontally or vertically.
- Vanish causes TimeStop during the match while we’re teleporting, which allows the opponent to buffer any move or super. The buffered move will auto-correct directions after the TimeStop
- Cannot be cancelled into any move after hitting the opponent.
- If used as a starter, it will not cause a wallbounce (please read the “Smash” section for more information on this)
- If used in a combo, it will cause a wallbounce allowing for a combo extension. Certain factors may cause a wallbounce to not happen, such as using a second vanish in the same combo as well as other specific factors that will cause vanish to lose its Smash property. It’s important to note that vanish has to be properly timed when doing a combo, as it requires specific timing to have the smash effect.
- For example, if we use Goku’s Kamehameha and press Vanish quickly, it will have the smash effect, but if we try to delay it to hit confirm it properly, it will most likely lose the smash property if we’re too late on the vanish.
- During Sparking Blast, the Vanish hit won’t come out and we’ll be free to move after teleporting behind the opponent (BUDOKAAAAAAAAI)
- Vanish can be used as a cancel tool for any move that isn’t a Super. This allows us to cancel normals or zoning tools on whiff, but not special moves unless our opponent gets hit or blocks them.
Wake Up
There are many kinds of wakeup in DBFZ, making this section important for people who have never played ASW games, as wakeup isn’t usually simple in their games.
First, we have to understand two concepts or states :
- Grounded hitstun:
- Juggle State:
In the first example, Krillin is getting hit while on the ground. In this case, Krillin has no control over his current state (as it happens in most fighting games) , and once the combo is over Krillin will automatically exit his hitstun state and will be standing again.
This section is mostly dedicated to the second state, the Juggle State (being hit in the air)
When we enter a Juggle State due to a combo and the last hit’s hitstun time ends, the game will allow us to break free out of the combo manually by pressing or holding down a button. In the second case, we will exit the combo at the first available moment, rather than having to mash out during the entire combo.
Buttons to use to break out of a combo: L, M, H, ZA1 or ZA2
If we don’t press or hold any of the 5 buttons, the juggle state will persist until we reach the ground, as if we were stuck in hitstun permanently. This allows the player to control when to break free out of a combo to avoid a potential reset situation.
During the execution of a combo, we can see the hit counter in a red / orange color.
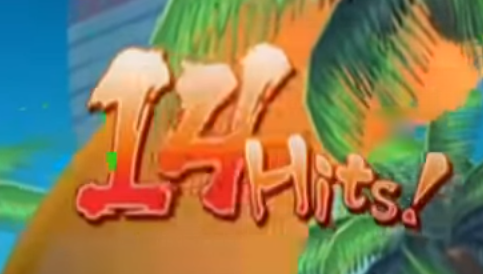
This color indicates that the combo is a true combo, which we will not be able to escape no matter what we do.
If we don’t break out of a combo that gave us a window of time to do so, the following hits we receive will give the combo counter a blue color, indicating that the combo was not a true combo and that we could have broken free out of it.

Having said all of this, let’s understand the different tools we have to free ourselves from the juggle state in the air and to get up on the ground, which are commonly referred as “teching out”.
Airborne tech:
- Backroll tech (Hold 1, 4 or 7 and a button):
(Vegeta)

Will free us from hitstun with a fully invincible backroll until we can perform another action.
- Front tech (Hold 6):
Will free us from hitstun with a hop animation that does not actually move the character from his or her actual position. Fully invincible until we can perform another action.
- Forward Roll (Hold 3, 6, 9, 8 or 5 and a button):
(Vegeta)

Will free us from hitstun with a fully invincible forward roll until we can perform another action.
- Down Tech (Hold 2 and a button)
(Gohan)

Will free us from hitstun with a fully invincible downwards move until we can perform another action.
Ground tech:
- Neutral tech (Default action, no inputs required):
(A16)

Will free us from hitstun with a fully invincible backroll until we can perform another action.
- Up tech (Hold 8):
(C18)

Will free us from hitstun with a backroll that will also put as airborne. Fully invincible until we can perform another action.
- Cause Hard Knockdown (Hold 2)
(Trunks)

We will force our character to remain grounded, with no OTG possibility.
Breaking free of Hard Knockdown (our character slides through the floor for a brief period of time):
Unlike the True Hard Knockdown state that can be self-inducted by holding 2 when touching the ground after a knockdown, there are different moves that can force a Hard Knockdown without the player being able to prevent it. We will refer to this as a “Sliding” Knockdown. While in this state, there are four ways to wake up :
- Neutral Tech (hold a button) . Just like with the regular knockdown, we have the option to free us with a back roll, but this time we need to hold the button.
- Front tech (hold 6): We also have the option of recovering with a small bounce or hop in-place without a backwards movement.
- Air tech (hold 8 and a button) . For air recovery, we also need to hold a button alongside the up direction
- Keep the hard knockdown . If we don’t press anything, we will remain in the forced state.
Hard Knockdown Properties:
We have already explained the different ways to break free out of the hard or slide knockdown state. Now, we’re going to explain what interactions with the opponent this state has.
When a character lays on the ground, be it a forced state or not, they stop being vulnerable to regular hits or proyectiles in the game. Therefore, OTG combos (On The Ground) do not exist in this game with regular moves, although exception exist such as Base Vegeta’s OTG command grab.
However, there is one exception. In the Forced Hard Knockdown state caused by the opponent, he can use a Super Move of any kind (grab, projectile, hit, etc) and this Super will work as OTG. If this Super allows for a combo extension after it, it will be performed normally (which differs from Guilty Gear, in which the damage will be drastically reduced as well as the hitstun timer and pushback when hitting someone with an OTG)
Breaking Free out of a True Hard Knockdown :
To sum up knockdowns in DBFZ, there are basically two types. The first one is the already mentioned “Hard / Slide Knockdown”. These state can be identified by our character sliding through the floor, being able to get hit by a Super and to choose between the different wakeup options.
However, there is another type of knockdown, which we will refer to as “True Hard Knockdown”. This knockdown forces a unique, slow recovery that does not allow the opponent to tech in any way they want, but rather has an extablished time for their wakeup with an in-place tech (no bounces on any direction)
This type of wakeup only happens after we’re hit with a level 3. However, landing a level 3 does not mean that the True Hard Knockdown will happen for all characters due to the fact that there are certain level 3s that have a height limit in order to cause it, such as SSJ Vegeta’s Final Flash.
The True Hard Knockdown is reminiscent of Guilty Gear’s conventional knockdown, with the added property that the opponent cannot be hit OTG in any circumstance.
Assists

Thanks to this mechanic, the game has a great deal of versatility when carrying out different matches. Because Assists can be very complex, we will divide it into different features in order to explain all of them in detail.
- Simple call
You can call your first assist with the ZA1 button, and the second one with the ZA2 button. Every character has a unique move that can’t be changed, whether they’re called in an airborne state or a grounded state. In order to execute this move, the assist must be available.

Once used, the assist character will be vulnerable to be hit during a few seconds after which it will leave the screen, being placed in a recovery state of 6 seconds. If an assist is comboed into, he will receive the full damage for each hit with no damage reduction applied, which makes it dangerous for us to use our assists without being careful.
The Simple Call mechanic can not be used if we’re on blockstun.
The following link shows every character’s unique assist. Credit to @AlzarathEX for his work.
- Character Switch.

You can switch your character using 6ZA1 or 6ZA2 if the assist icon is available. The switch-in character will have invuln from frame 0 when the switch happens until it appears with a Super Dash attacking the opponent, which means it will be vulnerable to anti airs or other anti-homing dash tools. The rest of the assists will be disabled due to a penalty for 3 seconds, and the switched character will have a total recovery time of 12 seconds.
This mechanic can be used in neutral and as a tool to cancel normals.
- Z Change
When using Super moves, we can see that the light on the screen changes shading. During this period of time, pressing ZA1 or ZA2 , the selected assists will enter the fray and perform a pre-set level 1 super (which costs 1 bar).
- This can be done even if our assists are disabled, but not if they’re in a penalty state.
Once this cancel window timing is over, if we used Z Change, our assists will have the same recovery time as a character switch, due to the fact that the last character who did a super will stay on screen. All assists will remain disabled due to a penalty for 3 seconds, and the switched characters will suffer 12 seconds of recovery time.
This tool cannot be used to cancel powerful level 3 supers, meaning we can’t Z Change after a level 3. However, we can call a character’s level 3 by calling them with 4ZA1 or 4ZA2.
- Ultimate Z Change
Ultimate Z Change is very similar to the previous mechanic but with an important difference. This mechanic allows us to use Z Change without having to use our current character’s super. However, we must place our opponent in a hitstun or blockstun state, meaning we can’t use this tool at neutral. We can also use it even if our assists aren’t enabled, unless they are under the effects of the penalty state.
Thanks to this, when we want to directly use a tag-in super with our assists we can press 41236ZA1/ZA2 to use their level 1 super, or 63214ZA1/ZA2 for the level 3 without any restriction. Just like when using regular Z Change, the character that comes in with the super will remain as our focus character after using it.
(A16 using 63214ZA1 , tagging Cell in)

- Wake-up
If we hold ZA1 or ZA2 during wakeup we will break out of a combo just as if we did it with L,M or H. However, if we break out of a combo with these buttons and keep holding them we will automatically change to the assist character, no matter the direction we are holding.
Thanks to this the game gives us the advantage of performing a switch with complete invincibility, because the character that wakes up can’t be hit after wakeup thanks to the invulnerability given by the change mechanic. However, the incoming character is not invincible.
- Healing
As with most fighting games that use assists, changing our character will allow them to recover health as long as they’re not on screen, but only blue health, as we explained in the Health Bar section. If we make them enter the battle again, be it our own decision via change, Z Change or forced by the opponent using Snap Back, all the blue health not yet recovered will be lost, and the entire blue health bar remaining will dissapear.
- Guard Cancel

Guard cancel is a defensive tool to use against pressure by using a character switch. During blockstun, pressing will make the assist change as if we performed a regular switch. However, this mechanic has some differences when compared to a regular change.
- One bar of the Ki Gauge is required
- Extra Timestop is created before the assist enters the ring as the now on point character, in order to help the opponent react
- If the opponent is hit by the entering super dash, he will be launched at a great speed, making it impossible to confirm the super dash into a combo.
- This mechanic can be used without having assists enabled unless they’re on a penalty state.
- Much like other games, a combo started from a Guard Cancel cannot kill the opponent, and it will have additional scaling so the damage done using it as a starter will be very low. As you can see here, Goku is unable to kill Tien.

The assist recovery effects are the same as a regular character switch, with the usual 3 seconds of penalty to every assist and the 8 to the switched character. If we use a guard cancel when we’re on our last character, we will instead use a vanish-like teleport behind our opponent. Both versions of the guard cancel are punishable on block.
- Different Assist States
Assist available……………………………..

Assist in normal recovery……
This assist is recovering for a period of time indicated by the shining blue colored timer.

Assist waiting……………………………………
Whenever we call an assist, its normal recovery is halted for a couple seconds, after which it will start slowly recovering, entering “normal recovery” state. However, there are a couple of exceptions that may cause our assist to be kept in this “waiting” state :
- Opponent in hitstun.
- Opponent in blockstun.
- We’re still in the air when recovery time finished.
However, even in this state we can use it for Z-Change purposes. Furthermore, using Sparking Blast will make it so that this “waiting” state is ignored entirely.

Assist Penalty…………..
Every assist will remain blocked from use for a period of time due to a penalty. This state does not stop the recovery process, but it does prevent from using the assists in any way.
Extra Details
- Killing an on point character will enable all the assists before returning to neutral. However, if they were in a penalty state, it will persist until normal recovery.
- If the opponent hits an assist, the damage taken will be 200% of the normal damage it would take, and he won’t be affected by combo reduction or scaling. All Damage caused to the assist will be dealt as recoverable blue health.
- If we press an assist button during the Dragon Rush sequence, we will force a switch to the opponent’s selected assist character. If he only has one assist remaining, the button won’t matter, and if he has none the regular Dragon Rush sequence will apply
- Forcing a switch like this will cause an Assist Penalty of 8 seconds to our opponent’s assists.
Defensive Options
- Deflect (4S):

Universal anti-pressure tool that pushes back the opponent if he tried to hit you with a move that isn’t a projectile. Assists can be pushed back too. This mechanic may remind you of the Pushback system in games such as MVC, but it works quite differently:
- It has to be done in a neutral state, not during blockstun
- Has a unique animation that will prevent you from doing any other actions.
- Absorbs and reflects all kinds of hits and projectiles, even Supers, but not Dragon Rush or Command grabs. Receives no Chip Damage or Hitstop
- Effective from frame 0, but when its invincibility ends it has a short window of time in which it can be punished. This recovery state is also counter-hit state.
- Deflect doesn’t deal any hit, but pushes the opponent away when the game realizes that deflect absorbed a hit.
- If you successfully deflect something, you can cancel into another deflect or super dash.
- If you manage to deflect a hit, the rest of the animation frames, including the recovery period will gain deflect property until the entire animation ends.This also shortens the total recovery time.
- A triggered deflect can be cancelled into another deflect or a vanish
- Can be used to cancel normals.
- Can only be done while on the ground.
- Universal Anti-Air (2H):


- 2H is the main universal anti air for every character. This tool has the same properties as BlazBlue and Persona 4 Arena Anti-Airs
- Invulnerable to “airborne” hits that are not projectile based
- Requires a few frames to gain this invincibility, but once it kicks in it will stay until the move hits.
- Every other move not affected by this invincibility can hit this move’s hurtbox just like normal
- Usually they have a high recovery time.
- If an airborne move tries to hit you while in your invincible frames, a blue bubble will appear with the message “Anti-Air!” on screen in order to tell that you successfully invuln’d through the opponent’s move.
- Guard cancel:
- Using the Blockstun state to change a character (check the Assists/Guard Cancel section)
Extra:
Clash: The clash System in ASW games is not a defensive mechanic by itself, but rather provides your adversary with an equal footing of sorts. During the match, if two characters swing at the same time and the hitbox of their moves interact with each other, the Clash mechanic will appear. Both hits will be “nullified” and neither opponent will receive damage.
- If the clash happens, the players will be allowed to cancel into any other action, even jump. If you don’t cancel the animation, the move will have the regular animation and won’t cancel by itself. In the gif, Buu does not cancel his 2M and gets hit due to the move’s recovery, because Vegeta did cancel the second clash.
- For example, a move such as Gohan’s 214M can’t be canceled into 5L conventionally, but with a clash, Gohan would be able to do so.
- Clashes cause TimeStop of several frames to give the players reaction time. The cancel window starts from the clash to noticeable frames after the actual TimeStop.
- Just like in Guilty Gear, in DBFZ the clash system ignores hurtboxes if those two hits are of the same Attack Level, so we will see those hits going through the opponent’s body and still clash, just like it happens in the shown gif.
Dragon Rush (Universal Throw)
Dragon Rush (L+M) is the universal throw, but it works differently in this game. When using it, a green bubble will appear on the character in order to indicate it’s being used. The character will move forward and on contact with the opponent will do a barrage of hits and launch them into the air, following them with a Super Dash similarly to how the Dust Followup works in Guilty Gear. After this sequence, we can perform regular combos in the air.
Dragon Rush can be done while airborne or while grounded, but the opponent must be at the same height in order to catch them, so grounded Dragon Rushes won’t work on airborne foes and vice-versa.
Your opponent can dodge Dragon Rush in several ways.
- Pressing any normal button or Dragon Rush (even if this last option won’t catch the opponent in time) . This way, the two opponents will exchange blows and return to a neutral state. Neither will receive damage this way.

- Moving to a different height to avoid it.
- Instant movement techniques such as Super Dash or 6M (which places them in an airborne state) . The concept is the same as jumping out of it, allowing for a punish.
- Being in blockstun. Dragon Rush can’t hit you if you’re being forced to block something else, preventing an unblockable situation.
If Dragon Rush hits you, there’s nothing you can do. You can’t tech out of it due to a tech window time like in other games, so you should react by the time it’s on startup.
As a rule of thumb, you can’t kill your opponent by Dragon Rush alone, but the follow up hit after the launcher will kill, much like it happens with Super Dash.
There are two other ways to use Dragon Rush. As a combo ending tool to cause a hard knockdown (this version CAN kill the opponent without an extra hit due to the final hit)

And to force a character switch. This can be used as combo starter or combo filler.

Pressing the ZA1 o ZA2 button during the sequence will force the current enemy character out and will the chosen assist in, much like we explained in the previous section. If the opponent has no assist characters left, they will be pushed horizontally instead without being snapped back. Remember that this will also cause a penalty on our opponent’s assist, as you’ll notice if you look at Cell’s slot in the gif above.
Super Dash

Super dash allows all characters to launch themselves towards the opponent and hit them while in the air, but it does not hit overhead. The super dash tracks the opponent no matter where they are or where they move to, making it very reliable in chasing down the opponent.
This move can be used to cancel normal moves as if it were a special move of its own, and even moves with smash properties (launchers such as 5H, 2H o j.2H) have their own followup by pressing H again without having to press Super Dash’s two button combination, like if it were another auto combo.
Advantages:
- Very good anti-zoning tool, as it absorbs projectiles taking no damage and not being slowed by hitstop.
- Allows you to ignore almost entirely the opponent’s location, as it has very accurate tracking.
- Good active frames even when it’s already on top of the opponent. If your opponent uses a move with invulnerability and you use superdash, it will not stop on top of them, but will rather chase them and hit the opponent once they’ve run out of invincibility frames. Making it a good option vs meterless reversals after a knockdown, making it good for airborne meaties (not so much grounded, as Super Dash cancels itself when you reach the ground)
- Even if an assist gets in the way, you can still hit it without HitStop. Assists also won’t stop you from reaching the other character.
- Even despite all these excellent advantages, the move is still remarkably fast.
Disadvantages:
- Mediocre Hitbox. Can be traded with or beaten with other moves, remarkably 2H.
- Powerful projectiles such as Kamehameha, Destructor Disk or Supers can go through the projectile invincibility and hit you out of the super dash.
- Because it’s an airborne hit, anti-airs will be effective against it, gaining invincibility.
- Can’t kill the opponent on its own, although it’s not a strong disadvantage due to any regular normal killing on follow-up.
Sparking Blast
Say hello to the new X-Factor. Sparking Blast works in a similar way, empowering your character giving you new tools and strengths for a limited time.
Main Properties
- Executed with L+M+H
- Can only be done once, whenever you chose to.
- Usage icon:
- Sparking Blast available.
- Sparking Blast already used.
- Can be used while grounded, airborne, or at neutral. Can’t be used on blockstun nor hitstun. It looks like a burst, but it is not.
- When activated, a red aura will cover the character and give him invincibility from its startup until it hits (like ASW Bursts)
- Has a few recovery frames after hitting the opponent
- Not punishable on block
- Can be used to cancel normals and specials on block or hit
- Sparking Blast has different states according to the remaining amount of characters in your team. The fewer they are, the stronger Sparking Blast becomes in different areas that include Damage, Duration and Health Recovery once it’s active. This can be seen on the icon itself.
- 3 character remaining:
- 2 characters:
- Only one alive:
- Once activated:
- You will gradually recover all blue health remaining.
- The character will deal more damage
- All normals can be canceled into jump, even on block.
- Air moves can be cancelled by Air Dash.
- The Vanish attack won’t hit the opponent. Only the teleport will happen.
- Sparking Blast’s activation hit can be used as a combo extender, much like it happens in BlazBlue with Continuum Shift and Persona 4 Arena’s Bursts.
- This hit deals no damage.
- As a combo starter it does not work, but pushes the opponent away
- Using it in a combo will cause the opponent to be launched in the air.
- The first time the opponent touches the ground, he will bounce, allowing for a combo even after he reached the ground.
- The second time, he will be able to tech out.
Smash

Hold on tight, we’re about to take you for a ride. This system is by far the most complex and mysterious in the entire game, so we’ll start from the beginning.
The Smash System (as I decided to call it while we don’t have an official name for it) is an added effect some moves gain. They can be easily identified when we see the same hit with a camera animation but a different effect.
For example, every hit starting from a H normal can have the Smash property that is identified with their animation, the move’s hitstun and the message on screen that says “Smash!” on the English and Japanese versions, “¡Golpe!” in the Spanish one and “Fracassant!” on the French translation. However, not every hit with the Smash Property makes those words show up in the screen.
Take a look at the camera effect on Gohan’s in the following examples.
(236M with Smash Property) (236M without it)


In order to give you an idea about what causes the Smash Effect, moves such as Gohan’s 236M with it can cause the opponent to wallbounce. However, without it the opponent won’t wallbounce and will have less hitstun. It’s similar to some CounterHit effects in ASW games.
First, let’s name every known hit category with Smash property. In order to do this we have to be mindful that each character is different and may have some variations, so we’ll only take the common traits among them.
“Launcher” Smash
Moves that will have the Smash property by default. All of them have this property at the start, but will use it if we use them more than once in the same combo.
Moves with this “Launcher” property.
- 5H
- 2H
- j.2H
- Dragon Rush (as a starter)
- Vanish
- Autocombo
- Character specific moves (For example, Goku’s 214M). Oddly enough, some of these moves even with the Smash property won’t make the “Smash!” message appear on the screen (Don’t ask me, I don’t know why :P)
While in this category, we can divide them further into subtypes
- Simple Launchers
- They simply deactivate the smash property from the rest of the launchers.
- They include 5H and character specific moves.
- Vertical Launchers
- These launchers activate the smash property on some “finishing” smash moves (j.5H), as well as having the same utility as Simple Launchers.
- They are 2H, j.2H and Dragon Rush.
- Vanish
- Vanish is a tool also affected by the Smash System, but it is not affected by the deactivation of said property by other launchers and finishers.
- Vanish does deactivate the property from the rest of the moves, as well as itself.
- Vanish needs to be activated in order to have the Smash Property. In order to do this we have to use it as a combo filler. As a starter, it won’t have the Smash Effect.
- Certain other factors can also deactivate Vanish’s smash effect, but they remain unknown until the actual game release.
- Each move in the game (whether they’re normals, proyectiles or anything else) has been designed so it has a specific window of frames with Smash effect on their Hitstun time, so that Vanish will only apply the smash property if we hit the opponent during said window of time. This is so that vanish is not a guaranteed tool in order to confirm combos and requires minimum reaction time in order to properly use it.
- AutoCombo
- 5L’s autocombo gives us an exclusive launcher on the third hit, very similar to Vertical Launchers.
- It deactivates the rest of the Launchers but Vanish’s.
- The autocombo’s Smash Effect never deactivates. It will grant a Smash Effect no matter the amount of times we use it or use other Smash types of attacks.
- It provides activation of the “Finisher” moves Smash property. In particular, the last move of the autocombo (j.5H) will receive a different Smash property than what it would have when it’s done on its own (Please check the “ Smash Finishers” section)
Smash “Finishers”
This move in particular is a move that requires the smash property to be activated previously during a combo. To be precise, I’m referring to j.5H , and to the particular j.5H that finishes the autocombo. It’s important to note that this mechanic does not work exactly the same for every character. Let’s get into it.
There are two types of Smash Finishers that we can get from Vertical Launchers.
- Finishers
- When j.5H obtains Smash property from a 2H or j.2H, this will cause hard knockdown to the opponent
- “Smash!” will appear on screen.
- Dynamic Finishers

- When the Autocombo Smash property is activated, j.5H still has the same regular Smash Finisher property, but if we follow the combo while in the air, the move will now have a new type of Smash that I call “Dynamic Finisher”.
- This will cause a simple knockdown, and a wallbounce if we’re in the corner.
- For this finisher, the work “Dynamic!” shows up in the screen
- This particular kind of Smash has the added property of being able to get a Dragon Ball.
- The dynamic finisher will be deactivated if we slow down the moves followup or we somehow change the Autocombo, causing the smash effect to be lost in these circumstances.
Note : Smash finishers can not only be activated, but also deactivated if they have been already activated :
- A smash finisher will be deactivated if during a combo, any hitstun interval is extended during a long period of frames.
- A Dynamic smash finisher has two intervals of deactivation :
- If more than 20 frames pass between a regular hit and a hit from the autcombo, the dynamic smash will be turned into a conventional smash finisher.
- If any more time is spent, it will completely deactivated as it happens with the conventional smash finisher.
As you can see, the entire Smash system can be summarized in that during our combos we must know in what kind of Smash state we are in, which will give us more versatility in our combo paths.
As an extra detail, another property of attacks with Smash Property is that they are hit-grabs, moves that reposition the opponent as if it were a grab or throw, in the exact position where it’s hitting.
Here we can see Buu being repositioned downwards after receiving a hit with the Smash Property.

This means that landing an attack with the Smash Property can be a huge success in order to confirm combos.
Notice: There are several character whom the regular rules do not apply to their launchers and finishers. Some examples would be :
- A16: His j.2H is a divekick that does not have Smash Effect. However, his j.5H has the Smash Property by default, with no need of previous activation.
- Piccolo: Even if he used Vertical Launchers such as his 2H or j.2H, his j.5H will not have a Smash Finisher Effect. He can only use Dynamic Finishers as part of his autocombo.
- Cell: His j.2H isn’t a Vertical / Activating Launcher, but rather a simple one that causes a Wallstuck effect.
There are many bizarre variations of this particular Smash Effect, so we’ll have to figure out how each character works and interacts with this system.
Dragon Balls

(This section will be updated at a later time)


