
USE THE NAVIGATION OUTLINE TO FIND WHAT YOU NEED.
The TL;DR version of this guide:
- Be picky with what equipment you upgrade. % main stats are good, flat is bad.
- See the Rerolling section for what guardians are worth rerolling for.
- Pick rook Hwaryong or knight Hades as your free gift. Don’t pick Aslan.
- Don’t feed away all of your nat 3s and nat 4s. There are top tier nat 3s and nat 4s.
- Some nat 3s to keep are knight Finn, Edele (king/queen/rook), Prebella (bishop/queen), queen Lucian, queen Grion, knight Ms. Dale, bishop Langmar, and others that are more situational.
- Funnel your early game resources into Hwa or Hades to carry you through early game.
- Don’t just build damage dealers in early game. Build buffers and healers as well.
- Combine for Artemis.
- Upgrade your Nexus directional buffs and Guild War Totem.
- Pay attention to safe spots from boss AoE’s when making a team.
- Keep all nat 5’s in case of buffs or for legendary guardian crafting.
- Join a guild ASAP and participate in world boss to start getting Morias.
- Consult the What do I do with my Currency? section.
Check out the these lists to know what guardians are worth keeping or foddering:
AJ Burn’s 3/4 star Tier List
Xuperstar’s Food or Fodder List
Contents
The Directions of Chain Strike:
(NOTE: The specific directions of guardians are VERY IMPORTANT. The skills differ between directions and the attack range of each guardian affects their viability in particular scenarios)
The Combat:
The combat in Chain Strike is unique. There is a SRPG element due to the importance of positioning. It is a turn based combat system; however, your individual members do not get individual turns. Instead, your entire team is given a set amount of Action Points (AP) to use per turn. There is no speed mechanic in this game. This encourages the use of more supports and discourages the use of an all damage oriented team that is sometimes seen in other games. The game also has a unique pincer system. When allies are in range of the enemy (refer to THE DIRECTIONS OF CHAIN STRIKE) they will do a supporting attack in addition to the main attacker. This is called a pincer attack. It is incredibly important to bring guardians with useful skill 1’s since their skill 1 effect can activate with pincer attacks. The directions of guardians, how well they synergize with other guardians, as well as their pincer effects are all important factors to consider when forming a team. For example, rook guardians are extremely well suited for equipment dungeon bosses due to the layout of the map and their ability to attack from outside of the range of powerful aoe attacks. Knight directions are often extremely useful in PvP due to their ability to hit over obstacles and due to their ability to hit enemies from an L shaped position (much like chess). Guardians may also be unsuitable or undesirable for certain game modes due to the low chance of their skill 1 activating but be meta defining in other game modes. For example, Rook and Bishop Krishna are top tier guardians for guild boss which is a fight in which you are given 5 AP every turn. This makes it so that her s1 effect (which only has a 22% chance of activating) is still incredibly useful since she has 2-3 chances of activating it per turn. Contrast this with 3 AP areas like equipment dungeon where there are only 1-2 chances of activating it per turn. In 3 AP areas guardians with low s1 chances become less desirable.
When building a team composition, you want to keep an eye out for important skill 1 effects. There are numerous skill 1 effects that are needed in different situations such as defense breaking, attack breaking, blocking heals, applying DoTs, removing buffs, stealing buffs, cleansing your party, healing your party, and more. Due to the AP system, it is typically unnecessary to bring more than 2 main damage dealers to a game mode since only one guardian can initiate a main attack in a 3 AP area. Of course, this logic may not apply in certain cases, like speed runs.
The Summoning System:
There are many different ways of summoning in Chain Strike. Each different method gives you a certain number of Summoning Points. After you accumulate 300 summoning points, you will receive an Ancient Book. When estimating the value or cost effectiveness of a purchase, use the summoning point system as a baseline. For example, Event summons cost 499 moonstones for 7 summons which will give you 10 summoning points. The 750 moonstone summoning pack in the magic shop gives you 11 summons worth 11 summoning points. If you have 1500 moonstones you can choose to buy three event summons which will net you 21 summons and 30 summoning points or two 750 packs which will net you 22 summons and 22 summoning points. Thus, you can judge that the event summon is more cost effective even though it gives 1 less summon. The following are the different methods of summoning:
NormalBooks | Gives you a 1-3 star guardian. Used to obtain fodders for powering up guardians. Gives 0 summoning points. Obtained from Adventure, Magic Shop and Unknown Lands. | |
MysticBook | Gives you a 3-5 star guardian. Gives 1 summoning point.Can be obtained from Mysterious Sanctuary, Unknown Lands, Hall of Judgement, Tower, Magic Shop, World Boss Shop, Events, Log in | |
EventSummon | Pay 499 moonstones to summon seven 3-5 star guardians. Gives you 10 summoning points. Has an increased chance of giving you banner guardians. Overall nat 5 rate is still 1.2%. | |
DirectionalMysticBook | Obtained from the forgotten tower shop. Gives a 3-5 star guardian of that specific direction. Gives 2 summoning points. | |
Daily DungeonSummonStones | Gives you a 3-5 star guardian from a limited pool of guardians. Gives 2 summoning points. Obtained from daily dungeons. Clearing the stage under a certain amount of turns and without anyone dying will award more stones. Harder difficulties also award more stones. | |
Guaranteed4 Star Book | Gives you a 4 star guardian. Gives you 5 summoning points. Obtained from Events, Magic Shop, Log in. | |
Legendary Book | Gives you a 4-5 star guardian. Gives you 20 summoning points. Obtained from Tower, Guild Shop, Log in, Events. | |
AncientBook | Gives you a 5 star guardian. Gives you 20 summoning points. Obtained from Cash shop, Tower floor 60 reward, and mileage system. | |
SelectiveAncient Book | Allows you to pick any 5 star guardian that you want. Gives you 20 summoning points. Obtained from purchasing event deals in cash shop. |
Non-Playable Guardians
Flora | Flora are used to give power up exp to a guardian (Note: THIS IS NOT related to level. Level is raised through adventure farming or by using potions) Once a guardian is powered up to +5, they can be evolved or transcended.(From: Gold/Exp dungeon, PvP, Tower, Mysterious Sanctuary, HoJ, Events) | |
Awakened Flora | Floras can be awakened using stones from Hall of Judgement. This doubles the exp that they give guardians for powering up.(From: Using HoJ stones, Events, Guild Shop) | |
4 Star Skillbook | As the name suggests, this skillbook can only be used on natural 4 stars like Claudia, Maria and Juan. It cannot be used on natural 5 stars like Hades or Hwaryong.(From: Guild Shop, Events) | |
Skillbook | This skillbook can be used on any guardian regardless of star level. However, due to the existence of 4 star skillbooks, only use this for natural 5 star guardians or combining for legendary skillbooks(From: Tower, Promotion Battle, Events) | |
| Legendary Skillbook | This skillbook can only be used on legendary guardians. It is acquired by combining 3 skillbooks and spending 200k gold.(From: Dimensional Shift) | |
Moria | This is used to transcend a guardian. You can use this in place of a duplicate guardian. Only use this for natural 5 stars.(From: Guild Shop, Events) |
How F2P Friendly is Chain Strike?
A F2P friendly game is very important to a lot of people. Chain Strike is (in my opinion) very free to play friendly. It gives new players the ability to choose one from 3 of some of the best natural 5 stars in the game for free, has a mileage system that is very easy to fill up every 2 weeks or so in end game, does not dilute the summoning pool with items, and constantly has log in bonuses and events to supply you with more shoes, currency, and books. Also, the best guardians are not necessarily natural 5 stars. Some of the best guardians are nat 3s and nat 4s. Also, most, if not all, content in the game can be cleared with the beginner 3 stars and the combine guardians. The amount of free books and moonstones given every month is considerable:
Tower: 2600 moonstones, 4 skill books, 5 legendary books and numerous directional books are available every month if you clear both normal and hard mode. The first clear of Tower also gives you incredibly generous rewards including 2 Ancient books, 2 Legendary books, 2 skillbooks and 2000 moonstones.
Guild Wars: Ranges from ~300 to ~1000 moonstones per week depending on your rank in your guild. Also gives one Moria, 2 legendary books, and 8 four star skillbooks per month.
Promotion Battle: Gives skillbook weekly and moonstones depending on your rank. Gives you up to 30 moonstones per day from winning 10 times.
Unknown Land/HoJ/Mysterious Sanctuary/Magic Shop: Can randomly drop mystic books and the shop often sells mystic books for gold.
SoulStone/World Boss Shop: Can obtain a Moria and 4 skill books every month, as well as one Ancient book and 4 legendary books every month.
Daily Missions: Gives 35 moonstones daily.
Various Quests: Many moonstones and very good starting gear.
Events: Often gives legendary books, skill books, mystical books. The special events that celebrate holidays or anniversaries may give thousands of moonstones, Ancient books or Morias in addition to what other events give.
This is not to say there are no P2P elements in this game. There are skillbook packages, moonstone packages and a monthly Ancient book that can be bought from the cash shop. However, with the mileage system, amount of free books given, and premium currency given, there is not a large gap between P2P and F2P players. In fact, this may be one of the few, if only, games where a completely F2P player ranked number 1 in PVP for several weeks. It is not uncommon to have over 20 nat 5s after a few months of playing.
Promo Codes:
Every once in a while, a coupon code will be made available. If you are using Android, hit the microphone icon and go to events. Scroll down to the PROMO CODE section and enter the following codes.

Make sure to use whatever the coupon of the month is.
After you use the coupons or go to the links you may see a white screen with a prompt that has a blue OK button. Press ok and the rewards should appear in your mailbox.
Rerolling:
Chain Strike is very generous with its books and premium currency so rerolling is unnecessary. However, if you want a head start, then you can choose to reroll. Keep in mind that the chance of pulling a 5 star is 1.2% so its normal to go through 80 or so summons without pulling one, 1/83 chance to be precise. You can probably expect one nat 5 every 4-5 rerolls.
If you don’t like what you’ve pulled after using your books, click your portrait in the lobby and go to the settings and delete your account. It should allow you to make a new account afterwards.
When you reroll, play up to stage 1-2 in adventure mode and you will be able to use your summoning books. The first day log in bonus is 10 mystic books and three guaranteed 4 star books. Also, collect the coupons that are available. GO TO THE PROMO CODE SECTION IN THIS GUIDE. After collecting the first day log in bonus and the coupons you should have about 28 mystic books, a legendary book and three guaranteed 4 star books (the tutorial makes you spend one of these after 1-1). The following guardians are priority reroll targets:
4 star reroll targets (don’t worry too much about these):
- Rook or Bishop Indra: for late game PVE content
- Knight Claudia: for late game PVE and PVP content
- Knight Juan: for late game PVE content.
- Queen Maria: for PVP
5 star reroll targets:
- Rook/Knight Tahn: Very good mid to end game damage dealer with a great leader skill. If you pull 2 more dupes you can make a legend Tahn which is the best dps in the game currently.
- King/Bishop Diaz: He won’t help at all in your early game but he is one of the best supports in the game for end game PVP offense and PVE (guild boss). Aim for him if you have the long term in mind.
- King/Bishop Fritz (Any Fritz is good but King and Bishop are preferred): Fritz will only start to show his usefulness in mid to end game when you can reach 100% crit but he is incredibly useful in end game PVE content. Arguably best support for guild boss.
- King/Queen Cosmos: King of PVP. If you want to shred tanky PVP defenses, this is your target. However, he has limited use in PVE content since he is unable to deal critical damage.
- Rook/Bishop/Knight Krishna: One of the best supports for end game guild PVE content. Knight is the best pvp defense unit in the game.
Honorable Mentions:
- Bishop/King/Queen/Knight Despia: Very useful from early to mid game as a dps.
- Rook/Queen/King Wukong: Arguably the best skill 1 debuffer in the game. Has a variety of uses in PVP and PVE and is useful from early to late game.
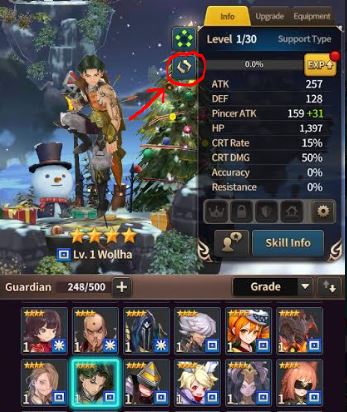
- Rook Hwaryong: She is free (See Cherince’s Gift) but rerolling for her allows you to pick Knight Hades. Very strong early to mid game carry for equipment dungeons.
- Knight Hades: He is free (See Cherince’s Gift) but rerolling for him allows you to pick Rook Hwaryong. The best farmer in the game and very strong in PVE and PVP content.
- Queen Stein: Useful in end game PVE content and can be good in PVP as well.
- Knight/Bishop Lubu: Useful in PVP and some end game PVE scenarios.
- Queen Soulless: Best attack debuffer in the game with the best defense break and a shield with defense to penetration.
- Mountain Spirit (any direction): Very tanky and provides team defense buff. Deals a lot of damage and is a solid choice in PVE and PVP.
- Knight Aslan: One of the best PVP guardians available. Can be used to consistently defeat nexuses in one turn.
- Rook Azreal: Very strong PVE healer. Practically unkillable unless the enemy has heal block or ignore defense. Provides a ton of party healing as long as he is hit with critical hits.
- Rook/Queen/Knight Lord Dragon: Provides a free attack at the end of every turn. Can be used in both PVE and PVP.
- King/Knight Seimei: Good cleanser and viable in PVP defense.
- Bishop/Knight/Queen Barjan: Very useful in pvp for incapacitating enemies by stripping and blocking buffs.
Cherince’s Surprise Gift
After completing stage 1-2 in adventure go back to the lobby. You will be taken to the summoning screen again where you can choose one out of three 5 star guardians. These guardians are top tier. Don’t mistakenly assume that they must be bad since they’re free.
The first thing you should know is DO NOT PICK ASLAN. He is strictly for PvP and King is not the best direction for him.
That narrows down the choice to Rook Hwaryong or Knight Hades. But, due to a recent buff to Lucian, it is recommended that you choose Rook Hwaryong and build a Queen Lucian instead of choosing Knight Hades.
Rook Hwaryong:
She has heal block and DoTs on her skill 1 which is very good for equipment dungeon. She also has a self revive and passive team healing which gives your early to mid game team some much needed survivability. She is incredibly useful in early to mid game and can help you jump straight into higher level equipment dungeon floors due to the survivability she brings to your team. However, in late to end game she has limited use. She becomes unnecessary in equipment dungeons since she is not suitable for speed teams. She is used primarily as a meat shield in difficult tower floors and PvP defense in end game. She can also be useful in floor 11 of equipment dungeons if you are having trouble surviving.
Knight Hades:
He is one of the best farmers in the game. His skill 3 AoE resets its cooldown whenever he kills an enemy. He also passively gains 40% atk for every enemy that is dead (he doesn’t have to personally kill them). His ability to spam his skill 3 endlessly makes him one of your most used guardians in end game. He also has incredible damage potential since his AoE damage increases depending on how many enemies are in range and due to his passive attack boost. However, he is not able to easily carry you through early to mid game equipment dungeons like Hwaryong. Also, Queen Lucian has a similar AoE that resets its cooldown with a kill. This has reduced Knight Hade’s value.
Personally, I recommend Rook Hwaryong over Knight Hades. Instead of Knight Hades, build Queen Lucian (it is important that you build Queen over the other directions). Queen Lucian will allow you to farm efficiently while Hwaryong will be extremely helpful in early boss fights.
Powering up Guardians:
In order to evolve guardians and transcend them, it is necessary to first power them up to +5. The general rule is that fodder one star below the target guardian will give 40%, two stars below will give 15%, and 3 stars below will give 2.5%. For example, If you are powering up a 6 star guardian, 5 star fodder will give 40% exp, 4 star fodder will give 15% exp, and 3 star fodder will give 2.5% exp. You generally want to use fodder that is one or two star grades lower than the target. If you are powering up a 6 star guardian, 4 or 5 star flora are best. If you are powering up a 5 star guardian, 3 or 4 star flora are best and so on.
You can awaken floras to give double the exp they normally would. This is the most effective way to power up your guardians and why its important to refresh HoJ 1-2 times per day. It is recommended to awaken all floras 4 star and above. 3 star floras are worth awakening as well but it can be difficult to do so as a new player. Do not awaken 2 star or 1 star flora.
Refer to tier lists to see which 3 stars and 4 stars are food. Never use nat 5s as food even if they aren’t currently useful. Guardians are buffed regularly and can change from trash to gold. Some examples are Tahn and Wukong.
It is important to note that whenever you evolve a guardian, a Flora of one lesser star grade will be generated. For example, if you make a 6 star guardian, a free 5 star flora will be generated. This is a very useful strategy for powering up guardians. If you lack fodder for powering up guardians, you can focus on evolving multiple fodder guardians for transcendence or combine guardians in order to generate more free floras.
Refer to tier lists to see what nat 3s and 4s are able to be used as fodder. If you still find yourself struggling with a lack of fodder for powering up your guardians, you can choose to evolve your own fodder. In order to do this, evolve 1 star fodder into 3, 4 or 5 star fodder. The reason you evolve 1 star fodder instead of 3 star is due to the decreased evolution stone requirements. It is much cheaper to upgrade a nat 1 compared to a nat 3. In addition, as stated above, each evolution generates a free flora. If you evolve a nat 1 into a 5 star fodder, you will generate a 1, 2, 3, and 4 star flora along the way. However, this is not recommended unless you are severely limited by lack of fodder. Due to the initial flood of free summons and moonstones that new players receive, as well as the gold/exp dungeons you should have plenty of fodder for powering up your guardians.
Transcendence
Transcendence is accomplished by using a duplicate guardian that has been evolved to 6 stars or by using a Moria. Transcendence using a duplicate guardian will also add a skill up while a Moria will not do so. It is important to note that the duplicate guardian does not have to be a duplicate direction. It also does not have to be leveled or awakened after reaching the 6 star level. Note: After the legendary guardian update, it is recommended that you do not use ANY nat 5 guardian to transcend. Try to exclusively use Morias for transcendence. You will need a very large amount of actual nat 5s in order to craft legendary guardians. See the Legendary Guardian section for more.
The First Transcendence is most important. It will raise the level cap of the guardian from lvl 40 to lvl 45 AND unlock a relic slot. Every 5 levels after transcendence raises the guardian’s base stats by approximately 10%.
The Second Transcendence is not as important. Therefore, it is recommended that you save your Morias for guardians that have not gone through their first transcendence. The second transcendence only raises the level cap from 45 to 50. Again, the base stats increase by about 10% from what they were at lvl 40. In total, a lvl 50 guardian will have approximately 20% higher base stats than a lvl 40 guardian.
Skilling up Guardians
Skilling up Guardians can be done by using skillbooks or using a duplicate guardian (direction does not matter). Nat 3s should only be skilled up using dupes. Nat 4s can be skilled up with nat 4 skillbooks (the gold ones) or dupes. DO NOT USE RED SKILLBOOKS ON NAT 4’s. Nat 5’s should not be skilled up with dupes. It is a complete waste. Either use dupe nat 5s as transcendence material (which also serves as a skill up) or save them for combining for a legendary guardian. The only exception to this are the combine guardians Artemis/Valkyrja/Zygmunt. Since you can combine an unlimited number of these guardians, you may want to use dupes as skill ups in order to save your skillbooks for summonable nat 5s. Use red skillbooks only to skill up nat 5s or for making legendary skillbooks.
Equipment Guide
Equipment is the key to end game. It won’t matter if you have the best guardians but mediocre gear. Equipment upgrades are very costly in terms of gold so being picky with what gear you upgrade is a must.
Flat gear and Percent Gear
Every equipment has a main stat. These main stats can appear as percent stats or flat stats (except for critical rate and critical damage which will always be percent). The thing to remember in Chain Strike is, Flat stats are ALWAYS bad. However, they can be acceptable in some cases. Flat gloves can be acceptable on main attackers in scenarios with 3 AP. Flat HP armor or rings can be acceptable on PVP attackers meant for 1st turn team kills. In these cases, the substats are what are more important. Always consider the situation you will be using the guardian when equipping them with gear. The main stats of equipment are as follows:
Weapon: Attack
Armor: HP
Shield: Defense
Gloves: Pincer Attack
Necklace: Attack, Defense, Pincer Attack, Critical Chance, Critical Damage
Rings: HP, Defense, Pincer Attack, Accuracy, Resistance
Substats:
Substats also vary on each equipment. A piece of equipment can never have the same main stat and substat. For example, a piece of armor with % hp as the main stat will never have a hp % substat. However, it is possible for a flat stat equipment to have a percent substat of the same kind. Also, Weapons cannot have defense substats and shields cannot have attack substats.
The following are possible substats for each equipment:
Weapons: HP, Accuracy, Resistance, Critical Chance, Pincer Attack, Critical Damage
Armor: Accuracy, Attack, Defense, Resistance, Critical Chance, Pincer Attack, Critical Damage
Shield: HP, Accuracy, Resistance, Critical Chance, Pincer Attack, Critical Damage
Gloves: HP, Accuracy, Resistance, Critical Chance, Critical Damage, Attack, Defense
Neck: Any substat is possible. However it cannot be the same as the main stat.
Ring: Any substat is possible. However, it cannot be the same as the main stat.
Substat Rolls:
Every time you power up an equipment by +3, a random substat will be upgraded if you have 4 substats on the equipment, or a new random substat will be generated if you have less than 4 substats on the equipment. The amount the substat will increase differs according to its type and what star grade the equipment is. Only 5 and 6 star gear is shown since anything lower will be replaced in late/end game.
5 Star Gear
Accuracy 3%-4%
Resistance 3%-4%
HP 3%-6%
Defense 3%-6%
Attack 3%-6%
Critical Chance 2%-4%
Critical Damage 3%-6%
6 Star Gear
Accuracy 4%-5%
Resistance 4%-5%
HP 4%-6%
Defense 4%-6%
Attack 4%-6%
Critical Chance 3%-4%
Critical Damage 4%-6%
Based on the possible rolls, you can gauge how good a certain equipment piece is based on its substats. For example, a 5-6 star equipment has
Categories of gear and Criteria for keeping them (Assuming main stat is %)
Brown: No beginning substats. Immediate trash. Don’t bother upgrading.
Green: One beginning substat. Immediate trash. Don’t bother upgrading.
Blue: Two beginning substats. If it has two good substats that are both percent with one being crit chance, keep it. If it double rolls into a good substat with high substat rolls, keep it.
Purple: Three beginning substats. If it has three good substats with all percent, keep it. If it has 1 flat substat but two good percent substats, power it up to +9. If it rolls into the flat stat at all, sell it. If it has 2 or 3 flat substats, immediately sell.
Gold: Four beginning substats. If it has 3 or 4 good substats with percent, keep it. If it has 2 percent substats and 2 flat, only keep it if it has valuable percent subs like crit chance and crit damage. 3 flat substats or more is an immediate sell or disassemble. When upgrading gold gear, you can accept one or two rolls into a flat substat on your way to +15. If it rolls multiple times into a percent substat that you don’t want like resistance, you may want to stop as well.
Relics
Relics are obtained by clearing floor 11 of equipment dungeons or by using disassembled equipment and equipment dungeon drops to craft them.
There are 5 types of unique effects that can be given by relics. These effects only activate when a relic has been transcended to +3. Each transcendence will require more materials and will upgrade a random substat or generate a new substat, exactly like other equipment.
Relic substat rolls are identical to 6 star gear. Refer to the substat roll section. The following are effects that can be given by relics:
- Counter Attack Rate +5%
- Reduce Damage Taken +5%
- Penetrate Defense +3%
- Final Damage +5%
- Stun Rate +5%
Gearing your Guardians
This will be a general guide on how to gear guardians. Builds for guardians in the same class can differ drastically depending on their skill sets as well as where you are using them. For example, Cosmos is unable to deal critical hits due to his passive. Therefore, unlike other Attack Type Guardians, he should be built with only attack in mind. Remember to think for yourself and experiment with different builds on Free Gear Removal Days. These builds are just what are mainstream and widely used. Keep in mind that there will be many unorthodox builds that are perfectly viable.
DPS
Main damage dealing guardians are focused on maximizing Crit chance primarily, then an equal spread of attack and critical damage. However, if they are a guardian with a skill that scales off of enemy max HP like Rook or King Artemis, critical damage should be favored over attack. DPS should have 100% crit chance. You can gear a guardian with leader skills and buffs in mind but the guardian should have 100% crit chance as the end result. Late/End game goals of attack and critical damage are about 150% attack and 150% critical damage. For early game, strike sets are acceptable. However, in end game Blade and Violent sets are preferred for maximizing damage. Vampire Gear is used for World/Guild Boss but this will be covered in greater detail in those sections. You want to use Critical Chance, Critical Damage, or Attack Necklaces. For Rings you will want HP in 95% of cases for all guardians. However, some guardians deal more reliable damage if they have low max HP such as Queen/Knight Despia and King/Rook Artemis. These damage dealers can sometimes benefit from an Accuracy, Defense or Pincer Ring depending on where they are used. Relics should be either Final Damage or Penetrate Defense. If you have a multi hit guardian like Despia or Tahn, a penetrate defense relic can be very useful. Each hit has a chance to ignore defense so it is very common to get a hit that penetrates. If you are using a guardian with a skill that already ignores defense or has single hitting skills like Artemis, use a final damage relic.
Revenge Supports
Some guardians have incredibly useful skill 1 effects. Examples of this include, but are not limited to, Prebella, Claudia, Azreal, Mua and Fritz. These guardians’ skill 1 effects are so important that it is best to forgo some tankiness or damage in favor of revenge gear. This will allow them to counter attack on the enemy turn and activate their skill 1 effects on enemy turns as well. These guardians must be equipped with 4 sets of revenge gear and their revenge relics must be transcended to give +5% counter attack as well. This will give a maximum of 50% chance of counter attack. Guardians with conditional skill 1s that depend on critical chance will need 100% critical chance and the other substats will focus on HP/Defense or Pincer attack/Critical Damage depending on where they are used. Use a counter attack +5% relic.
Tanky Guardians
Some guardians have skills that scale off of HP or defense. There are two options for tanky guardians. They can be built with very high HP (or defense depending on what their skill scales off of), 100% crit and high critical damage. Late/End Game goals are typically about 30,000+ HP (or 3,500+ defense for guardians like Mountain Spirit), 100% critical chance, and ~150% critical damage. These will use the same gear sets as DPS guardians. Blade, Energy, and Violent sets can be used. Violent will be most effective but will require stricter requirements on HP or defense substats. They should be equipped with Crit Chance, Crit Damage or Defense Necklaces if they scale off of Defense. Rings should be either HP or Defense depending on what they scale off of. These Guardians should have Final Damage, Counter Attack, or Penetrate Defense Relics depending on their skillset and where they are being used.
The other option is to build your guardian with only survivability in mind. This can be done if you want a guardian to solo tank the guild boss, or if you want a guardian to be more difficult to kill in pvp. These guardians will typically use Damage Reduction Relics and be built with HP rings and Defense Necklaces. They can be geared with Energy, Resistance, Pulverize or Stun Gear. Due to the fact that building a guardian so tanky without crit chance or crit damage makes them less of a threat in PvP, some players choose to use Pulverize or Stun gear on their tanky guardians to make them have a supporting role. Pulverize sets decrease enemy max HP by 3% and remains even after healing or reviving which can be useful against turtle teams. Stun sets can be useful for obvious reasons. A guardian that is built with only tankiness in mind will typically have HP ranging from 30,000 to 40,000, Defense greater than 2,500 and high resistance if they are built that way.
Support Guardians
There are two builds for support guardians like Diaz/Krishna/Astro/etc. In most cases, they are only needed for their buffs or skill effects. Therefore, your main priority is survivability. In cases like equipment dungeon, Tower, and PvP they will be built tanky with no regard for damage output. These uses do not require any specific gear sets. You can often put together whatever gear you have lying around and put it on them as long as the end result is survivability. Typically, a Defense Necklace and HP ring will be used.
The other build for supports is specific to guild boss battles. In addition, this build only works for end game players who have an abundance of hydra gear. In the guild boss battle, it is a waste to build guardians super tanky. The goal is to deal as much damage as possible in 20 turns. Therefore, supports for guild boss should be built with damage in mind. In order to maximize damage, it is essential to have build them with maximum critical chance and a lot of crit damage. They should also have be built with high pincer attack. In order to have a full damage build on a support, you will need sufficient healing. In order to accomplish this, double vampire sets or one vampire, one violent set are the usual builds for end-game support guardians in guild boss. Critical Chance or Critical Damage necklaces and a pincer attack ring are preferred. However, you will still need about 15,000 HP and 1,500 defense to survive the guild boss’s ultimate skill. Until you have very good gear from hydra, it is recommended you use the first build mentioned for support guardians.
Healers
Healers are generally built the same as tanky guardians (See tanky guardians build above). Some exceptions are Prebella, Mua, Azreal, and Fritz who are better on revenge builds (See revenge support build above).
Debuffers
There is a special group of guardians used in PvP with total team wiping or nexus sniping in mind. A strong DPS, a buffer, and a debuffer are commonly used. They are also used in Tower floor 51 and 52 (optional), and floor 56 and 57 (mandatory unless you have king Breo or Queen Aslan). Unlike other guardian types, This class of debuffers do not require any stat other than accuracy. You can choose to leave this guardian unawakened level 1 if used in PvP, or built with only survivability and accuracy in mind if used in Tower. These guardians will typically require focus sets and accuracy rings in order to reach 100% accuracy. If you are able to reach 100% accuracy without focus sets, you can put a secondary focus on tankiness so that they don’t die too quickly in Tower.
Early Game Progression
(See individual game mode sections for more in-depth coverage)
The Beginner guardians are actually useful even in late game so don’t hesitate to form a team with them. Keep in mind that although 5 stars are generally better, even a 3 star team can clear floor 10 of the equipment dungeons. An early team for general purpose progression may be Knight Finn, Rook Edele, Queen Lucian, Rook Hwaryong/Knight Hades and another guardian of your choice.
When you are summoning, keep an eye out for the 3 star guardian, Prebella. She is arguably the best PVE healer in the game and absolutely essential to game progression. You want to invest in bishop Prebella primarily. Also keep bishop Langmar who is given as a reward from beginner missions. In order to receive him, you will need to complete all of the daily missions for 5 days. He is basically required for later Apollon floors.
With your beginning team, focus on progressing through adventure mode. Go as far as you can in easy mode, then switch difficulties and go as far as you can in each respective difficulty. Remember to S clear the adventure modes. The rewards for S clearing all stages of a particular zone is often a gear set. DO NOT SELL THIS GEAR. It is 6 star purple gear with all percentage stats which is rare to find even in late game. Power up the free 6 star gear to a minimum of +12 and equip it on your best damage dealer. This is most likely going to be your rook Hwaryong or knight Hades. The general strategy for early game progression is to put all of your resources into upgrading your primary damage dealer to 6 star awakened so that it can carry you through adventure and early game farming. Use potions received from log in bonuses, events, etc to level up your rook Hwa, or knight Hades. After they are max leveled, you can focus on the rest of your core team.
Do not use Moonstones to expand your inventory slots. Gold is very easily obtainable. You can expand 100 slots for 1,000,000 gold. This may sound like a lot but you can easily farm that amount in less than a day. As an early game player, 200 slots should be plenty but expand however many that you need. 50,000 gold for 5 slots is very cheap.
Unknown Lands in Early Game
Clear the floors of the direction stones that you need. For example, if you want to evolve rook Hwaryong, clear the rook direction floors first. The mission rewards for clearing each floor is a certain amount of directional stones. This makes it much easier to do your first evolution. It is unnecessary to refresh unknown land entries. If you are farming the 20 entries everyday and farming Hall of Judgement you will have a surplus of stones at all times.
Exp/Gold Daily Dungeon in Early Game
For gold dungeon, bring bishop prebella or a passive healer and 4 guardians with AoE skills.
For exp dungeon, bring 5 guardians with AoE skills.
The goal in both of these dungeons is to at least reach wave 7 before turn 15 ends. This will reward you with a 3 star flora which can be used to power up your guardians.
Hall of Judgement in Early Game
After you’ve made your first 6 star guardian, you will unlock Hall of Judgement. It is relatively difficult for new players so it is recommended that you add a friend that can carry your team. Some places to add friends are in game chat, reddit, and discord. Similar to Unknown Lands, clearing each difficulty of HoJ will give you a certain amount of awakening stones which makes your first awakening much easier. You want to refresh Hall of Judgement at least once a day. It is recommended to refresh it twice a day. The first refresh costs 10 moonstones while the second costs 20 moonstones.
Daily Dungeon in Early Game
Daily dungeons are where you farm an additional source of summoning points. It is limited to 3 entries per day and does not allow you to reuse guardians per entry. It can be difficult to form 3 different teams in early game so just try your best to clear the easy mode. It doesn’t matter too much if you can’t clear it 3 times a day for now. See the DAILY DUNGEON section for more.
Promotion Battle in Early Game
As an early game player, you can’t expect to rank very high in PvP yet but it is still important to spend your tickets. You will receive trophies even if you lose. Your number one priority is to buy the skill book in the glory shop once a week. It costs 200 trophies. After doing so, it is recommended that you buy the Nexus directional buffs. These are permanent buffs to all guardians of that particular direction and it applies in all game modes, not just PvP. You should first invest into rook atk and crit damage. You can also choose to upgrade your nexus which will make your PvP defense slightly more difficult to kill but it is not recommended for new players.
See the PROMOTION BATTLE section for more.
Mysterious Sanctuary in Early Game
Do not focus on this area of the game as a new player. The free equipment you obtain from S clearing adventure is far more useful than anything you can obtain by farming low level floors. See the EQUIPMENT DUNGEONS section for more.
Forgotten Tower in Early Game
The first 50 floors of forgotten tower do not require much strategy. It’s relatively straightforward and does not require specific guardians. Progress as far as you can and remember to revive any dead allies before the end of the day. See the TOWER section for more.
Guild Content in Early Game
Join any guild that you can in the beginning. Participate and spend all of your entries even if you can’t win against the defenses or you die instantly against the guild boss. You are still rewarded coins and moonstones for participation. It is important to AT LEAST get the moria pieces from the guild shop. Don’t worry about the guild boss or guild stones at this stage of the game. You don’t have the guardians built for it yet and spreading your resources so widely in the beginning will hurt your progression.
What Should I use my Select 5 Star Book on?
After S clearing hell mode in adventure, you will receive a select 5 star book. This allows you to pick any 5 star guardian (with the exception of combines, legends, and newly released ones) as well as the direction.
It is recommended that you hold onto this book when you are still new to the game. When you have a limited amount of 5 stars and you are still pulling mostly non-dupe 5 star guardians, save your select book.
When you start building your end game teams for pvp, world boss, and guild boss, you can finally decide what to use your select 5 star book on. The following guardians are the most highly recommended choices:
- King/Bishop Fritz: Cooldown reduction is essential to a good boss team. Choose the direction that will best fit your team.
- King Diaz: Not as good of a cooldown reducer as fritz but has a very useful extend debuff skill as well as a +1 AP skill.
- Rook Tahn: She needs to be made into a legend to be top tier so use your select book on her only if you already have 2 other copies of Tahn. Legend rook Tahn is the strongest single target dps in the game.
- Rook/Bishop/Knight Krishna: Krishna is the ideal guardian for providing team immunity. She is a great addition to most boss teams and essential for Milliah teams in world/guild boss. Knight Krishna is also a top tier pvp defense unit due to her passive invincibility for nexuses. She also happens to provide passive immunity which makes her great for pve as well.
- King/Queen Cosmos: Only consider choosing Cosmos if you already have all of the units above. A good boss team is arguably the most important aspect of this game. King/Queen Cosmos is great due to his AoE skill. Add on his passive ban revival ability and he perfectly counters the revive meta in PvP.
The select book is ultimately your choice to make, but the guardians listed above are the best choices for bosses and pvp.
Mid Game Progression (Artemis):
The key to quickly progressing from early to mid game is to COMBINE FOR ARTEMIS. All of early game is essentially leading up to and preparing to combine Artemis. Even if you have Despia or Tahn, it is recommended you combine for Artemis. Not only does Artemis complement their damage with her brand, she is also a more reliable damage dealer since she ignores defense. Artemis is one of the 3 natural 5 stars that can be combined. She is very important for equipment dungeon farming and a solid DPS choice all around. An important thing to note is KEEP KING AND ROOK ARTEMIS. You will need both.
Which Artemis is good?
Artemis must be split up by direction. Rook and King are the best versions of Artemis and your goal when combining for her. Knight is top tier for Promotion Battle (discussed in Promotion Battle). Queen is somewhat useful for instantly killing a difficult tower floor (although you’ll waste many shoes trying to get RNG to work in your favor). Bishop is the one version that is definite fodder.
Why is Artemis so Good?
First, we need to look at her skill 1. It applies a debuff that increases all damage that the enemy receives by 30% for 1 turn (hereafter called BRAND). The brand is generally useless if Artemis is alone as the main attacker in 3 AP areas since she will apply the debuff, and it will disappear immediately after her turn is over. However, her brand becomes extremely useful and irreplaceable when there are two Artemis in one equipment dungeon group or in Guild boss battles with 5 AP. In these cases, Artemis applies her brand by pincering. You can then proceed to use an overpowered skill 3 that will take advantage of the brand.
This brings us to Rook and King Artemis’s skill 3. It ignores defense if the enemy’s HP is higher than her’s and does damage that scales according to max HP. This makes her perfect for high HP bosses and extremely reliable since she does not require a defense break to deal insane damage. Much of end game PVE compositions revolve around Artemis’s skill 3 and maximizing its damage. In end game, an Artemis can be buffed and geared to the point that she will deal anywhere from 120,000 to 160,000 damage with her skill 3. By bringing a rook and king Artemis to an equipment dungeon, you can often kill a floor 10 boss by having one artemis use her skill 3, then have the other artemis use her skill 3. This can lead to some incredibly fast dungeon runs. The current record for a Kraken f10 run uses 2 Artemis and finishes in 39 seconds. She remains a staple in all end game players’ team compositions. It is almost safe to say that the deciding factor between an early-mid and a late-end game player is whether he has a level 50 well geared Artemis.
How do I Combine for Artemis?
Combining for any guardian requires three natural 3 stars, and two natural 4 stars. Each of these fodders must be evolved to 5 star and leveled to 35. They must also all be different directions. At the end, you should have 5 guardians with one of each direction. DO NOT power them up to +5 or evolve them to 6 star. Refer to tier lists to see what is safe to fodder. Keep in mind that the direction of Artemis you receive is random. However, you will not receive a duplicate direction in the first 5 combination. After 5 combinations, you are guaranteed to have all 5 directions of her. In subsequent combinations after the 5th one, the direction will be completely random.

What is the Best Way to Farm for Artemis?
In early game, you should have focused your resources and equipment on a main damage dealer. Your goal is to have a damage dealer than can reliably clear an adventure stage with 4 fodder guardians. Good stages for farming exp are 8-5 normal (by far the fastest and easiest but slightly less efficient), or 7-5 hell and 8-5 hell (more efficient but difficult to solo carry quickly). Personally, I recommend 8-5 normal since it has the lowest barrier to entry and it is very quick. Each run can be cleared in as little as 15 seconds. The requirement is being able to deal roughly 11,000 damage in one skill which is not very difficult if you have been funnelling your resources and best equipment into your damage dealer. When you are farming for guardian exp ALWAYS BUY DOUBLE EXP. It is probably the best use of your moonstones in the game. For 30 moonstones you can have double exp active for 24 hours. I recommend that you stack as many shoes as you can in your mailbox for a few days in preparation for an “Artemis farming day”. That way, you can use double exp and spend most of the day just grinding out exp for fodder. Remember that you will also need a lot of evolution stones and directional stones to evolve the fodders. Take advantage of hot times in which unknown land is free to enter and make sure to consistently use up the 20 entries that you get per day.
I Got Artemis. Now What?
Your goal is to get the full collection bonus of Artemis. By doing so, you are also getting transcendence fodders for Rook and King Artemis. As soon as you get one, build a rook Artemis. Rook direction is favorable to equipment dungeon farming due to its ability to stay out of range of big AoE attacks as well as its ability to attack from most areas of the board. Using the exp farming method stated above, quickly level your rook Artemis. After awakening, gearing and leveling to about lvl 30, she should be able to solo 8-5 normal by herself (when you’re leveling her it may be beneficial to use flat armor and flat rings so that she is able to deal more damage with her skill 3). Have her solo farm exp and transcend her with Artemis copies. Level her to 45 or even 50 if you have the time and resources. Congratulations! Now you can finally start progressing to late/end game.
After playing Chain Strike for a few weeks and combining for Artemis you should now have all of the necessary guardians to start progressing towards clearing floor 10 of the equipment dungeons and to progress in Tower. We will now be going into individual strategies for each equipment dungeon as well as other end game content.
Legendary Guardians (under construction)
Note: Legendary guardians are primarily for mid to end game players. It is recommended that you do not attempt it as an early game player. It will drain your resources and stall your progression. Since you are not guaranteed a specific guardian, you may get lucky and get a guardian that will help progression tremendously or you may be unlucky and get a guardian that won’t help you with progression at all.
Legendary Guardians are crafted in the Dimensional Shift. Go to the menu in the lobby and you will find it next to the shop.
The thing that sets apart legendary guardians from other nat 5s is that they have an additional 4th skill (a legendary skill) and they have higher base stats. A level 40 legendary guardian will have slightly higher stats than a lvl 50 normal guardian. However, they are very difficult to create. Just as it is very difficult for a complete beginner of the game to try to combine for Artemis, it is very difficult for a mid game player to try to combine for legendary guardians. Legendary guardians are not essential to clearing any PvE content. Therefore, do not attempt to create a legendary guardian until you have built satisfactory teams for floor 10 of each equipment dungeon, and have at least 3 summonable nat 5s that you do not want to use. Due to the large amount of books and free currency that players receive, after a few months of playing, we will inevitably have many benched nat 5s that are just taking up space in our inventory. The dimensional shift gives us a place to exchange these nat 5s for default legendary guardians or normal legendary guardians.
The Requirements
In order to exchange for a default legendary guardian (Dia, Jormungand, Bergis) you will need:
- A level 45 awakened summonable nat 5 guardian (Artemis/Valk/Zygmunt do not work) that has been transcended twice. DO NOT level to 50. Its a waste of time and not necessary.
- Two 6 star awakened summonable nat 5 guardians. Do not power them up or level them to 40. Its a waste of time and not necessary.
In order to make a +2 transcended guardian, it is recommended that you exclusively use Morias if you want to be able to make a legendary version of that guardian in the future. Due to the fact that each legendary guardian requires a minimum of 3 nat 5s to craft, summonable nat 5’s will quickly become a limiting factor. Also, guardians will be constantly getting legendary upgrades in the coming patches.
In order to make a legendary summonable guardian (Ex: Lord Dragon) you will need the following:
- A level 45 awakened nat 5 guardian of the direction that you want.
- Two 6 star awakened nat 5 guardians of the same name as the base.
This means for each legendary summonable guardian you will need at least 3 dupes and 2 morias to make a single copy. In order to transcend legendary guardians, you can only use legendary dupes. Therefore, as an example, to craft a level 50 +2 transcended legendary Lord Dragon, you would need at least 9 duplicates of Lord Dragon and 6 Morias. In addition, you will need millions of gold, 100’s of awakening stones, soul stones, legendary fragments, etc. Hopefully you can see now why I said this is only meant for late/end game players.
Unlike the default legendary summon that is completely random, when you are building a legendary nat 5 like Lord Dragon, you have control over what direction the final product will be. If you use a lvl 45 +2 transcended rook Lord Dragon, the result will be a legendary rook Lord Dragon. Use this function wisely.
Skillbook Refunds
When you are using a guardian as fodder for legendary crafting, pay attention to how many skillbooks you have invested into that guardian. When you are making a legendary guardian, you will be refunded with skillbooks ONLY for the amount of skillups that the BASE lvl 45 +2 transcended guardian had. The other two fodders’ skill ups are not refunded. For example, if you are using a lvl 45 +2 transcended guardian with 3 skillups, a 6 star awakened nat 5 with 5 skill ups, and a 6 star awakened nat 5 with 2 skill ups, you will only receive 3 skillbooks in the mailbox. Therefore, if you have a skilled up non transcended nat 5 that you no longer want, you should save it as eventual lvl 45 +2 transcended fodder rather than using it as un-transcended fodder.
Skilling up Legendary Guardians
Skilling up a Legendary Guardian is also very difficult. Unlike normal guardians, legendary guardians can only be skilled up with legendary skillbooks. These skillbooks also need to be crafted. You will need 3 red skillbooks and 200,000 gold to make one legendary skillbook.

Therefore, if a legendary guardian needs 10 skillups, it will cost a total of 30 red skill books, and 2,000,000 gold. Again, I hope this drives in the point that you should not attempt building a legendary guardian until you have established a foundation in the game.
Looking at how expensive it is to craft a legendary guardian, it is easy to jump to the conclusion that Chain Strike has now entered P2W (pay to win) territory. It may also be discouraging for new players to see veterans with legendary guardians that feel so far off. However, this game is meant to keep players engaged for a long time. In addition, with the amount of summons that players receive per month, it is inevitable that your roster of guardians will be filled with useless nat 5s after a few months of playing. The default legendary guardians are accessible to all players as long as they sacrifice 3 nat 5s and 2 morias. This means f2p players can build at least one default legendary guardian per month (not including events). If you stick with the game until you are able to farm f10 of each equipment dungeon, you will realize that building legendary guardians is very achievable as a f2p player.
Awakening and Transcending Legendary Guardians
In order to awaken legendary guardians you will need more unknown stones, more stones from HoJ, and 2 new materials: Soul Stones and Legendary Fragments. Soul Stones are obtained from converting guardians. You will lose these guardians after converting them. Nat 3s will give 1 stone, nat 4s will give 20 stones, and nat 5s will give 200 stones.

Legendary Fragments are obtained from the World Boss shop.
In order to transcend a legendary guardian, you will require another legendary guardian with the same name or a legendary Moria. Regular Morias do not work on legendary guardians!
Default Legendary Guardians (under construction)
In this section, I’ll review each default legendary guardian’s skills and attempt to rank them in terms of usefulness. You will notice that each guardian has a direction with a third skill that is completely unique. Those directions are generally worth keeping and building.
Dia

Leader Skill: Raises Ally’s Attack by 35%
Skill 1 | Dia’s 1st skill applies a DoT lasting 2 turns with each hit and applies a brand, increasing the damage that enemies receive for 1 turn. | |
Skill 2 | For Bishop, King, Queen This skill increases the duration of weakening effects PER hit, up to a total of 4 turns, and decreases defense for 2 turns.For Rook, Knight This skill adds a DoT lasting 2 turns with each hit, up to a total of 4, and decreases defense for 2 turns. | |
Skill 3 | For Knight, Queen For Rook, Bishop For King This skill grants Dia 50% attack (which can stack with other buffs) and +4% additional attack per turn. This means for guild spirit, she will have a +130% passive attack buff on turn 20. | |
Skill 4 | Dia’s skill 4 is both an active skill and a passive skill. The active skill is an AoE that deals an incredible amount of damage. The passive allows Dia to gain +1 AP if she kills an enemy with any skill. |
Dia is currently the strongest damage dealer in the game by a long shot. She also has a brand on her skill 1 which means that she is THE Artemis killer. If you have Dia, there is no longer a need for Artemis in your guild/world boss teams (Artemis is still useful for equipment dungeon speed teams).
The fact that Dia applies so many weakening effects makes her a very good combo with bishop/knight Despia who have skill 2s which scale off of weakening effects. Rook and Knight Dia’s skill 2’s are great for this. Bishop/Queen/King’s skill 2 is very good at keeping up weakening effects on an enemy. However, Rook/Knight’s skill 2 is slightly more advantageous since it can quickly apply an incredible amount of weakening effects at once. This is important for guild/world bosses who regularly cleanse themselves.
Rook/Bishop’s skill 3 deals the most damage out of all Dias. It can deal over 1 million damage in one skill on Trigo (Thursday guild boss) if there are 12 weakening effects applied. Since it scales off of the number of weakening effects, Rook’s skill 2 is more advantageous.
Queen/Knight’s skill 3 scales off of the enemy’s attack and max HP. This skill deals a lot of damage but it doesn’t quite match up to Rook/Bishop’s skill 3 in terms of damage potential.
King’s skill 3 is unique. She is missing a high damage single target skill but makes up for it with a permanent attack passive that allows her to hit much harder with every other skill.
Dia’s skill 4 is the strongest AoE skill in the game. King Dia’s skill 4 can deal over 600,000 damage on Trigo (Thursday guild boss). It blows away even most single target skills in terms of damage.
Tentative Ranking: Rook Dia = King Dia > Bishop > Queen = Knight
- Rook and King Dia
- Bishop Dia
- Queen and Knight Dia
Jormungand

Leader Skill: Increases Ally’s Critical Damage by 50% in Guild Wars and World Boss
| Skill 1 | ||
| Skill 2 | Rook kingBishop knight queen | |
| Skill 3 | Knight, kingRook bishopqueen | |
| Skill 4 |
Bergis

Leader Skill: Increase Ally’s HP by 35%
King queenRook bishop knight | ||
Rook knight queen | ||
Equipment Dungeons
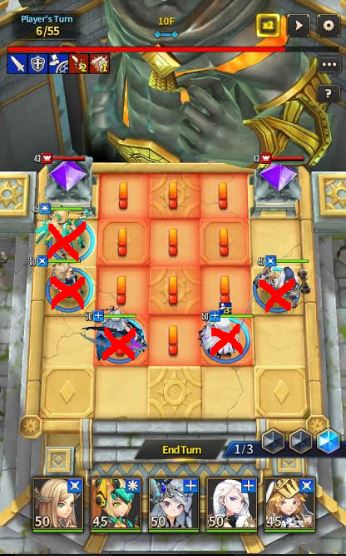
Although each dungeon has differing mechanics, there are some principles that hold true for all three. Each boss has some type of AoE attack that can be deadly for your team. Therefore, guardian selection needs to consider skillsets as well as direction. With equipment dungeons, your goal is to farm 7f or higher. This is where 6 star gear begins to drop.
Apollon drops the least useful gear out of all 3 of the dungeons. It is recommended that you try to skip straight to Kraken in order to progress more quickly. However, there ARE some cases in which Apollon gear sets can be useful. Cosmos benefits greatly from strike sets. In addition, PvP debuffers also benefit from focus sets in order to reach 100% accuracy. If you are not trying to gear any of these two, try to farm Kraken instead.
Kraken drops the most widely useful gear sets for mid to late game. Revenge, Energy, and Blade are all useful even in end game. Farming Kraken alone can get you equipment that will benefit your entire group of guardians.
Hydra is arguably the most difficult dungeon due to its specific guardian requirements. However, it drops the best equipment for end game PVE content.. Violent sets and Vampire sets are needed if you want to maximize your Guild boss score. This dungeon, like Kraken, will drop equipment that can benefit numerous types of guardians.
Everyone’s box of guardians is different and there are so many teams that are viable. Therefore, this guide will focus on the general strategies for the equipment dungeons, what you need to bring, and some suggested guardians. Strategies for these dungeons usually revolve around the safe spots. The safe spots are areas in which the boss’s AoE attacks will not hit. These safe spots generally determine what direction of heroes you should bring to a particular dungeon and where you should place them. However, keep in mind that speed teams and sufficiently tanky teams do not need to follow this rule.
Apollon
Apollon’s Skill Rotation (The gimmicks on the sides will also be casting a Heal over time buff and an attack damage buff on Apollon regularly)
Turn 1: Preparation for Fist Smash
Turn 2: Fist Smash (can inflict defense down)
Turn 3: Preparation for B Slap AoE
Turn 4: B Slap AoE
Turn 5: Eye Laser (Ignores Defense, hits the entire map)
Repeat.
Safe Spots

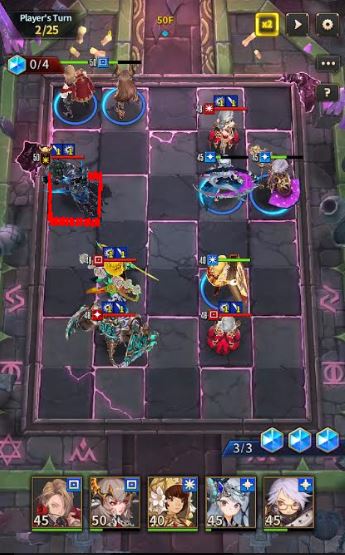
The Red X’s mark where you would ideally position your guardians. Note that the Artemis and Tahn, who are both rooks, are safe from the second AoE. Prebella and Maria, who are both bishops are in the safest spot of this battle. They will only be hit by the eye laser. Soulless is safe from the first AoE but will be hit by the second. Apollon is straightforward and your guardians will not move if you position them this way. Keep in mind that this is not set in stone. You can choose to bring different configurations. Just remember to put the boss’ AoE hit boxes into consideration when you are building a team.
What you need
- A healer: Bishop Prebella is usually the healer of choice. Her consistent healing on skill 1 makes her arguably the best PvE healer. Bishop Maria, Queen Cassandra, Lucia, Rook Edele are also options. Hwaryong is a very good choice due to her passive healing.
- A buff stripper or heal blocker or block beneficial effect debuffer: You need a way to deal with Apollon’s buffs, particularly the healing over time buff. You can choose to use a stripper like Maria, Cassandra, Lucia, Valkyrie, a heal blocker like Sylvia, Nemesis, Hwaryong, or a block beneficial effect debuffer like Francisco.
- A Penetration Defense buffer: Apollon’s eye laser can spell instant death for your team if you do not bring a penetration defense buffer. This buff prevents attacks from ignoring your defense. The most easily acquirable and best guardian for this buff is bishop Langmar who you can obtain from completing the beginner missions. Other guardians with this buff include Shayde, Killbe and Astro.
- A damage dealer: The damage dealer of choice for equipment dungeons is usually going to be rook Artemis (see Mid game progression section). However, there are other perfectly viable options for Apollon. Knight Sarin, Rook Hwaryong, Nemesis can be used if you want to use DoTs and bombs. Queen Lucian is a very good nat 3 that has been shown to be effective in speed clear teams. Queen/King Carly has been used with great success as well.
- Defense/Attack debuffs: These are optional but they make the fight much more manageable. The defense debuff will speed up the fight while the attack debuffs will lower your HP/Defense requirements to survive the AoEs. Examples are Langmar, Edele, Soulless, Wukong, etc.
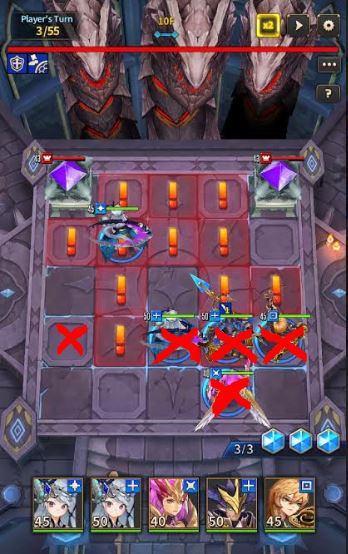
Kraken
Kraken’s Skill Rotation (The tentacles will do an aoe attack every turn that hits any guardian within one tile of them.)
Turn 1: Randomly spawns a tentacle.
Turn 2: Hits the map with his claw (can inflict silence for 1 turn)
Turn 3: Preparation for his wave AoE
Turn 4: Cleanses harmful effects, puts a 7 hit shield on himself, and does an AoE.
Turn 5: Shuffles your team and randomly scatters them across the map. (can stun for 1 turn)
Repeat.
Safe Spots
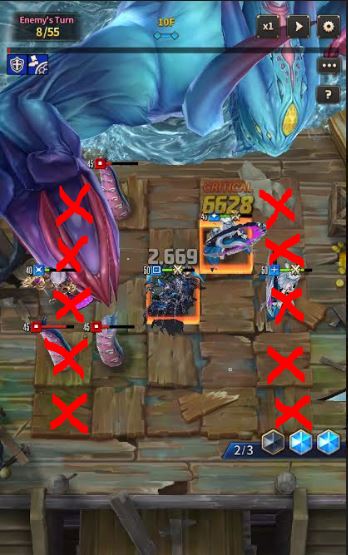

The claw attack shown in the first picture only hits the 3 middle columns of the map. The safe spots from this AoE are marked by red X’s. As you may notice, rook Artemis and bishop Diaz do not get hit by the claw attack.
The red X’s marked in the second picture are safe spots to initially place your team at the start of the battle. The two spots at the back would need to be rook guardians while the side positions are more flexible in the direction that you can use. The 5th guardian you bring will either need to be positioned in the far back if they are squishy, or inside the initial AoE if they are tanky enough.
What you need (assuming you don’t have a speed team)
- 1-2 healers: Again, bishop Prebella is a favorite. King Undertaker, Knight Skuld and rook Claudia can be used to balance HP after an AoE. Bishop Maria, rook Edele, Mua, Lucia, and other standard healers are all viable options. Hwaryong is a very good choice due to her damage and passive healing.
- Multi hitters: Kraken applies a shield on himself that will block all damage until he is hit 7 times. This makes multi-hit guardians valuable for Kraken. If you read a skill, it will say “hits the enemy for x number of times”. Guardians that can be valuable for this are: Wukong, Tahn, Artemis, Scarlet, Nemesis, etc.
- AoE damage guardians: Tentacles become a major problem in later floors of Kraken. Therefore, guardians with AoE skills like Carly, Queen Lucian, Nemesis, Azurok can come in handy. Lord Dragon is also a very good guardian for killing off tentacles and providing constant damage on the boss.
- Damage Buffer (optional): This is optional for mid game teams but required for speed teams. Examples are Queen/King Edele, Rook/Bishop/Knight Juan, Knight/Bishop Claudia.
- Defense/Attack Debuffers: Not absolutely necessary but they make dealing with higher floors easier. Examples are Queen/King/Rook Edele, Bishop Prebella, Wukong, etc.
Hydra
Hydra’s Skill Rotation (The gimmicks will apply DoTs on your team and cleanse/immunity Hydra)
Turn 1: Prepares for an AoE attack
Turn 2: Does AoE attack applying defense break and DoTs.
Turn 3: Replaces buffs on your team with DoTs. The gimmick on the right applies more DoTs. Prepares for an AoE attack.
Turn 4: Gimmick on the left cleanses Hydra and gives him immunity. Does AoE attack dealing increased damage if harmful effects are present. Applies disturb healing debuff.
Turn 5: Does another AoE attack targeting the entire map that detonates any DoTs present on your team.
Repeat.
Safe Spots

The red X’s mark the ideal positions for a Hydra team. The second AoE is the most deadly move since it blocks healing. As you can see, the positions marked by a red X completely avoid the second AoE. Bishop Valkyrja is placed in the back so that she does not kill herself by moving into range of hydra’s AoEs. The ideal arrangement would be to use 3 rooks, and bishop Valkyra in the red X’s that are marked. In Fritz’s spot, you could place a random support. You can put a rook or king guardian in that spot if you don’t want them to move at all, or a queen/bishop/knight position if they are sufficiently tanky and you are okay with the possibility of them dying in the AoE’s.
What you need
- Rook Artemis. By this point, you need to have her built. Don’t bother trying Hydra without her. Rook damage dealers are practically required for Hydra and Artemis fits that role too well. Of course you can do it without her if you really want to, but shes free to obtain for all players. It makes no sense not to combine for her and use her.
- Bishop Valkyrja. She passively removes one DoT from your team each turn and passively heals you. With the amount of DoTs being thrown at you, she is almost required. This does not necessarily apply to speed teams.
- Secondary damage dealer (preferably rook). This can be rook Tahn, another rook Artemis or king Artemis, rook LD, and the list goes on.
- Burst Healer with cleanse: You want to avoid healing over time if possible. Due to the move that turns buffs into DoTs, you want to avoid buffs if possible. Examples are King Maria, Mua, Lucia, etc.
- Passive buffers (optional): It is recommended that you do not use an active buffer for Hydra. He turns buffs into DoTs which can screw over your team if you’re not careful. Some options for passive buffers are King/Queen Edele, Rook/Bishop Juan.
- Stripper (optional): This role can be filled by bishop Valkyrja. The boss’s immunity can be stripped. Doing so allows you to apply defense/attack break and brands.
Speed Teams
I’ve been mentioning speed teams a lot so far. This is because that is the end game goal for equipment dungeons. You need to farm floor ten 1000’s of times if your goal is to get perfect gear (Thankfully there’s a 20x auto function). You don’t want a team that takes 5 minutes to complete a run. The goal is generally a team that can consistently clear floor 10 in under 1 minute and 30 seconds (even better if its under 1 min). Thankfully, this does not require much variability in your teams. The strategy is simple. You want to kill the boss within 2 skills. This lets you avoid the deadly AoE attacks and bring a team that is completely focused on damage. In order to do this, you will need:
- Two Artemis. You can choose to make 2 Rook Artemis or one Rook and one King. They will be in charge of killing the boss with their skill 3.
- Buffer: Passive buffers are more common since it does not require time to come off cooldown; however, active buffers can work as well. Examples are Queen/King Edele, Rook/Bishop/Knight Juan, Bishop/Knight Claudia.
- AoE damage dealer to clear the 1st wave (mostly for Kraken). Knight Hades is the favorite for this. He can clear the entire 1st wave in 1-2 turns which leaves your two Artemis’ with their skill 3s ready every single time.
- AP increaser (optional but extremely useful). Examples are Badka, Lirina, Bishop/King Diaz.
In order to build a speed team you will require very good gear on your Artemis’. They will need to deal about 120k damage with each skill 3 to pull off a 1-2 turn kill. Therefore, do not attempt to make a speed team until you have been farming Kraken or Hydra for a significant period of time. The composition will differ for each dungeon but the core is always double Artemis.
The following is a video of a Kraken f10 speed team. This is not my video. Credit goes to the owner of this video.
Hall of Judgement (under construction)
Tower
Remember that if your guardians die on a floor they cannot be used again. You can revive your dead guardians once a day. Use this revive wisely and remember to use the revive everyday if any of your guardians are dead. Normal Tower up to stage 50 requires very little strategy. Certain directions have decreased HP on certain floors but it is still easy enough so that it won’t matter as long as you have a proper team. It is mostly a gear check and can be easily cleared as long as you have a team geared in 5-6 star gear and awakened lvl 40+. Bring AoE guardians such as Queen Lucian, King/Queen Carly, Hades, etc and Artemis for the boss floors and you should have no problem with normal tower up to floor 50. However, floor 51,52, 56 and 57 are Tower floors that require very specific guardians. Typically, you will be unable to auto these floors due to the special passives that the enemies have.
Floor 51 and 52
Floor 51 and 52 have a special passive that deflects all damage and inflicts 300% of it back. This ignores any beneficial effects, meaning you cannot prevent it with invincibility. There are several ways to clear these two floors.
- DoT/Bomb Team with Healers: The enemies’ passive does not deflect DoT or bomb damage. Therefore, King/Knight Azurok and Knight Sarin are very good choices for these floors. They have skills that do not need to attack the enemy to inflict DoTs and bombs. In addition, their skill 1s apply additional DoTs/bombs. Use the healers to initiate the attack and use your DoT/bomb guardian to pincer attack. Your healers should be built with minimal attack and pincer with high defense and HP. This is to prevent the reflected damage from being too large. Your DoT/bomb unit can use flat main stat gloves for these floors to prevent themselves from suiciding on the enemy.
- Suicide Team with Reviver: This strategy requires a guardian with a one hit AoE skill that can one shot the enemy. The reason it needs to be a single hit AoE is because the skill will cease to inflict damage if your guardian died. For example, knight Hades kills himself on the enemies’ shields with his first hit and the other 4 hits of his AoE do not inflict damage. The end result is that Hades dies and the enemies don’t. A good guardian for this is bishop/king/queen/knight Lubu. After he uses his AoE to kill a few enemies, revive him and repeat the process. You will be unable to use him after you clear the stage so you will have to wait one day to clear the next stage.
- All healer team: Use a team consisting of 5 healers with consistent healing every turn. Some good choices are Rook Hwaryong, Maria, Prebella, Azreal, Bishop Valkyrja, etc. Build them sufficiently tanky and bring a reviver if necessary. Since healers don’t deal much damage, they should be able to survive the reflected damage. With constant healing every turn, you can slowly whittle down the enemy HP until you win.
- Transmogrify team: The enemies’ are unable to reflect damage if they are transmogrified. Therefore, if you bring debuffers with transmog, you can bring a standard dps team to kill off the enemies one by one or all at once without worrying about the reflect. Guardians with this ability include Luarg, Bishop/Knight Medusa, Esther, Rook Camael.
Floor 56 and 57
Floor 56 and 57 have enemies with a passive that increases their attack power in proportion to their lost HP. In addition, they are essentially immortal until they are inflicted with a very specific debuff. They have the endure effect which keeps their HP at 1 when inflicted with damage that should kill them. This makes them hit incredibly hard if you make the mistake of trying to kill them without debuffing them first. There are two ways to clear these two floors.
- Ignore beneficial effects skills: This only works for players who have been blessed with RNG luck to pull king Breo or Queen Aslan. They are the only guardians that currently have a skill that ignores all beneficial effects. In this case, it ignores the endure effect of the enemies and kills them. You will be using king Breo or Queen Aslan as your sole dps and waiting for their skills to come off cooldown between attacks.
- Debuffs: This is the standard way of clearing these floors. For floor 56 you will need a debuffer to inflict sleep, and a debuffer to inflict petrify. For floor 57 you will need a debuffer to inflict stun and one for freeze. MAKE SURE TO CHECK EACH WOLF’S PASSIVE. They each require a different debuff to get rid of the endure effect. Good choices for 56 are knight succubus and knight medusa. Some possibilities for 57 are Kaos, Stein, or Queen Valkyrja for stun, and Neebe for freeze.
Floor 60
Floor 60’s boss has penetration defense and a passive that gives him an endure effect for 1 turn before he dies. In addition, he has an AoE attack that will instantly kill whoever is caught in it. These factors make Artemis not a great option for this floor (although you could make her work). Dps like Tahn or Despia would be better suited for this floor. You can also use DoT/bomb guardians such as Rook Hwaryong, Nemesis, or Knight Sarin. Using Rook Hwaryong or Knight Zygmunt as a meat shield on this floor can be helpful. Like other boss stages, focus on killing the boss as soon as possible.
Hard Tower
Hard Tower up to stage 35 or 40 is much like normal tower. However, the difficulty quickly spikes to the point that it is very difficult to survive more than a few turns unless you are using a full on tanky team. Therefore, much of the team compositions used for floor 40+ are focused on pumping up an AoE dps or boss killer as much as possible in order to clear the floor as fast as possible. Keep in mind that every 5 floors has a boss. In order to clear these floors, you do not have to kill everything. You only have to kill the boss. For example, floor 50 hard can use the following team comp:
Hades (outlined in red) is the boss of this floor. Juan and Edele are there to provide buffs, while Despia and Artemis are responsible for damage dealing. King Diaz is there to allow 2 attacks in one turn. This allows you to clear this stage in 1 turn as seen above. However, it is important to note that the gear requirements for the upper levels of hard tower are very high. You will need to farm floor 10 of kraken and hydra for a considerable amount of time before you will be able to clear hard tower.
Promotion Battle

Promotion Battle is a very important aspect of Chain Strike. Even if you normally don’t enjoy the PvP aspect of gacha games, you should still spend your tickets. There is an auto repeat function for Promotion battles so you can choose to auto play or do it manually. The most important features of promotion battles are the nexus directional buffs that can be upgraded with trophies. These are universal buffs that apply to all guardians of a particular direction. That means, if you upgrade the rook directional buffs to lvl 10 for attack, HP and defense, all rook type guardians will have a 20% attack, HP and defense buff in ALL game modes.
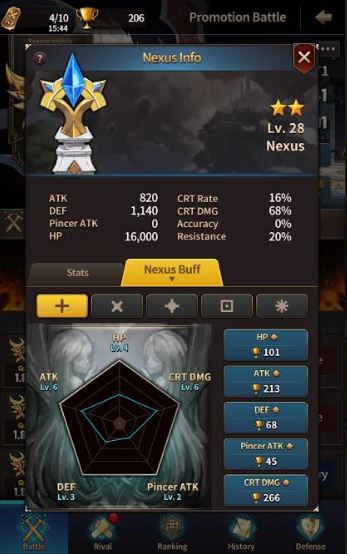
Promotion battles are different from other battle modes. You do not have to kill the entire enemy team to win (although you can). You can choose to target the enemy nexus and if you can take it down, you will automatically win. This aspect of promotion battles makes it more f2p friendly and allows new players to have a chance of beating opponents that would otherwise be way out of their league. However, the nexus can be upgraded so that it is more difficult to take down. It can be promoted a tier for every 18 levels that you upgrade the nexus (this is entirely different from the nexus directional buffs).
The nexus has a passive that reduces all damage received by 30%. In addition, it has a feature that prevents it from losing more than 30% of it’s HP per hit that it receives. For example, if you were attacking a nexus with 20,000 HP and attacked it using a single hit skill like knight Lubu, it will only receive a max of 6,000 damage. This makes multi hitter DPS very important for PvP, especially skills dealing 4 hits or more. With a 3 hit skill, you can only deal a max of 90% of the nexus’ HP. However, with a 4 or 5 hit skill, you can take down a nexus within a single turn if you have sufficient damage. This combined with the fact that attackers get the first turn, opens up the possibility of 1st turn nexus sniping. There are some main strategies for Promotion battles. 1st turn nexus sniping, baiting to nexus snipe, or team killing.
- 1st turn nexus sniping is the easiest method for winning promotion battles. However, nexus sniping becomes much more difficult against nexuses that are tier 5 or 6. Against tier 5 nexuses and below, the best snipers are Knight Artemis and knight Aslan. This is because they have multi hitting skill 3s that ignore defense while also being able to hit over enemies due to the advantage that the knight position gives. There are a few combinations with these two guardians that can allow guaranteed first turn victories against any defense (as long as they do not have knight krishna and your damage is sufficient). There is a single PvP defense arrangement that specifically blocks knight snipers but it exposes you to rook snipers.
- Knight Aslan/Artemis + Knight Claudia+ Rook/King Tarania + King/Bishop Diaz. This strategy uses reactivators to move Artemis or Aslan twice to get in range of the enemy nexus. Then Claudia buffs, Diaz gives +1 AP and you can snipe their nexus.
- Knight Aslan/Artemis+ Knight Claudia + Rook/Knight/Queen Skuld (or Knight Hwana) + Bishop/Knight Kaos. This strategy has the same purpose as the previous one but uses Kaos in case you do not have bishop/king Diaz. You increase the movement range of Aslan/Artemis with skuld, move in range, strip the buff with Kaos to turn them into a knight again, then reactivate with Claudia, buff, then snipe.
- Baiting to nexus snipe is essentially the same strategy as above. If you do not have a knight sniper or you are facing a tier 6 nexus that you do not have sufficient damage to kill in one hit, you will need a different sniper. These snipers may be king/bishop Despia, Rook Tahn, or (most importantly) rook/king/bishop Milliah. Despia and Tahn are very strong nexus snipers if you manage to defense and brand the nexus. Milliah, however, stands out as the strongest nexus sniper. She deals damage that ignores defense that is proportional to the HP of the shield that is on her. This may not sound great, but her damage is unrivaled in the game. She is able to snipe any nexus regardless of level as long as she is skilled up and geared well with ~30k HP, 150% critical damage and 100% crit chance. In order to bait and snipe, you will need to lure the enemy guardians away from their nexus. Reactivators such as knight Claudia and Tarania are still very important for this strategy. This strategy takes practice to get used to how the AI behaves but it can be a very effective way of winning against opponents that are way out of your league.
- Team killing is the most basic and straight forward way of winning a battle. However, you still want to build a team that can win as fast as possible. These teams will generally consist of an AoE damage dealing guardian and buffers. King/Queen Cosmos are especially noteworthy for this strategy. His passive counters revive and ignores defense. He also deals double damage against HP/Defense guardians which make up the majority of PvP defenses. This makes him the best PvP offense guardian in the game. If you do not have him, bishop/knight Lubu, King/Queen Sylvia, or King/Queen Carly are some other options. They all have AoE attacks (Carly has a chain attack) that can potentially wipe out an entire team as long as they have sufficient gear and buffs.
Keep in mind that there are other viable PvP teams such as sleep teams using Hameleon/Succubus, Stun teams using Kaos/Stein, Tanky teams using Zygmunt, Queen Valkyrja/Grion/Maria, Rook Hwaryong and much more. However, for PvP offense, the 3 strategies above are preferred due to the fact that it is much quicker to farm trophies that way.
PvP defense teams are generally all the same. They generally focus on tanky guardians that can strip buffs and revive allies while also being able to deal decent damage. This type of defense can easily kill off a sniper team if the sniper is not able to quickly kill the nexus. This is why many people opt for a team killing team using AoE dps guardians.
PvP defenses
PvP defenses generally consist of tanky guardians that are difficult to kill quickly. They are often set up with the nexus in a back corner and 4 guardians are hugging the nexus. However, you may also encounter forward defenses consisting of knight DPS and strippers such as knight Seimei or Knight Finn that are set up right next to your nexus. These forward defenses are meant to counter snipe your nexus. If you fail to snipe their nexus or kill their team on the first turn, they will snipe your nexus on the next turn.
The following are some guardians that you will often encounter on a PvP defense:
- Queen Maria: reviver, strips 2 buffs on S1, invincibility on S2 and deals a surprising amount of damage due to her HP scaling.
- Queen Grion: Hits incredibly hard for a tank (over 20k) due to his HP scaling, and is very difficult to kill due to his passive that decreases the chance of receiving critical hits.
- Rook Laval: Used to make nexus sniping more difficult. It passively decreases enemy critical damage by 50%.
- Knight/Queen Zygmunt: Extremely tanky, has a provoke on S1, and hits hard for a tank due to his HP scaling.
- Rook Hwaryong: The passive team healing and auto revive makes her a staple of many defense teams.
- Bishop/Knight/Queen Barjan: Strips and blocks buffs. Also reduces movement range of enemies that he attacks which can be very annoying.
- Knight Krishna: Has a passive that provides the nexus with an unstrippable invincibility shield. This makes her very good for anti snipe defenses.
- King/Queen Cosmos: Even though Cosmos is more suited for PvP offense, he remains a large threat in defenses due to his anti revive, ignore defense and high damage output.
- King/Knight Seimei: They have a passive 25% HP shield that activates PER HIT after taking critical damage. This makes them almost impossible to kill if you do not bring a guardian that blocks beneficial effects.
Daily Dungeon
Daily dungeon allows 3 entries with 3 different levels of difficulty. Each dungeon has a particular status effect as a theme. For example, the Monday dungeon has enemies focused on the sleep debuff. Since you are given 4 AP per turn, it is easy to just bring a DPS/buffer team and focus on first turn kills. However, if you are having difficulty with the status effects, you can build particular guardians that give passive team immunity for those specific status effects.
- Bishop Azurok: Team immunity to freezing at 6 star
- Bishop Nepur: Team immunity to petrification at 6 star
- Bishop Ladark: Team immunity to stun at 6 star
- King Aegeus: Team immunity to sleep at 6 star
Other useful guardians may be knight violet, rook Kaos, or an immunity guardian like krishna/alice/indra if you have difficulty with the status effects. Do not focus too heavily on trying to progress in daily dungeon. As you progress through equipment dungeon and build a 6 star transcended team, you will naturally progress from low to high daily dungeons.
Guild Wars
Guild Wars are split up into a PvP section and a PvE section. It is important to understand how each part works in order to maximize your guild’s score which will allow you to climb the guild ranks. Guild Shop is extremely important for the legend books, moria and
Guild Stone Battles
Guild stone battles are the PvP aspect of Guild Wars. Unlike promotion battles, there is no nexus. However, the same principles and choices for guardian picks apply. The guardians you will encounter will largely be the same as promotion battle. An important thing to remember with these battles is that you need to use 2 of the same guardian directions as the stone you are attacking. For example, if you are attacking a king guardian stone, you need to use 2 king guardians in your offense. Each stone has a health bar. If you defeat a king defense using 2 kings you will inflict 50% of the health bar and receive the max number of coins. If you defeat a king defense using 1 king, you will only inflict 40% of the health bar and receive a decreased number of coins. If you defeat a king defense using no kings, you will only inflict 40% of the health bar and receive even less coins.
It is important to coordinate with your guild members and take out one of each type of stone at a time. It is much better to take down one of each direction rather than 5 rook stones but none of the others. You receive a bonus to your guild’s score for every 5 different directions that are taken down. Taking down all 25 stones of the enemy guild will boost your guild’s score by 55%. However, guild stone battles do not directly add to the score of your guild. It only gives a multiplier. In the end, the guild spirit battle is what will determine the winner of a guild war.
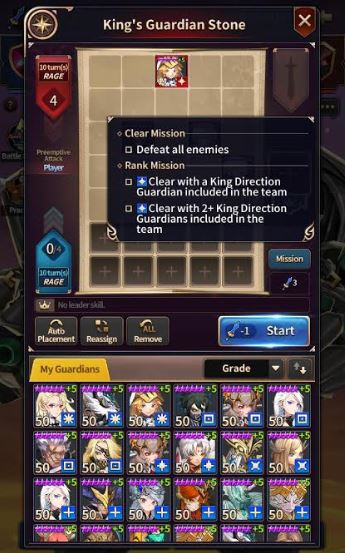
Guild Guardian Spirit Battle
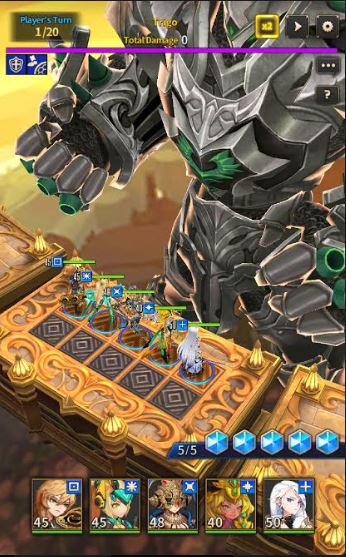
There are different Guild bosses for each day from Monday through Saturday. However, the only difference is the various status effects that they inflict on your team after the first ultimate skill. Each boss alternates between an attack debuff and defense debuff. Each boss also has an ultimate skill at turn 5 and turn 15 which ignores beneficial effects and inflicts a status effect for 2 turns. After the ultimate skill, the boss will become inactive for 2 turns. Upon waking up, he will inflict an additional debuff with the attack and defense debuff. The following is a summary of each boss.
Monday: Inflicts Sleep. Attack Down (Attack Damage decreased), Defense Down (DoT)
Tuesday: Inflicts Petrify. Attack Down (Strip Beneficial Effects), Defense Down (Reduce Movement Range)
Wednesday: Inflicts Freeze. Attack Down (Critical Rate decreased), Defense Down (blocks healing)
Thursday: Inflicts Silence. ALSO SELF DEBUFFS HIS OWN DEFENSE BY 99%. Attack Down (Critical damage decreased), Defense Down (Prevents pincer attacks)
Friday: Inflicts Stun. Attack Down (Increases cooldowns by 1 turn), Defense Down (Increase damage taken)
Saturday: Inflicts Transmogrify. Attack Down (blocks beneficial effects), Defense Down (inflicts Despair; you will die in 2 turns)
The guild spirit’s damage is distributed between the front and back rows. Most people choose to have all guardians in the front row. This evenly distributes the damage. As discussed in the “Gearing your Guardians” section, even supports are built with damage in mind for end game Guild boss builds. However, as a mid game player, you may have difficulty with this strategy. Many people will choose to use one or two tanky guardians in the front and have 3 squishy guardians in the back. Use practice mode to see which placement suits you best. Remember that position still matters even though you can’t move your guardians. If you place a rook guardian in the back row behind another guardian, you will be unable to attack. Remember that you must bring one of each direction to the fight. You also need to build two different teams. Dupes of the same direction are okay. If you have two rook Artemis you can use them on separate teams.
Guardian spirit is a straight-forward fight in which you must deal as much damage as you can while dealing with the various status effects. Keep in mind that there is a guild totem that increases your stats for guild wars. Unlike the nexus directional buffs, however, this does not apply to modes outside of guild war. There are many different team compositions that can do well. The key is to make sure that you have all of the necessary components of a good team. Keep in mind that your guardians will likely be fulfilling multiple roles at once. The following are the necessities.
:
- Sufficient healing- As a mid game player you may need up to 2 healers. As you get better, you reduce it to one healer, then no healers and just use vampire sets.
- Examples: Rook/Bishop Edele, Bishop/King Maria, Queen Cassandra, King/Queen Edele, Mua, Lucia
- Defense Break- Defense break is absolutely essential to maximizing your score. You typically want a guardian that has defense break on their skill 1.
- Examples: Edele, Krishna, Wukong, Juan, Breo, Ms. Dale etc.
- Attack Break or Attack Damage Break- The Guardian Spirit hits hard enough each turn so that it is difficult to survive if you do not break his attack damage somehow. However, if you have very good healing this may be unnecessary.
- Examples: Bishop Indra, Wukong, Soulless, Aikan, Bergis
- Immunity/Cleanse: Cleanse and immunity are the most important component for making a team that can survive until turn 20. If you do not cleanse the defense break before turn 5 or 15, you are basically guaranteed to have a team wipe. In addition, even if you have a cleanser, if you do not have immunity, you will waste 4 turns every fight due to the 2 turn stun/sleep/petrify/silence/freeze/transmog that he inflicts on your team.
- Examples of Cleansers: Bishop/King Maria, Queen Cassandra, Claudia, Seimei, Knight Violet, Mua, Alice, etc
- Immunity buffers: Bishop/Rook Indra, Bishop/Rook Krishna, Alice, Jormungand
- Buffer: Even if you survive 20 turns it doesn’t mean anything if you don’t deal any damage. The most important buffs are attack/crit damage or critical chance/critical damage.
- Examples: Knight/Bishop/Rook Juan, King/Queen Edele, Bishop/Knight Claudia, Knight Ms Dale, Queen Syledrin, Skuld, Jormungand
- Increase Damage taken and increase damage dealt(optional but basically required for end game): These are two separate status effects. One increases the damage the target receives by 30% and one increases the damage you deal by 30%. One is a debuff and the other is a buff.
- Examples of Increase Damage Taken debuffers: Artemis, Robin Hood, Tahn, Soulless, Dia
- Examples of Increase Damage Dealt: Alice, Jormungand.
- Decrease Cooldown on skill 1 (optional but basically required for max scores)
- Only Diaz and Fritz.
- Damage Dealer: Since guardian spirit is a 5 AP fight, you ideally want 2 main damage dealers. There are too many options for this so only the best will be given as examples:
- Best Damage Dealers: Rook/King Artemis, Rook/Bishop/Knight Tahn, Queen/King/Bishop/Knight Despia, Rook/King Milliah (needs a VERY specific team), Dia
- Increase AP (optional): Due to the 5 AP given, you often end turns with 1 AP remaining since 2 attacks only consume 4 AP. This is where increase AP effects come in handy. It will grant you 1 additional AP and allow you to make 3 attacks instead of 2.
- Examples: Badka, Lirina, King/Bishop Diaz, Jormungand, Bergis
As you may see, there are many different roles that need to be filled when building a guild spirit team. Therefore, you will need to prioritize guardians who can fulfill multiple roles.
The following is an example of an early-mid game player team composition:
Rook Artemis, King Carly, Knight Aikan, Bishop Claudia, Queen Cassandra.
Note: You are missing immunity but that may be unavoidable if you haven’t pulled an Indra/Krishna/Alice yet. If you have a guardian with immunity, prioritize building them first.
The following is an example of an end game player’s team composition:
King Diaz, Bishop Indra, Queen Despia, Knight Ms. Dale, Rook Artemis
Note: The team would be built with 45% critical rate and the rest into damage stats. Using Despia’s leader skill and Ms. Dale’s buff, it would be sufficient to reach 100% crit rate. Everyone would need vampire gear to survive. Indra provides immunity so that you don’t have to worry about debuffs, Artemis provides the brand debuff with strong damage on her S3, Ms. Dale provides a defense debuff, Diaz provides cooldown reduction and plus 1 AP. If you refer to the previous list of necessary components of a team, you will notice that all of them have been met. Go through a similar checklist whenever you’re trying to make a guild boss team.
The following are videos end game players’ Guild Spirit runs. These are not my videos. Credit goes to their creators.
5 million team (no legends)
6.4 million team (no legends)
World Boss (under construction)
Aries
Taurus
Al Tarf
Guardian Missions
Guardian Missions are ways to get a guaranteed 4 star as well as numerous small mission rewards along the way. It is important to note that each guardian will be featured for 3 weeks. Do not be surprised when you see the same guardian after 1 week. In total, you will be able to collect the featured guardian 6 times over the course of 3 weeks. The featured guardian that you begin with is Carly. Queen and King Carly help early to mid game in both PVP and PVE. She is a decent early/mid game investment.

What do I do with my Currency?
Where to spend Moonstones
This game is very generous with shoes from logging in, events, and guild check ins. Unless you are farming for several hours a day, it is hard to run out of shoes. Therefore, spending moonstones on summoning is okay, especially in early to mid game. However, never use the 75 moonstone summon. Always buy the 11 pack of books or do event summons.
After you reach late/end game, you will benefit more from using your gems for shoe refills.
Also, if you want to rank higher in PvP and farm more glory points for Nexus buffs and upgrades, buying more arena tickets is an option.
10 to 30 moonstones should be spent daily on refreshing Hall of Judgement 1-2 times. Refreshing a 3rd time costs 40 moonstones so its up to you whether you do the last one. If you can only clear HoJ easy mode, still refresh it once a day. Awakening is a large bottleneck in early game. The sooner you can awaken a team of 5, the sooner you can progress in guild wars, world boss, and promotion battle to collect more weekly rewards.
The 24 hour 2x exp for 30 moonstones is arguably the most efficient use of your moonstones. Always buy it before you start farming exp for your guardians. Do not buy equipment packs or relic crafting materials. It is better to use it on shoes to farm the equipment dungeon instead. Do not buy gold. You will obtain more gold in addition to exp by using those moonstones to buy shoe refills and farm instead. I don’t recommend you buy the nat 4 skillbook since they are easily obtained from the guild shop.
Refreshing World Boss entries are also recommended if you don’t have enough shards to buy the Moria pieces and skillbook.
Where to spend Friend Points
Only use friend points to buy shoes in the shop. Do not use it to summon. The exception to this is for the beginner mission.
What to Buy in the Magic Shop
Buy all of the extra slots in the magic shop. In early game it is not recommended to buy mystic books from the shop since gold is a very valuable resource for progressing your guardians and equipment. After you have a core team and have started farming equipment, you can buy the mystical books since you have the gold to spare. Be very picky with what equipment you purchase from the magic shop. Do not waste moonstones on refreshing the shop. It is very rare to come across good gear in the magic shop. Refer to the Equipment Guide for guidelines on good gear. The normal books and fodder from the magic shop are unnecessary to buy if you are regularly farming Adventure mode since doing so drops normal books. However, if you really need fodder to power up your 3 stars, the fodder is not a bad choice. Especially in early game, buying the normal books can increase your chances of getting a bishop Prebella and Queen Lucian.
What to buy in the Glory Shop
The Skillbook is the number one priority. In early to mid game you may want to buy some exp potions while in end game, you may want to buy some of the relic crafting materials. The floras are an option as well but they are quite expensive. Remember that the nexus directional buffs are more important than the floras, relic materials and potions. Refer to the promotion battle section of Early game progression for nexus buffs.
What to buy in the Forgotten Tower Shop
The normal mystical books are the most efficient use of your forgotten shop currency. After you buy out the mystical books, the legend book is slightly more cost efficient for obtaining a 5 star while the directional books will allow you to obtain more fodder.

What to buy in the Guild shop
First buy the Moria piece every week. Then buy the 4 star skillbooks every week. Afterwards, upgrade your totem. Focus on upgrading the directions with your strongest damage dealers and increase their attack/pincer/crit damage. Spare coins can go into buying floras. Beginners may find it more useful to buy floras rather than upgrading the totem in early game.
What to Buy in the Soul Stone Shop
Buy at least the Moria for 125 soul stones and the Ancient Book for 500 soul stones every month (only if you’re new). After you have a decent roster of nat 5’s its better to not buy the ancient book unless you’re overflowing with soulstones since a nat 5 is only worth 200 soulstones when converted. Soulstones are a VERY limited resource so spend it sparingly. Keep in mind that soul stones are also needed for upgrading legendary guardians! Don’t spend all of your soul stones on summons. Do not buy the legend book or the normal books. See the legendary guardians section if you do not know how to obtain soul stones.

What to Buy in the World Boss Shop
Your priority in the World Boss shop should always be the Moria. Morias are the most valuable commodity (other than nat 5s) in the game. Afterwards, you should obtain the skillbook. The legendary fragments are tempting but they should be bought after you have obtained the weekly moria and skillbook. Note: you will need to refresh World Boss multiple times to do this. DO NOT buy the equipment boxes.
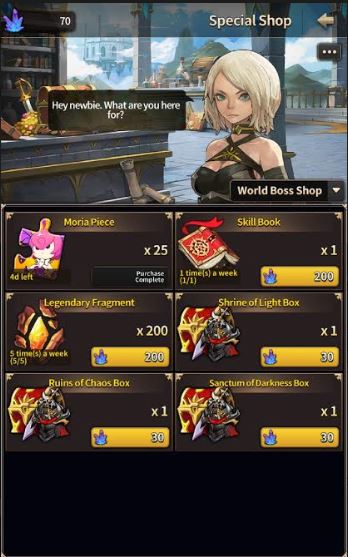
What Packages are Worth Buying with Real Money?
If you are f2p you can argue that no package is worth buying with real money but the game is kept alive by people who do spend. The following are packages with better value than others:
- Daily Succubus Packs- These packs give daily shoes, gold and moonstones which are worth about the same as a 100 dollar pack if you were to purchase it immediately. There is a 10 dollar pack and a 30 dollar succubus package.
- Event Packages- These are randomly put out for a limited time following an update. They generally give more stuff than usual and are split into a 50 dollar pack and 100 dollar pack. If you buy both, you are given an extra reward. In the past, they gave a Select Ancient Book through an Event package like this, which (despite the hefty $150 price tag) is the best deal that has been out to date.
- Ancient Book Pack (debatable whether it is worth it): The skillbooks in addition to the Ancient book make this pack an okay deal. 2 nat 5 summons are not that valuable in end game since you can easily summon an average of 4 or more per month, but it can be good for players in early/mid game without a varied roster.
- Starter/Intermediate/Advanced/Master 1&2 Packs: These are only worth it if you really need the moonstones for shoes or summoning. You can easily acquire all of these for free in end game. They do, however, have a much better value in terms of how much you receive for your money compared to the other packs.
- Skillbook Pack: Skillbooks are a pretty large limiting factor in this game. You can receive 8 skillbooks every 2 weeks but it is still always in demand. If you have a lot of money to spend, this will make a greater impact on your team than other packs.
- Moria pack: Similar to the skillbook pack, Morias are always in demand. This pack will make a greater impact on your team than standard moonstone/book packs.


